
Roku Not Working in 2024: Roku Troubleshooting Guide
Few things are as frustrating as when devices suddenly stop working, or even worse, when they don't work out of the box. If your Roku is not working, this guide will help you out.


Written by Sandra Pattison (Editor)
Reviewed by Jackie Leavitt (Chief Editor)
Last Updated: 2024-01-07T23:06:59+00:00
All our content is written fully by humans; we do not publish AI writing. Learn more here.
Is your Roku not working? Do you need some help reviving it? This Roku troubleshooting guide will help you fix some of the common problems associated with both Roku streaming players and Roku remotes.
Technology is constantly evolving, but no matter how good it gets, it’s likely that you’ll still experience issues now and then. Although Roku came out a while ago, the devices are no exception to this, but it’s often something simple that doesn’t take long to resolve.
Key Takeaways:
- If your Roku device is not working, a simple restart can often fix the issue.
- You can set your Roku back to its original state by performing a factory reset, but that will wipe all settings, preferences and data from the device.
- The Roku IR remote works by line of sight, so it’s a good idea to ensure there’s nothing in the way if you’re having problems.
- If you experience issues with the Roku Enhanced remote, you may need to reset your remote or re-pair it with your Roku device.
In this guide, we’ll list common fixes that can solve multiple Roku issues, and we’ll give the spotlight to any separate issues, too.
Before taking drastic measures — such as performing a factory reset — we suggest you try all of the more obvious fixes. Depending on your issue, that can include checking wires, connections and your input settings. The input setting is especially important if you have a “no signal” message on your Roku. Similarly, if you have no picture at all, it’s a good idea to check your resolution settings.
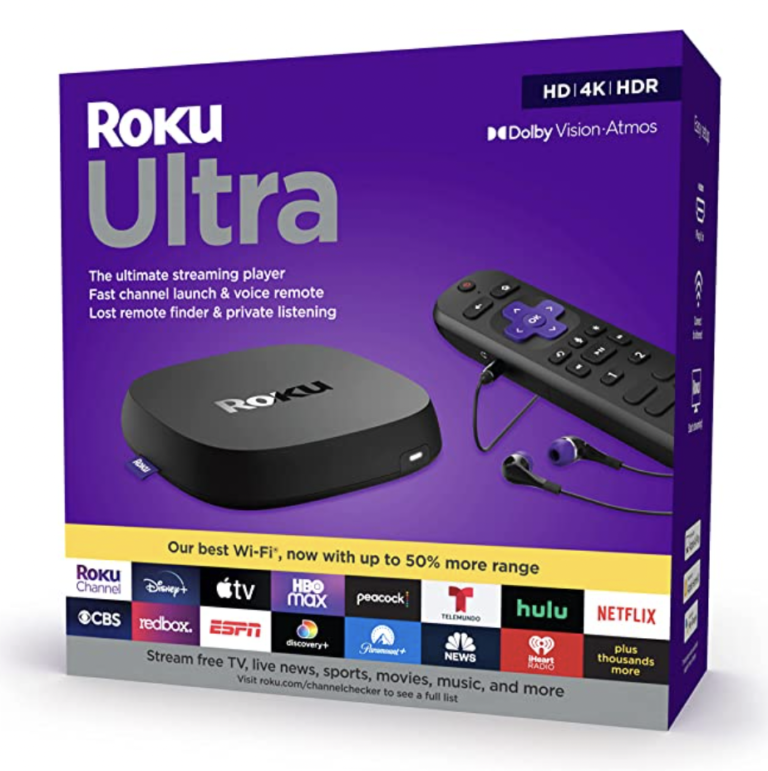
Roku Ultra
Pros:
- Supports Dolby Vision and Dolby Atmos
- Personal shortcut buttons
- USB for local playback
- Bluetooth, Long-range WiFi & Ethernet port
- Private listening with earbuds
Cons:
- Has to be powered via wall outlet
- Not portable
Roku Troubleshooting Guide: Roku Not Working
In this section, we’ll show you how to restart and reset your Roku. We’ll also show you how to update your Roku in case the automatic update procedure has been interrupted or didn’t work. These methods can fix multiple problems:
- Frozen Roku
- Unresponsive remote control
- Roku not turning on
- Roku connected but not working
- Roku not connecting (it’s advisable to restart your router, too)
- Roku has no picture
How to Turn Off Roku
In some cases, your Roku may just need to be rebooted. There are two ways to do this, though, and your issue will determine which method you use. If your Roku is still responsive, you can restart via the settings menu; otherwise, you’ll need to follow a button sequence. We have a dedicated guide on how to turn off Roku, but we’ll quickly run through the steps below.
How to Restart Roku Through the Settings Menu
- Press the Home Button
Press the home button on your Roku remote to ensure you’re on the home screen.

- Go to “Settings”
Select “settings” from the menu and press “OK.”
 Select “settings” and press “OK.”
 - Go to “System”
Scroll down a little using the down arrow button. Select “system” and press “OK.”
 Select “system” and press “OK.”
 - Go to “System Restart”
Select “system restart” from the menu and press “OK.”
 Select “system restart” and press “OK.”
 - Select the “Restart” Button
The “restart” button will be highlighted. Now press “OK” and your Roku will restart.
 The “restart” button is highlighted. Press “OK” to restart the device.


How to Restart Roku Manually
Follow this button sequence precisely with your Roku remote and your Roku device will restart.
We’ve provided pictures of the Roku Enhanced remote. If you have the standard IR remote, it will look a little different but you’ll still be able to follow the sequence.
- Press the Home Button Five Times
Press the home button on your Roku remote five times.
 Press the home button five times.
 - Press the Up Arrow Once
Press the up arrow button once.
 Press the up arrow once.
 - Press Rewind Twice
Press the rewind button twice.
 Press rewind twice.
 - Press Fast-Forward Twice
Press the fast-forward button twice. Then wait for a few seconds and your Roku device should restart.
 Press fast-forward twice and wait for the Roku to restart.
How to Reset Roku
Before you dive in and hard reset your Roku, you must understand that by doing so you will erase all of your settings and preferences. It’s a complete factory reset that will return your Roku device to its original state.
Like with restarting your Roku device, there are two ways you can do it: through the settings menu or by using the reset button on the device. The second method is the best if your Roku is unresponsive, but either way will have the same outcome.
Performing a factory reset is a good idea if you are returning, gifting or selling your Roku device. It will ensure that none of your personal information or Roku account data is left on the device, and the new user can set it up as if they are the first owner.
How to Factory Reset Roku in the Settings Menu
- Press the home button
Press the home button on your Roku remote.
- Go to “Settings”
Select “settings” from the menu and press “OK.”
Select “settings” and press “OK.” - Go to “System”
Select “system” from the menu and press “OK.”
Select “system” and press “OK.” - Go to “Advanced System Settings”
Select “advanced system settings” and press “OK.”
 Select “advanced system settings” and press “OK.”
 - Go to “Factory Reset”
Select “factory reset” and enter the code shown. Then select “OK” and press “OK” on your remote. Now follow the on-screen instructions.
 Select “factory reset,” enter the on-screen code and select “OK.”


How to Factory Reset Roku Using the Reset Button
- Locate the Reset Button
Before anything, you need to locate the reset button on your Roku device. It will be either a pinhole or tactile button and you’ll find it on the bottom or back of your device. If it is a pinhole button, you will need something small to insert into the hole and press the button, such as a paperclip or pen.
 The Roku reset button will either be a pinhole or a tactile button.
 - Ensure That Your Device Is On
Make sure your Roku device is powered on for the factory reset to take place. If you’re having issues with your picture or signal, you should see a white LED light indicating that the Roku is on.
 Some Rokus have a white LED to indicate that they are on.
 - Press and Hold the Reset Button
Press and hold the reset button for about 10 seconds. The light will blink quickly indicating that the factory reset is complete. The Roku logo will appear on your screen as it gets ready for a fresh setup (see our guide on how to set up Roku).


How to Update Roku Software
Roku devices not only check that they have the latest software installed upon initial setup, but they also receive automatic software updates as long as they are connected to the internet. That ensures you’re always up to date with both the Roku software and Roku channels, as well as any bug fixes. You won’t even notice it’s being done, too.
However, there can be times when the download or installation fails or gets interrupted. Additionally, you may simply have left your Roku disconnected for a while, leaving you behind in the Roku update world. That can lead to device failure and all sorts of annoying issues, not to mention any security risks that may have been patched.
Thankfully, Roku has made it possible to check for updates manually, too. The updates are completely free, so don’t fall victim to Roku scams, where scammers make you think you should pay for an update.
Here’s how you update your Roku software manually.
- Press the Home Button
Press the home button on your Roku remote.
- Go to “Settings”
Select “settings” and press “OK.”
Select “settings” and press “OK.” - Go to “System”
Select “system” and press “OK.”
Select “system” and press “OK.” - Go to “System Update”
Select “system update” and press “OK.”
 Select “system update” and press “OK.”
 - Go to “Check Now”
You’ll see the current software information including version, date, etc. Select “check now” and press “OK” to check for updates. If new software or channel updates are available, your Roku device will download and install them. Once finished, it will reboot.
 Select “check now” and press “OK.” The Roku will update and reboot.


Roku Overheating
It’s important to ensure that your Roku is not kept in an enclosed space, on top of other devices that can get hot or in direct sunlight. If you see a “your device is overheating” warning or you see a solid red light on your Roku, your device is too hot.

Unplug your Roku, allow it to cool down for at least 10 minutes and find a better location for it. If you power it back on and see a red light or the warning message, unplug it straight away. If the problem persists, contact Roku Support.
Roku Low Power
Some Roku devices can be powered via a USB port on your TV, but not all USB ports are sufficient. If you see a red flashing light or a “low power” warning, that means your Roku isn’t getting enough power. Your Roku may still work, but it can crash or behave differently at any time.

To resolve this issue, first, ensure that you are using the USB cable that came with your Roku, as others may not be suitable. After that, either try a different USB port or plug it into a wall outlet with a power adaptor.
Roku Remote Not Working
If your Roku remote has stopped working, resetting the remote can fix issues such as:
- Unresponsive remote
- Intermittent connection/signal
- Erratic remote response
- Missed button presses
- Remote not pairing
Check your Roku remote’s batteries. It might sound like the most obvious thing to check, but it can also be overlooked or forgotten. Many Roku remote problems can be resolved by simply changing the batteries. Keep in mind that a Roku Enhanced remote may need to be re-paired with your Roku device.
Also, if you have a Roku Streaming Stick+, the fact that it is directly plugged into your TV’s HDMI port can sometimes result in interference from the connection affecting the performance of your remote. If that seems to be the issue, you can request a free HDMI cable extender from Roku that will allow you to move the device away from the HDMI connection.
We’ll go over the steps on how to reset your Roku remote control. However, there are two different types of Roku remotes — the standard infrared (IR) remote and the enhanced “point anywhere” remote — and you need to determine which one you have.
To do that, simply remove the battery compartment cover and see if it has a pairing button. If your remote has a pairing button, then you have a Roku Enhanced remote.

Keep in mind that you may need to replace your Roku remote if none of the troubleshooting steps fix your problem. If you do, be sure to check which remote is compatible with your Roku device before purchasing.
Roku Standard IR Remote Not Working
An IR remote works by sending a signal via infrared (IR) light from your remote’s IR transmitter to your Roku player’s IR receiver. It works by line of sight, so in order for the signal to be reliable, there mustn’t be anything blocking it. The remote needs to be able to point directly to your Roku device.
Ensure you can see your Roku device from where you are pointing your remote. If you find the remote to be more responsive in different positions, make sure that nothing is blocking the signal’s path. If you have placed your Roku device behind your TV screen for tidiness, try relocating it to somewhere more visible.
How to Reset Roku Enhanced Remote
The enhanced “point anywhere” remote is a little more complex than the standard IR remote. It connects over a network by pairing with your Roku device, meaning you can point it anywhere and still be able to control your Roku device.
Because of its complexity, there are a few more things that can go wrong with the Roku Enhanced remote. In this section, we’ll provide different methods that might help fix your problem.
If you have a spare Roku remote or the Roku mobile app, you can go through the steps for restarting your Roku device through the settings menu.
Restart Both Your Roku Device and Roku Remote
- Remove the Batteries
Open the battery compartment on your Roku remote and remove the batteries.
- Restart your Roku Device
Disconnect the power lead from your Roku device and wait five seconds before reconnecting it.
- Reinsert the Batteries Into Your Roku Remote
Reinsert the batteries in your Roku remote when the Roku home screen appears. Then wait at least 30 seconds for your Roku remote to automatically connect.
Re-Pair the Remote With Your Roku Device
In some instances, the remote can become unpaired from your Roku device. Follow the next steps to re-pair your remote.
- Remove the Batteries
Open the battery compartment on your Roku remote and remove the batteries.
- Restart Your Roku Device
Disconnect the power cable for five seconds and then reconnect it.
- Reinsert the Batteries Into Your Roku Remote
Place the batteries back into your remote when the Roku home screen appears.
- Press the Pairing Button
Press and hold the remote’s pairing button located in the battery compartment until the pairing light on the remote starts flashing (around three seconds).
 Press and hold the pairing button until the green LED flashes.
 - Wait for the Remote to Pair
Wait until the remote establishes a connection. A pairing dialog should appear on your TV screen.
 You will see a “pairing” dialog box on your screen.


If you have a spare remote or the Roku mobile app, you can restart your Roku device through the settings menu.
Connect Your Roku Player to 5 GHz Wireless
If you have a wireless connection instead of a Roku with Ethernet cable, as long as your router supports 5 GHz, you can connect your Roku device to a 5 GHz network. However, you’ll need to change some settings within your router, so only do this if you’re comfortable tinkering.
Plus, all routers are different, so you’ll either need to know your way around your router’s settings already or have its manual handy.
- Enable 5 GHz Wireless on Your Router
First, you need to log in to the admin area on your router. To do that, you need to find the address for your router’s control panel. You can often find it written on the router itself, but if not, you can use the command prompt to find it. Type “cmd” into the search bar on your taskbar and then click on “command prompt.” This will open the command prompt window.
 Type “cmd” into the search bar and click on “command prompt.”
 - Type “ipconfig” Into the Command Prompt
Type “ipconfig” into the command prompt and press enter.
 Type “ipconfig” into the command prompt window.
 - Find the “Default Gateway” Field
Find the “default gateway” field and take note of or copy the IP address.
 Find the field that says “default gateway” and copy the IP address.
 - Type the IP Address Into Your Web Browser
Type or paste the IP address into your web browser. This will bring you to your router’s control panel. If you’ve been here before, you’ll have already set a username and password. If not, it’s likely to be set with default values, such as “admin” and “password.” You can often find them underneath your router, in the user manual or on the manufacturer’s website. Once you’re logged in, make sure that the 5 GHz network is enabled on your router.
- Connect Your Roku Device to the 5 GHz Network
Make sure you’re on the Roku home screen by pressing the home button on your Roku remote. Then, go to “settings” and press “OK.”
Select “settings” and press “OK.” - Go to “Network”
Select “network” and press “OK.”
 Select “network” and press “OK.”
 - Go to “Set Up Connection”
Go to “set up connection” and press “OK.”
 Select “set up connection” and press “OK.”
 - Go to “Wireless”
Select “wireless,” find your 5 GHz network and connect to it.
 Select “wireless” and connect to your 5 GHz network.


Change Your Router’s Wireless Channel
As with the last suggestion, only attempt this if you are comfortable tinkering with your router’s settings. All routers are different so although we won’t provide an exact step-by-step with images, this should still help you get to the right settings.
- Sign In to Your Router’s Admin Area
Log in to your router’s admin area and find the wireless channel settings.
- Change Your Router’s Wireless Channel
Your router will probably be on an automatic setting, but it’s best to choose a specific channel and one that won’t overlap with channels on other close networks.
- Save Your Changes and Restart Your Router
Now you need to save your changes and reboot your router. If you still experience issues, go through the steps again and try a different channel.
How to Contact Roku for Troubleshooting
If you’ve tried all of the troubleshooting tips in this guide but you’re still experiencing the same issue, you can contact Roku support for help. We’ll quickly show you how to do that.
- Go to the Roku Support Web Page
Go to the Roku support web page and select “questions about setup or using my Roku” from the dropdown menu.
 Select “questions about setup or using my Roku” from the dropdown box.
 - Select Your Roku Device and Issue
On the next page, select your Roku device and the issue you are having.
 Select your Roku device and the problem you have from the two dropdown boxes.
 - Go to “Need More Help”
You will be shown some popular help guides, but to actually contact Roku support, click “need more help.”
 Click “need more help” to go to Roku’s support contact page.
 - Choose How You Want to Contact Roku
From there you can access the Roku community, chat online or email the support team.
 Contact Roku via online chat or email. You can also join the Roku community and get help from fellow users.


Final Thoughts
Roku devices are great for streaming your favorite shows and movies, but they’re not without issues. This Roku troubleshooting guide will fix the most common issues associated with them, but if you’re still stuck, you can contact Roku support, too.
Although we hope you manage to fix your issue, take a look at our Roku buyer’s guide if you need to invest in a new one.
We also have a guide to the best free Roku channels, and our best VPN for Roku guide can help if you want to access channels and services that aren’t available in your region. You can also check out our guide on how to cast to Roku if you’re having trouble with that.
Have we missed anything in this Roku help guide? Are you having problems with your Roku not working? Let us know in the comment section and we’ll be happy to help. As always, thank you for reading.
FAQ
First, make sure that your power cable is connected properly and plugged in. If it still won’t turn on, remove the power cable for five seconds, and then plug it back in. If that fails then you will have to reset your Roku device using the reset button.
If your Roku has stopped working, try the troubleshooting steps in this guide. If it still won’t work, you can contact Roku support. You also have a one-year Roku warranty to fall back on.
First, make sure the batteries still work. If they do and you have a standard IR remote, make sure nothing is blocking the signal. If you have the Roku Enhanced remote, you may need to reset or re-pair the remote with your Roku device.