How to Use ClickUp Forms in 2025: A Beginner’s Guide to ClickUp Tasks & Projects
ClickUp forms can be used internally and externally to collect data. Create customized forms for your clients and co-workers, and create and assign tasks straight out of the recorded responses.
ClickUp is one of the most user-friendly project management tools out there, and is a great choice for beginners. ClickUp’s feature set is extremely versatile — from simple task management to complex project management, ClickUp helps manage deadlines, assignments, dependencies and much more. One top feature available through the paid plans is ClickUp forms, which allows users to collect data.
Key Takeaways: Form Submission From ClickUp
- ClickUp forms are fairly simple and easy to use, with additional customization features compared to other apps.
- ClickUp forms can be used to survey your clients to collect valuable information, and assign tasks to your team based on the responses received.
- ClickUp’s advanced features offer superb customization options without breaking the bank.
You don’t need to be a pro to get started with ClickUp forms — all it requires is basic knowledge. For this ClickUp forms tutorial, our experts tested the feature to show you how to use ClickUp forms to better communicate with your teams and get regular feedback from your clients. Let’s get started.
What Are ClickUp Forms and What Are They Used For?
ClickUp forms is a survey tool that makes collecting information a breeze. This is important for any business looking to act on qualitative insights. One of the most effective ways to collect data from people is through surveys. Blasting a survey out to hundreds of people can be time consuming, but with ClickUp forms, you can send out your survey in just one click.
ClickUp forms offers several custom field types, allowing you to collect and categorize different types of data easily. ClickUp also offers something called hidden fields, so you can make data collection seamless for the user. If you already have specific information about your respondents, they won’t see these fields; they’ll be auto-filled on their behalf.
Avoid Costly Project Management Mistakes – Get Free Tips Today!

- Discover 10 fundamentals of project management
- Understand step-by-step plans for PM execution
- Learn tips to avoid 5 common mistakes by beginners
Collecting data from your clients improves the quality of your services by addressing customer queries and grievances. Data collection can also enhance your company’s productivity, and generate new ideas from fellow employees or co-workers.
All of this can be done with the help of ClickUp forms. Once you get up and running, you can quickly capture the required information by building and sending out highly customizable and actionable questionnaires.
How to Use ClickUp Forms: Step-by-Step Tutorial
In this section, we’ll show you how to create, edit and share a custom form that suits your needs.
How to Create ClickUp Forms
Follow the simple steps below to create a ClickUp form of your own.
- Creating a New Form
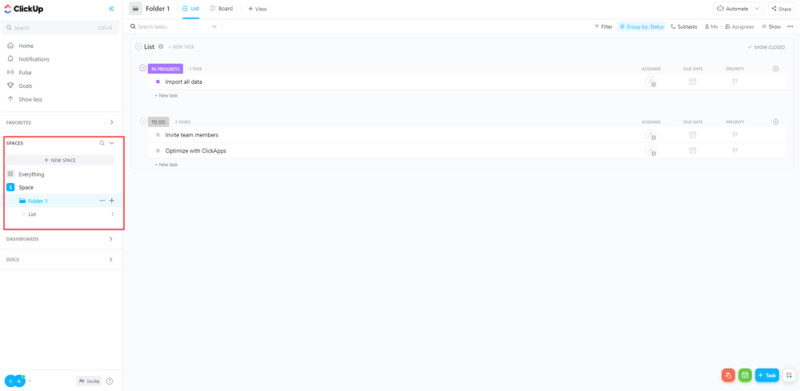
On the homepage of your ClickUp account, under the “spaces” section of your sidebar, select the workspace in which you’d like to create a form.
- Adding the View
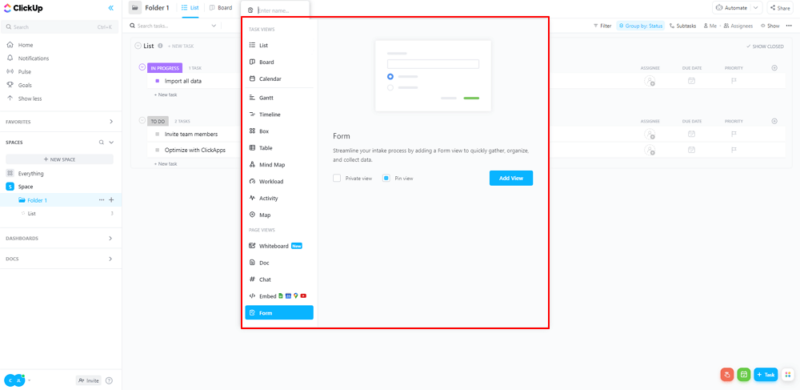
Click on the “+ view” button on the top pane, click on “forms” at the bottom of the dropdown list and click on the “add view” button. You can use the checkboxes to pin the view to the header of your page for regular access and to make the form private.
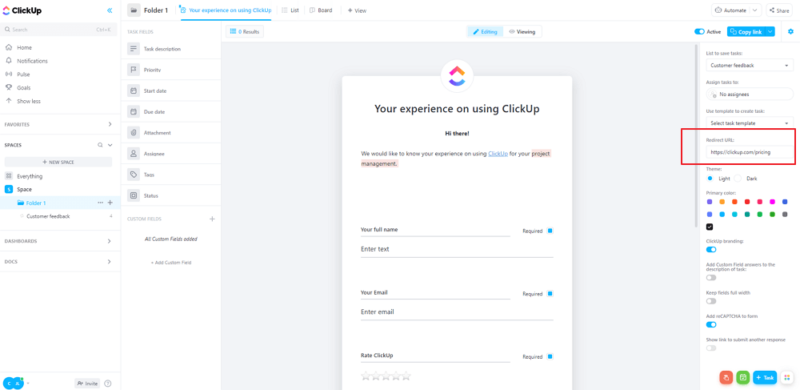
After you’ve added the form view, ClickUp will automatically display your new form with the task fields on the left and various customization options on the right. From here, you can start to build out your form.
How to Customize ClickUp Forms
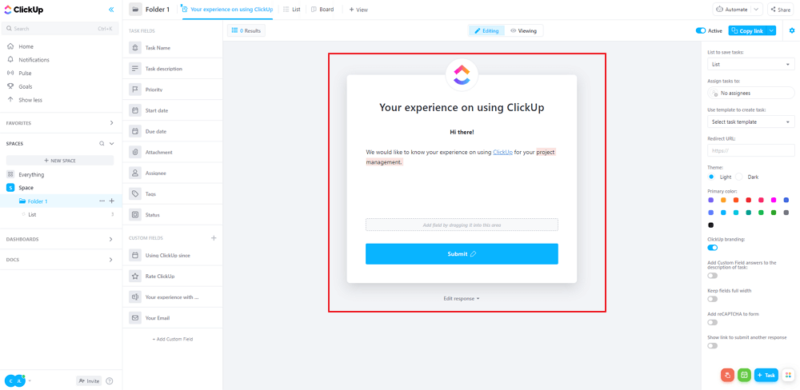
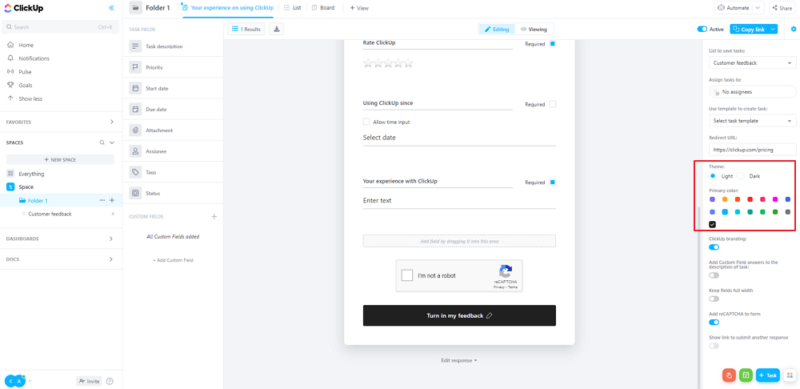
Unlike creating forms with Google Workspace, you can customize your forms in ClickUp however you’d like. You can also change the theme and primary color for your form, or use toggle switches on the right-hand side of your screen to keep your form active, make ClickUp branding visible, add reCAPTCHA to your form and more.
- Form Title and Description
You can give your form a title by clicking on the default title “form” and inputting your new title. If you have a Business plan, you can also add a brief description under the title to explain the purpose of the survey. From here, you can change the font style, color, alignment, highlighting, add checkboxes and integrate URLs into the text to make the description more detailed.
- Changing the Logo
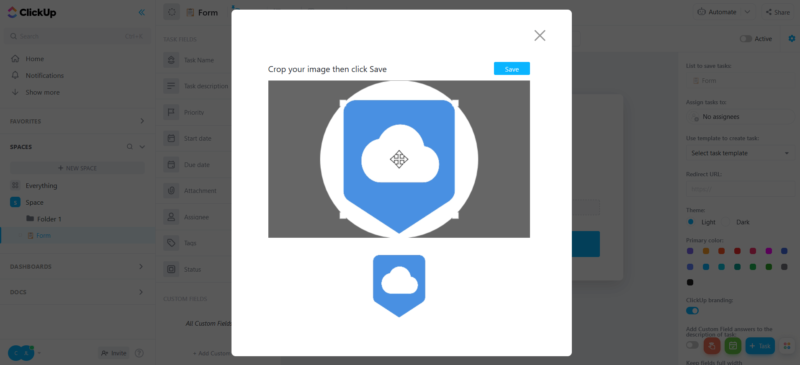
You can also insert your brand’s logo by clicking on the logo of ClickUp right above the title and uploading your desired picture. As you crop the image, you can see a preview of what the logo will look like.
- Choosing a Theme and Color
You can customize your form’s theme, as well as the primary colors of the buttons.
- Adding Fields
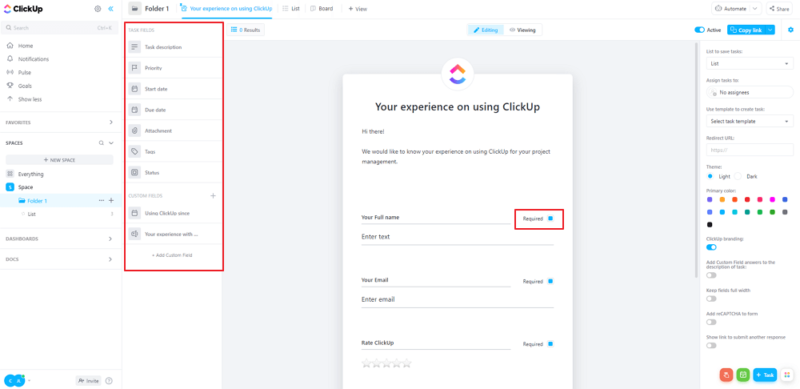
Once you’ve set up the outline of your form, it’s time to add your fields for data collection. You can create custom fields, name them and add them to your form with a simple drag and drop. You can also make any or all fields mandatory by checking the “required” box.
- Review Your Form
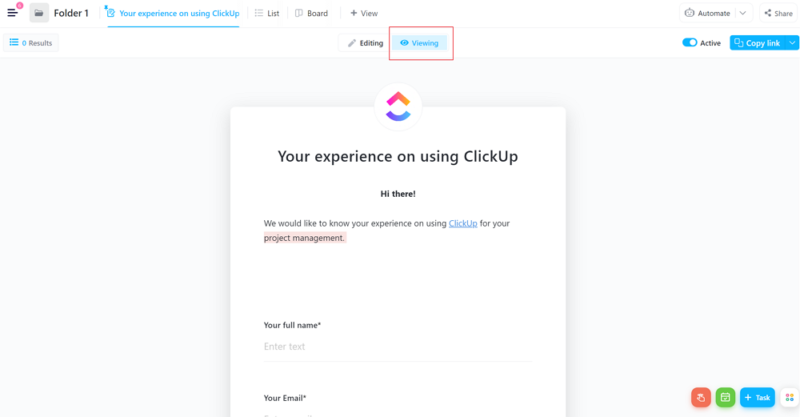
Once you add all the necessary fields for your survey, click the “viewing” button on the top to see what your form will look like to recipients. This can help you make the necessary changes before finalizing and sending out your form.
- Activate Your Form
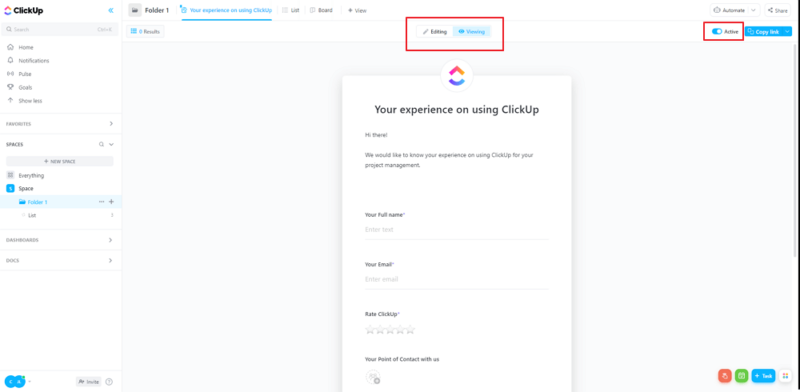
Before you finalize and publish your form, you can rename the submission button. Once you’re ready, toggle the “active” switch on. Once your survey is completed, you can switch it back off.
How to Share ClickUp Forms
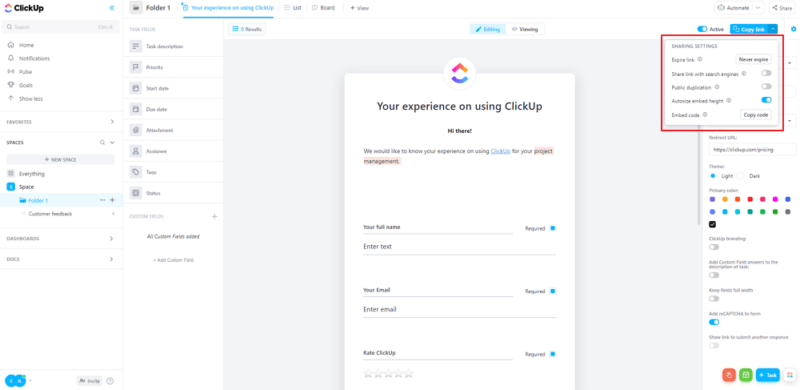
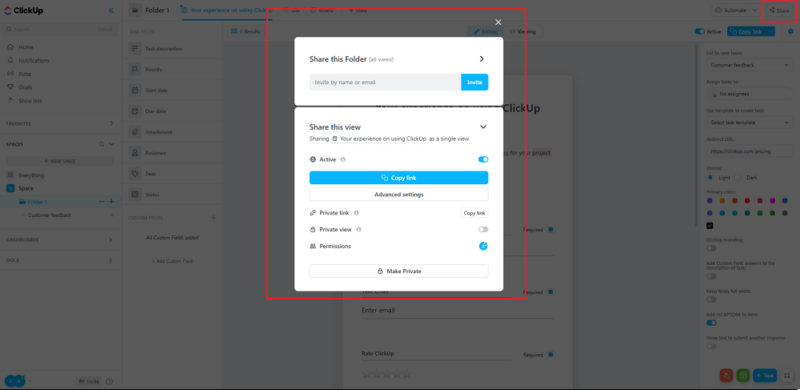
Once you have finished setting up your form, you can share it with your target audience by creating and sharing a link.
Other Features of ClickUp Forms
With ClickUp forms, you can go beyond just data collection. This includes features that allow you to create and assign tasks to your team members straight from the recorded responses. For example, a sales team could use this for lead generation. Once submitted, the form answer would convert directly into a task for the sales team.
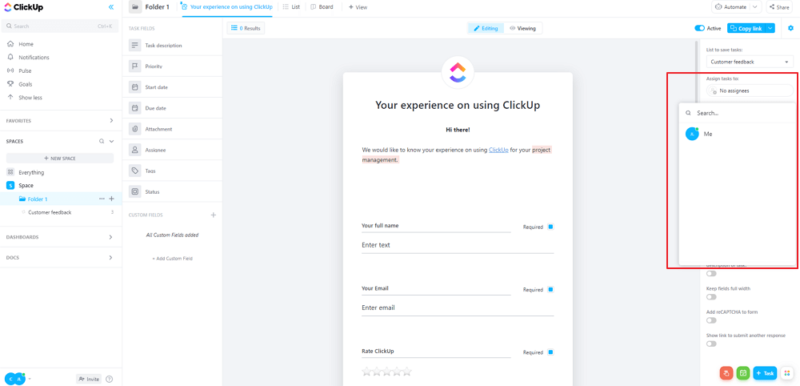
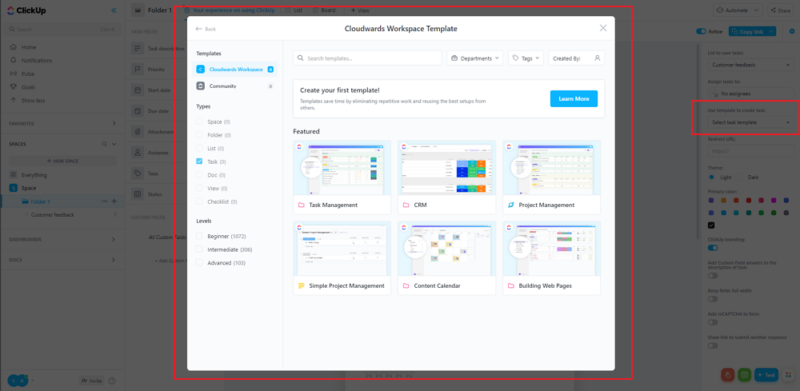
Depending on your use case for the form, you also have the option to choose a template from a pre-existing library. When the new tasks are created, you also have the option to display all recorded responses directly within the task’s description field.
Other handy features include redirecting form respondents to a specific page. If you intend to show something specific or intriguing, you can integrate the form submission button with a URL that redirects the user to the page you wish them to see.
You can also provide a link to submit another response. However, note that you cannot use the feature if you have integrated a link to another web page via a redirect. For additional security, you can also add a captcha to your forms.
Lastly, keep in mind that you can only remove displayed ClickUp branding from your forms if you have a paid plan.
Final Thoughts
Whether you’re planning on exploring ClickUp’s free plan or opting for the paid plan to access more of its features such as Forms, it’s worth giving it a try. Clickup is one of the most versatile project management tools, with numerous integrations, task automation, data collection through ClickUp forms and more.
If you want to explore ClickUp’s capability beyond its forms feature, worry not. We created comprehensive guides on how to use ClickUp, how to use ClickUp emails, how to create recurring tasks and how to make a ClickUp roadmap.
We hope this guide helped give you a running start with ClickUp forms. What app are you currently using to build out forms? Did you see any features you like in ClickUp’s form tool? Is there anything specific you were looking for in the forms feature? Comment below to share your thoughts and, as always, thank you for reading.
FAQ
ClickUp forms can be used for surveying your clients and assigning tasks to respective teams.
Form view in ClickUp is not available in its free plan. However, you can access forms on the 15-day free trial. Moreover, if you wish to unlock branding and customization features, they start only at Business tiers.
Anyone can submit a form as long as it’s open to the public. Only the people with access can submit a form if the form is made private.


