Basic ClickUp Tutorials: How to Use ClickUp Effectively in 2025
Teams can make use of the ClickUp platform to manage complex tasks and assignments. Knowing how to use ClickUp and navigate its interface will be great for your time management.
Getting started with ClickUp is as easy as signing up and installing the program. But once you’re in, there can be a bit of a learning curve involved with figuring out how to use ClickUp effectively. Our experts have spent hundreds of collective hours testing the service to bring you this tutorial.
Key Takeaways: Using Project Management Tools
- ClickUp is fairly easy for new users to set up, from creating a new account to starting projects and related tasks.
- The application offers multiple views and integrations, making it one of the best project management platforms.
- Advanced features like unlimited tasks and task automations are affordable with ClickUp’s higher priced tiers.
This guide will walk you through how to use ClickUp for project management, including setting up your account, using basic features to create projects and tasks, and taking advantage of some of the available tools. You can also read more about the project management tool in our full ClickUp review.
How to Use ClickUp: Understanding the ClickUp Hierarchy
ClickUp’s hierarchy is one of the most important concepts to grasp when you start the program. The hierarchy and ClickUp structures help organize your work into various levels, with each level having its own set of privileges and features. From largest to smallest, the five levels are workspaces, spaces, folders, lists and tasks.
Workspaces
A workspace is a collection of projects. It’s helpful to think of a workspace in the same way you think of a folder on your computer desktop that holds various files and subfolders. Each project in the workspace has its own independent settings.
Avoid Costly Project Management Mistakes – Get Free Tips Today!

- Discover 10 fundamentals of project management
- Understand step-by-step plans for PM execution
- Learn tips to avoid 5 common mistakes by beginners
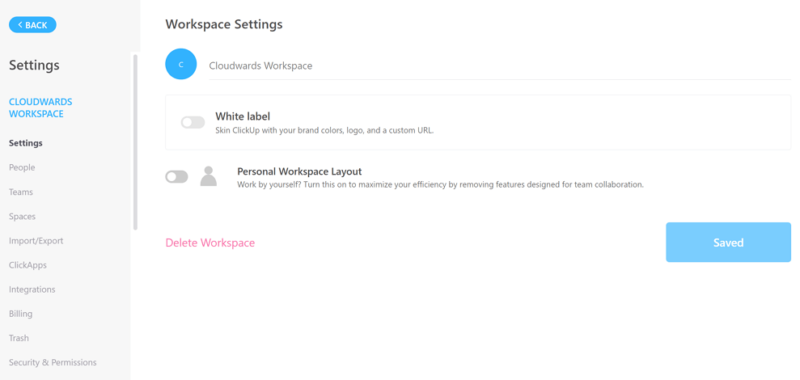
Make sure all teams sharing relevant information in ClickUp are located in the same workspace, because work cannot be moved between two or more workspaces. However, you are free to create as many workspaces as you want.
Spaces
ClickUp spaces are for multiple teams or departments. You can create them under each workspace. This way, people on the same project team can view their tasks and share work and updates within their teams.
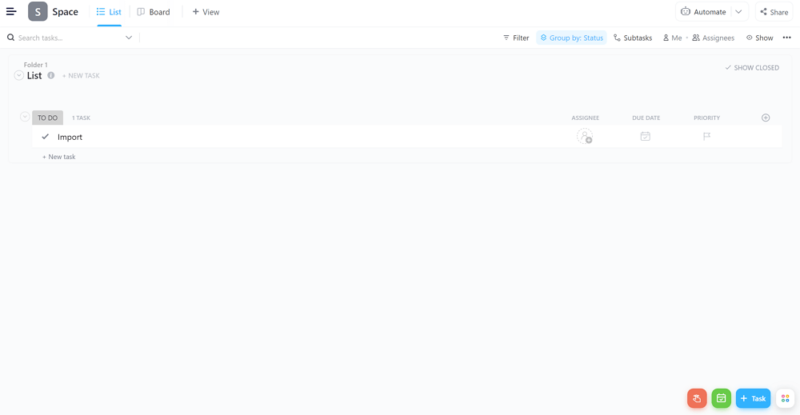
Customizations come from status and ClickApps. Status allows you to create different statuses for your tasks. You can get notifications when your task is in progress or completed, and set up rules based on task statuses. ClickApps are extensions like time tracking, milestones and so on that allow you to add specific features or functionalities within spaces.
Folders
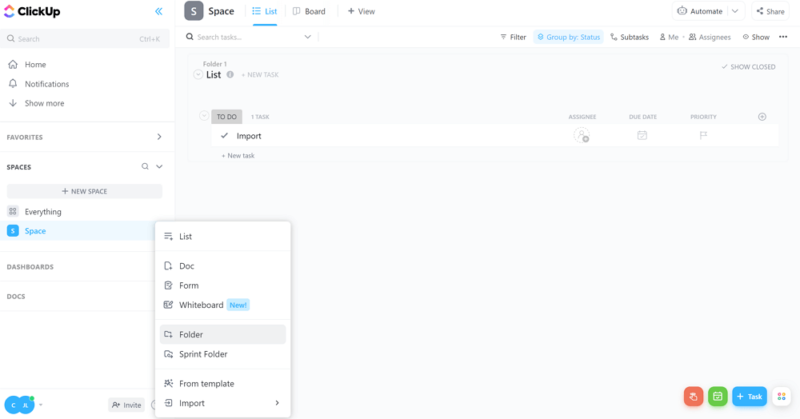
Folders act as containers to help you arrange your projects. They are located underneath spaces in the ClickUp hierarchy. Keep in mind that the folders can’t directly contain tasks. However, you can use them to create multiple lists beneath.
Lists
Lists are a type of view in ClickUp that serve as storage for tasks. These are the most comprehensive and default view type in ClickUp.
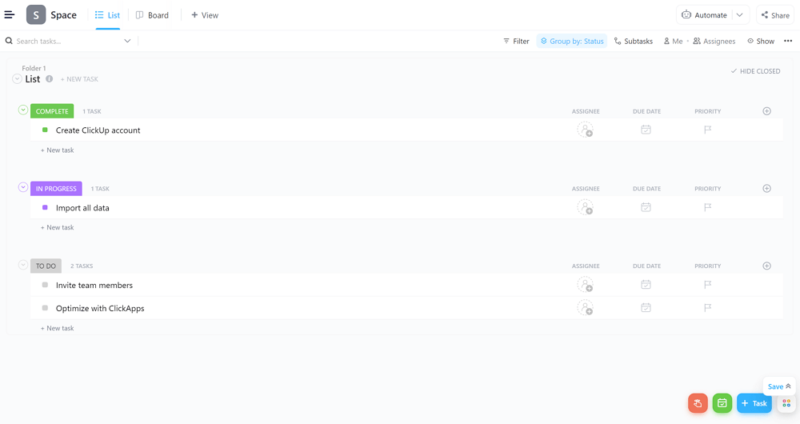
There are several alternatives to conventional lists, including board or kanban view, calendar, timeline and Gantt charts (see how to use ClickUp Gantt charts). You can also duplicate the same view in a ClickUp space and add different filters to each one, so it communicates specific information to your team members.
For example, if you’re managing an editorial team, you can have multiple views of your content calendar filtered according to each writer so they only see their specific assignments.
Tasks
The most significant component of the ClickUp hierarchy is tasks, the items that must be completed in each list or workspace. A ClickUp task contains a variety of tools to help you complete it, such as a description box, custom fields and checklists.
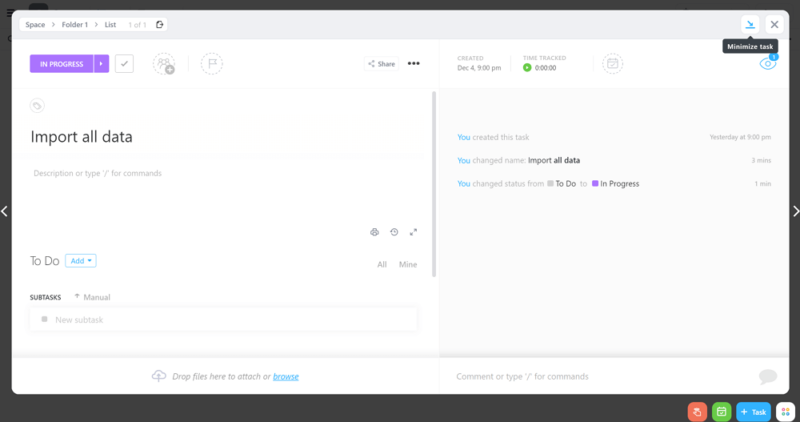
For project managers with multiple team members, you can assign each task to a specific person and view the updates in real time as work progresses. You can also set due dates, create subtasks, attach files and more.
ClickUp Onboarding: How to Set Up Your ClickUp Account
Getting started with ClickUp is really simple. We’ll walk through the steps and provide you with a brief description of each.
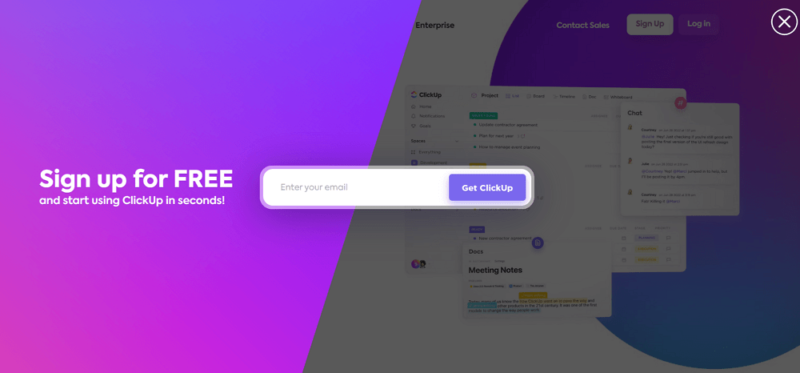
- Sign Up Using Your Email
On the ClickUp signup page, enter the email address you’d like to use with ClickUp. You will be sent a verification code at the same email. Once you’ve verified the code, you will be able to log in to ClickUp.
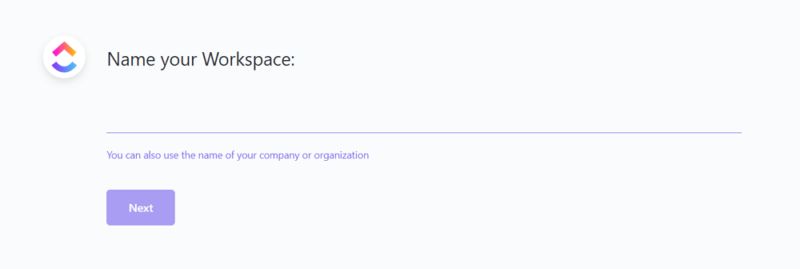
- Name Your Workspace
Once you’ve logged in to ClickUp, you’ll be met with an easy setup tutorial and steps to get you started up with the software. The first is to name the workspace you’re going to create.
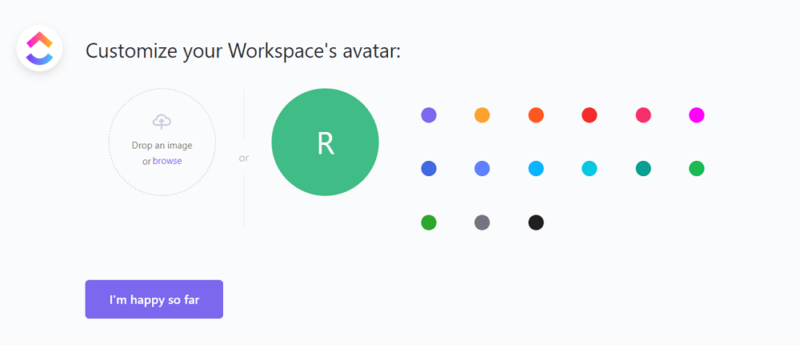
- Choose an Avatar
After naming your workspace, you can create a unique avatar or color for your workspace. You can choose from the color options given, or upload your own avatar.
- Choose a Theme Color
The next step is choosing a theme color for your workspace. The color you choose here will change the whole aesthetic of your ClickUp workspace, so you can select the one that appeals to you the most.

- Choose Team Size
The next step includes selecting the size of the team you’ll be working with. If you’re using ClickUp for yourself, you can choose the “just me” option, or choose team members accordingly.

- Choose Your Use Case
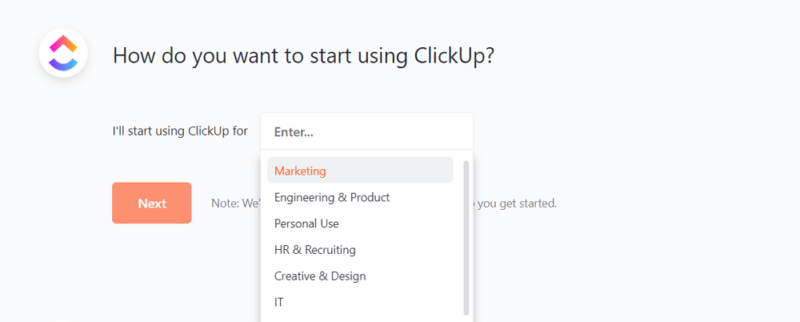
Choosing what you want to use ClickUp for is your next step. You can select from the dropdown list, and ClickUp will provide you with customized templates and tools accordingly.
- Import Tasks
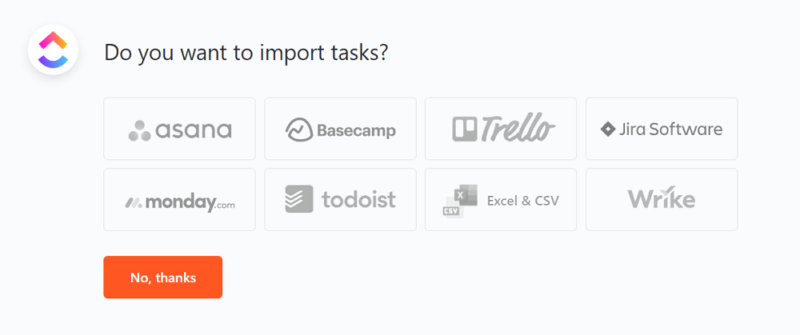
A project manager can also import tasks from your previous project management tools. The tools you can import from are listed in the options provided. You also pick Excel and CSV formats to import a data file.
Finalizing Setup
Once you’ve got your account set up and workspace created, you can start optimizing your ClickUp workspace to suit your specific needs.
- Select the Setup Type
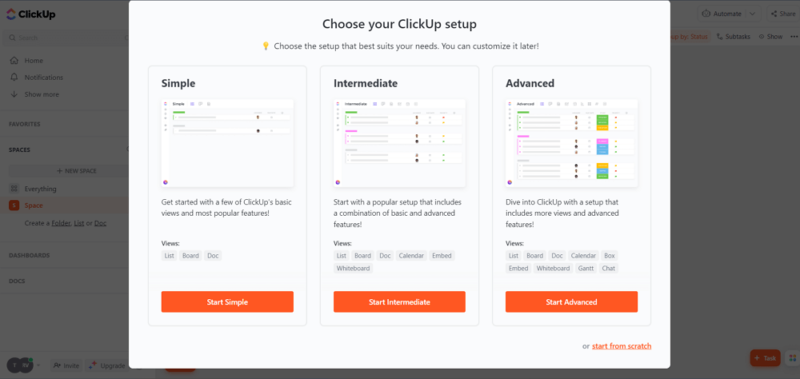
After you’ve completed the initial steps, you can choose from any of the three setups displayed. You can also choose “start from scratch” if you want to customize the tool for yourself. The “simple” setup is for beginners, whereas “intermediate” is geared toward those looking for more complex elements. “Advanced” is best for avid users of ClickUp who are familiar with all its tools.
- Set Up ClickApps
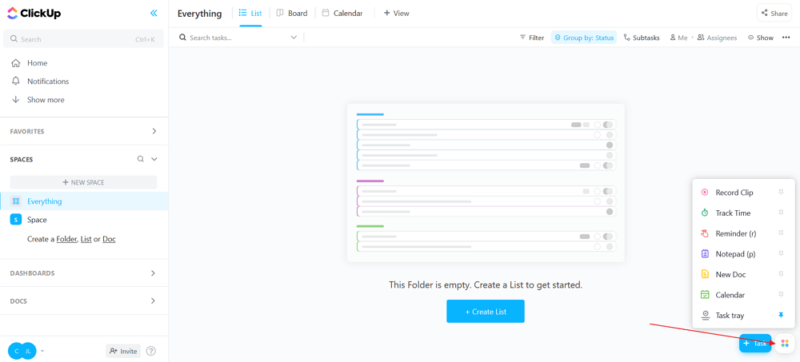
After your workspace is set up, make sure you’re getting all the ClickUp integrations you need to get started with task management. Click on the four dots icon in the bottom-right corner of the workspace and select all the ClickApps you need, like time tracking, reminder, calendar, etc.
- Create a List or a Task
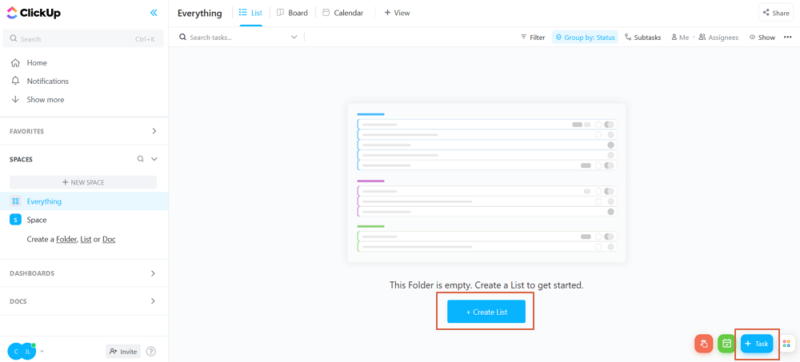
Once you’ve added the ClickApps you need, you can create your lists or tasks from this workspace using the buttons highlighted below.
- Invite Team Members
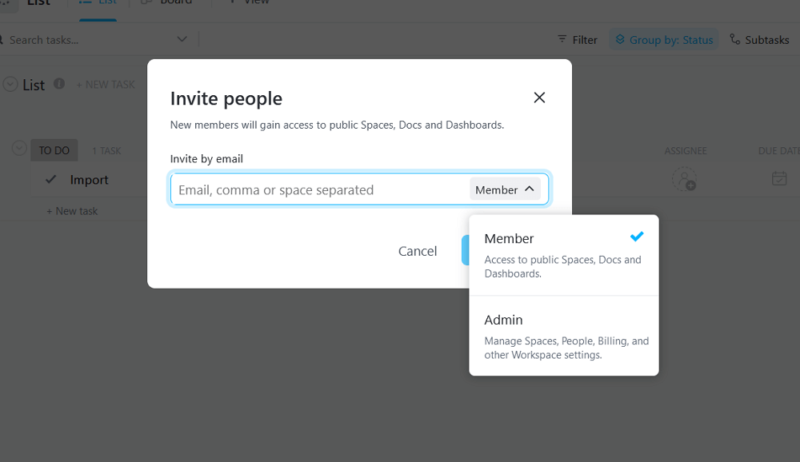
You can invite team members to your spaces and lists using the “invite” option. You also have the option to specify the level of access they’ll have. Furthermore, you can also publicly share various items in your workspace. This allows your entire team more visibility into your work.
- Choose the Integrations You Need
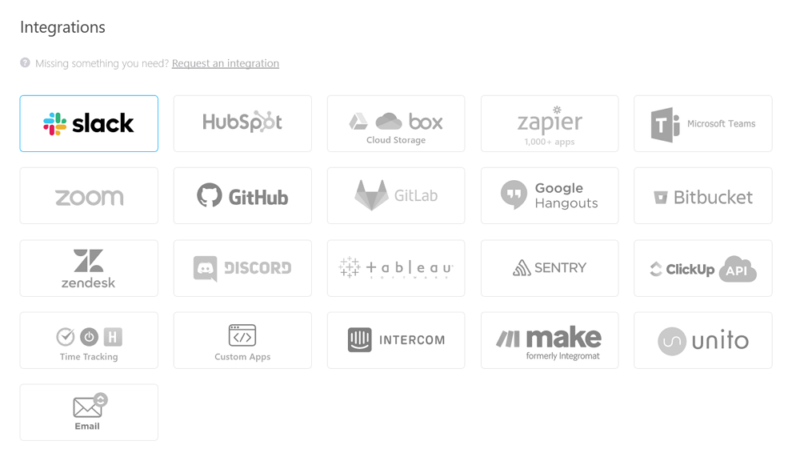
Finalize your account setup by choosing from a wide variety of integrations to add to your ClickUp workspace. ClickUp provides integrations to apps like Slack, Zapier and GitHub and cloud storage platforms like Google Drive and many more.
The ClickUp App: A Brief Tour
You have now created your ClickUp account and set up a new workspace for your team. If you’re still unsure about how to navigate through the app, rest easy as we explain ClickUp’s home screen navigation.
Home & Inbox
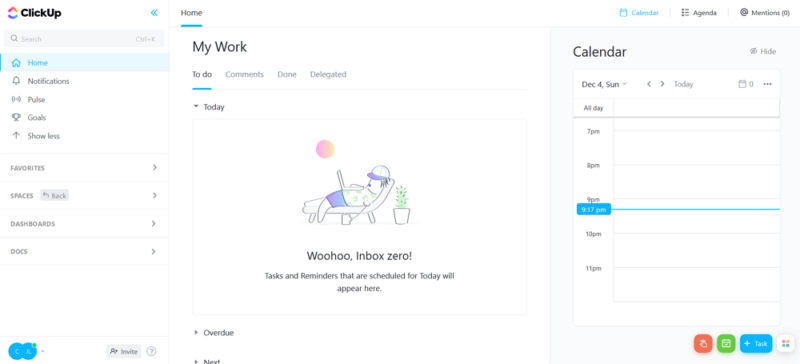
Find your homepage by clicking on the “home” button on the top-left navigation pane. The homepage is where you can see all your small tasks and projects listed in an all-in-one view.
Your pending tasks and reminders will be listed in the inbox, also located on the homepage. The search bar above will also help you search all your posts throughout the ClickUp app.
Spaces & Tasks
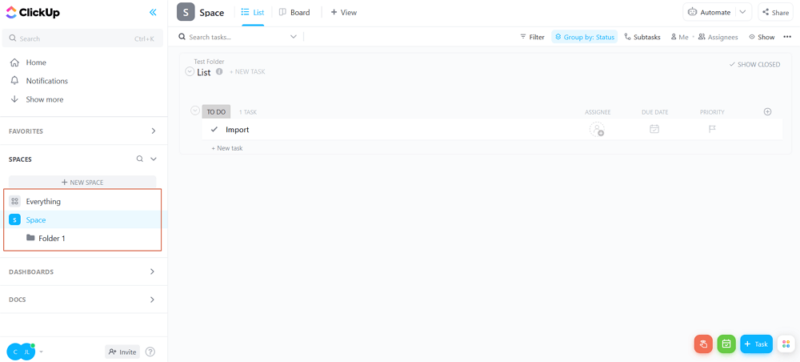
You’ll be able to see the “spaces” button just under the “home” and “favorites” area. This is where all the magic happens — you can add lists, manage your tasks, assign reminders and more. This navigation sidebar shows all the spaces and ClickUp tasks as a table of contents, making it easy to switch between two or more spaces.
You’ll also be able to automate recurring tasks, though the lower plan tiers limit automations to 1,000 per month and the free plan has a limit of 100. These limits can be increased with advanced pricing options like the Business or Enterprise plans.
Notifications
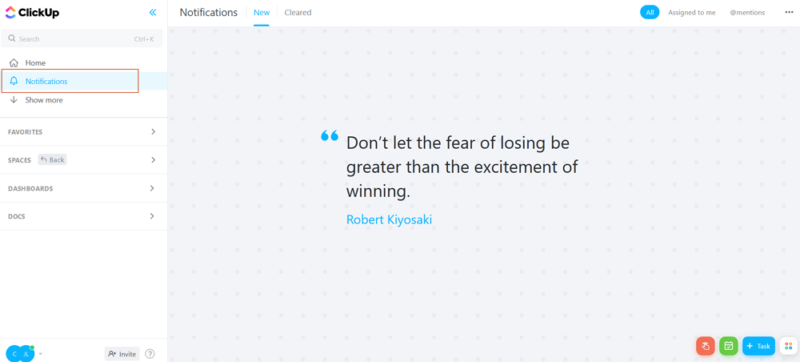
You can find the “notifications” button right under the “home” button. Under “notifications,” you’ll see all the notifications from your team and task activities. You can sort these notifications by choosing from “assigned to me” or “@mentions.”
Dashboards
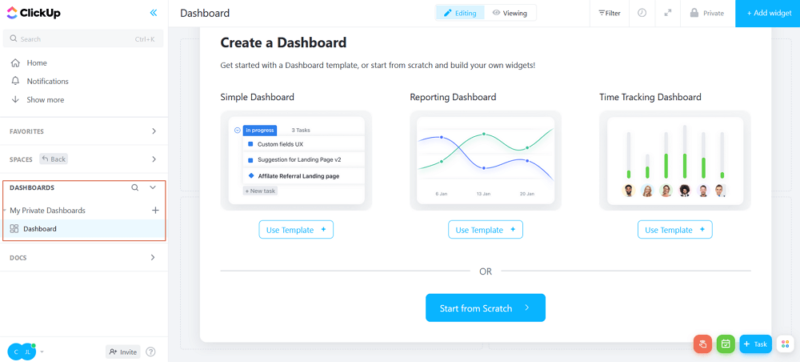
The “dashboards” button is next. Dashboards bring you a high-level overview of all your data and can be used to create and share reporting insights with your team. You can create custom dashboard views, such as line, bar and pie charts that help you visualize your data in different ways.
The time-tracking view is great for employee management if you want to view all time entries for billables. Progress tracking and sprint-inspired dashboards are also available to monitor your team performance and view any bottlenecks. You can use widgets to further customize your ClickUp dashboard the way you want, making it a versatile reporting tool.
ClickUp Docs
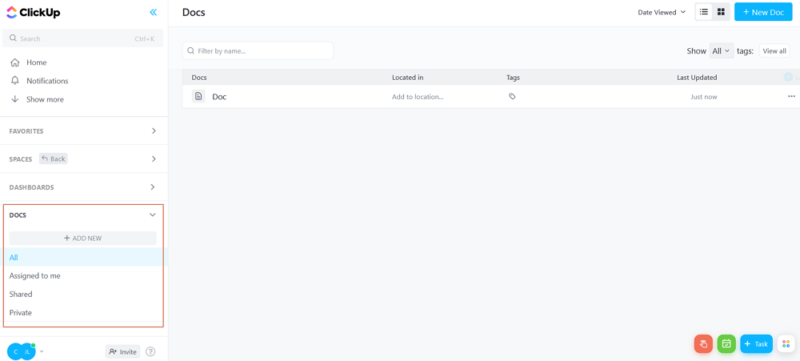
ClickUp offers an inbuilt documentation feature called Docs. You can use this to create documents that integrate with your current workflows, such as detailed SOPs or Wiki-style information bases for your team to access. You can also edit ClickUp Docs in real time, add comments and assign tasks to team members directly from the document you’re on.
Final Thoughts: ClickUp Tutorials
ClickUp is a highly versatile and capable project management tool. You can create multiple tasks, assign them, track their statuses and invite team members to your spaces, and its reporting capabilities are an added advantage.
With the ClickUp team making improvements constantly, the free plan is a steal. You can also unlock the app’s full capability with a paid plan, which costs cheaper than monday.com as you can read in our ClickUp pricing guide.
We have a comprehensive guide on how to use ClickUp forms in case this is a feature you’ll be using. Beyond that, we have detailed guides on how to use ClickUp emails and how to make a ClickUp roadmap using ready-made templates.
We hope this post helped clear up the key elements of setting up and navigating your ClickUp account. What app do you use to stay organized? Did we discuss the feature you like most about ClickUp? Let us know what you think about this application in the comments below. Thank you for reading!
FAQ
ClickUp is a project management software that makes it easy to manage tasks, projects and teams. You can organize everything from your personal to-do list to corporate projects on one screen. You’ll also be able to track your time and get accurate ClickUp reports.
With ClickUp’s tutorials and integrated sign-in wizards, ClickUp is an easy app to learn. It also offers detailed video lessons on its YouTube channel that show how to use various advanced features.


