How to Access Cloud Storage Like a Local Drive: a 2025 Guide
Given that the internet is likely the reason you’re using a computer, it’s reasonable to assume you won’t hesitate to use it to access your cloud storage. That said, if you use offline apps that require you to access cloud storage files, you’re in for a treat because we’re going to tell you how to access cloud storage like a local drive in this article. Also, our definition of “treat” may differ from yours.
Cloud storage lets you collaborate with others by keeping your files in the cloud. That way, you can easily share them. Plus, if your hard drive malfunctions or someone steals your laptop, your important files won’t be lost.
That said, using cloud storage as a local drive is different than using it as a cloud network drive. It won’t save you disk space but will let you access your content faster. The reason for that is your cloud storage content will sync, or download, to your computer. If you’re a OneDrive user, read our how to map OneDrive as a network drive article to learn how to set that up.
Sync lets you edit files using offline programs, then sends the changed files to the cloud. Sending the whole file again is a waste of time because it would be better just to send the changed portion. That’s what the block-level sync algorithm is for. Some of the best services that have it are on our best cloud storage with sync list.
10,000+ Trust Our Free Cloud Storage Tips. Join Today!
- Demystify cloud storage terminology and key concepts in plain language
- Discover easy-to-implement techniques to securely backup and sync your data across devices
- Learn money-saving strategies to optimize your cloud storage costs and usage
If you’ve stumbled here looking for backup, you should refer to our list of the best cloud backup services and read up on the difference between cloud storage and backup. Otherwise, in the rest of the article, we’re going to talk about services here, but we have a quick list of cloud storage compared if you prefer to look at that.
1. pCloud
pCloud launched in 2013 and it’s based in the U.S. It sits near the top of our best cloud storage list thanks to its excellent value, ease of use and good features (it’s also one of our best offline cloud storage picks). Like many others services, it uses the common model of sync which consists of a system tray icon and a sync folder. Follow the steps below to install and access it.

Sign in to your pCloud account using the pCloud web app and click the “download” link at the top of the page.
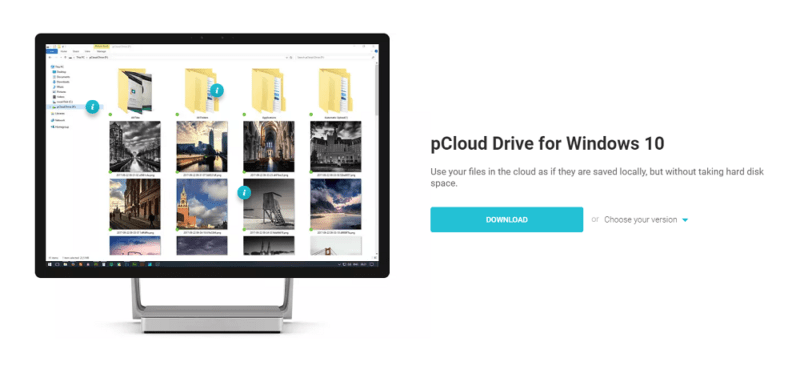
From there, choose your operating system. We used Windows 10. pCloud works on macOS and Linux, too. If you want an alternative service for Apple’s OS, read our best cloud storage for Mac piece. pCloud tops our best cloud storage for Linux list, but there are other services on it that might suit you better.
Once you download and install the client, run it and log in with your credentials. You’ll see the pCloud app and the pCloud local drive.
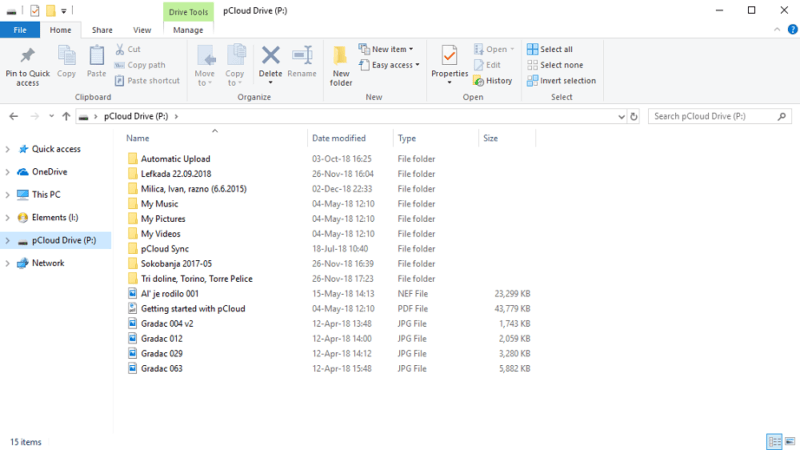
The pCloud drive syncs your files from the cloud to your computer and any file you put in it will get synced to the cloud. You can also set it to sync screenshots. Unfortunately, pCloud doesn’t offer block-level sync to speed up collaboration.
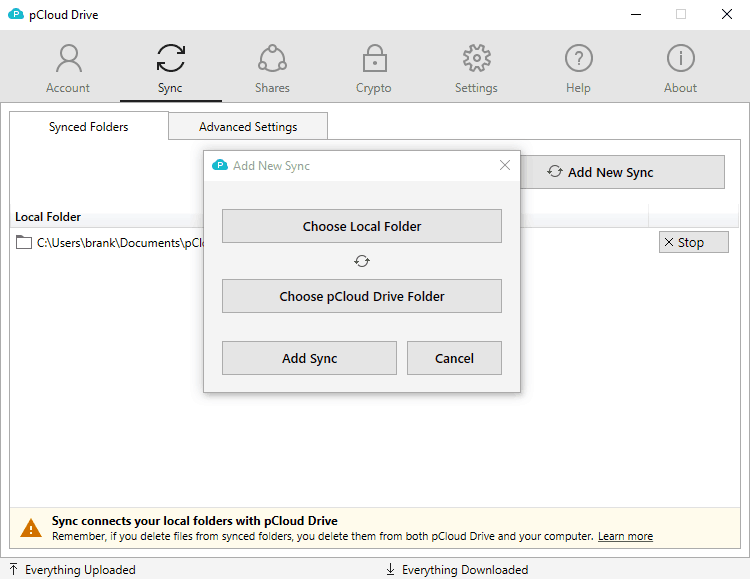
pCloud lets you select additional folders to sync to the cloud, too. You can also share files and folders from your pCloud drive by right-clicking them and navigating to the “share” menu.
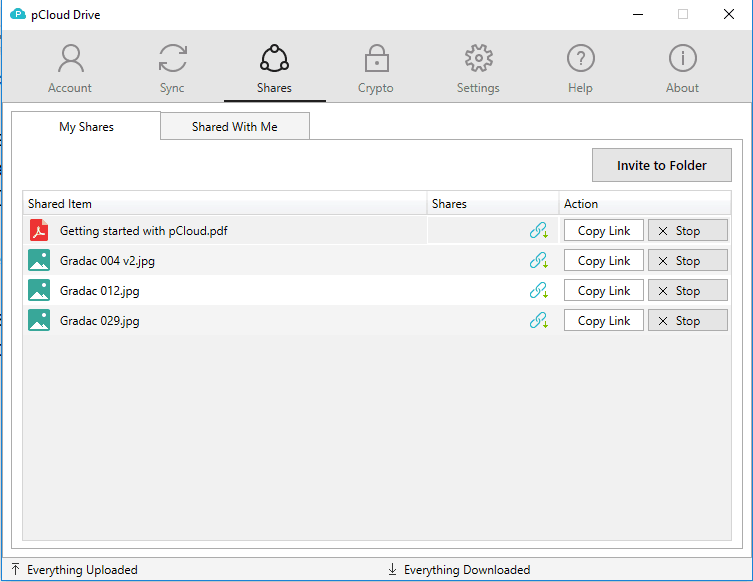
pCloud is good at media preview, which is why it’s at the top of our list of the best cloud storage for photos and videos. If you want to learn more about its features and pricing plans, read our pCloud review, and find out how to set up pCloud Drive, too.
2. Google
With 800 million users, Google Drive is the most popular cloud storage service. That’s not surprising considering it has great ease of use, strong collaboration features, including Google Docs, and a global network of servers that allow you to reach good sync speeds.
To access the sync folder, you first need to log in to your Google account and navigate to the Google Drive page. Then, click the little gear icon near the top right corner.
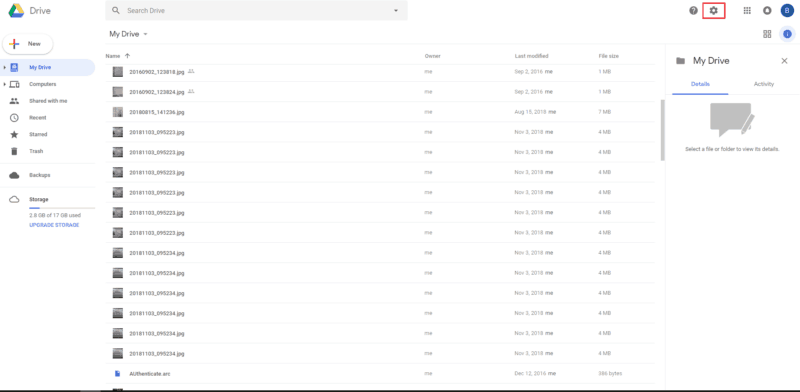
Click “get backup and sync for Windows” and download the client.
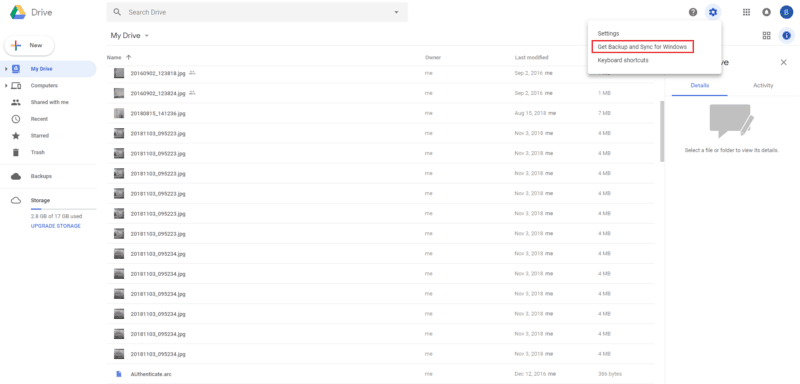

Choose “backup and sync,” download the client and install it. After installation, the app will start automatically but you can use the system tray icon to launch it.
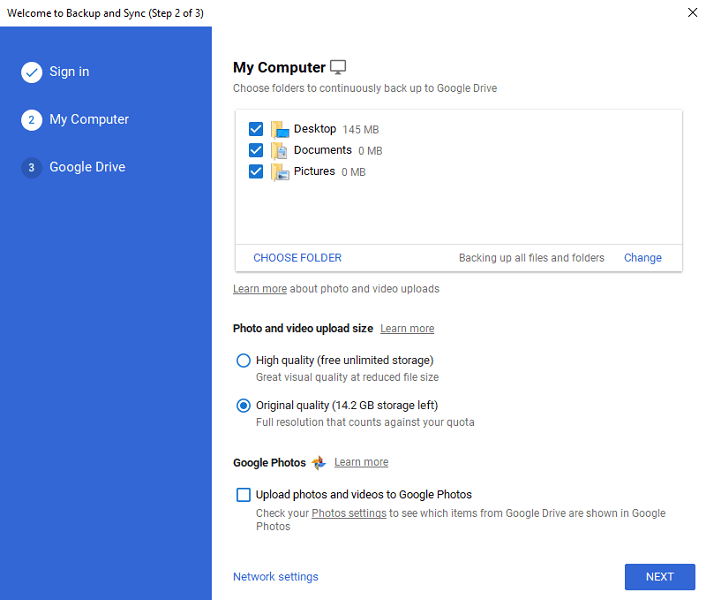
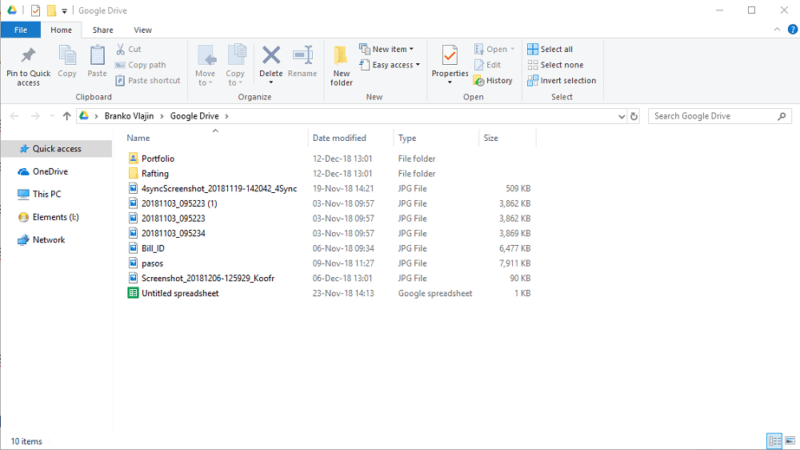
You can then choose which folder you’d like to continually backup to Google Drive and which files and folders you want to sync to your computer. Once you finish setting up sync, the Google Drive sync folder will show in your file browser manager (on Windows 10, it will be in “quick access”).
If sync takes too much of your system resources or network bandwidth you can pause it by right-clicking the system tray icon, clicking the settings button and choosing “pause.”
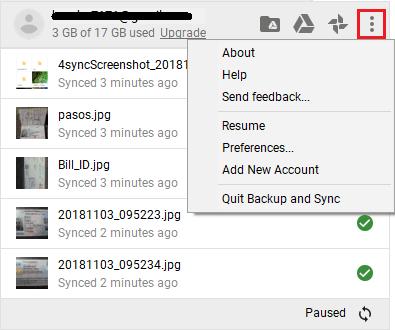
From the same menu, you can navigate to preferences, then settings to tweak the network settings to limit how much bandwidth you want to allocate to syncing. The client also lets you save screenshots directly to your cloud.
Though Google Drive’s transfer speeds are decent, it could improve its collaboration features even more with block-level sync. To see what collaboration features it offers along with pricing details read our Google Drive review.
3. Dropbox
Dropbox, which has 500 million users, is another popular service. It invented the common model of sync and the block-level sync algorithm. It has fast speeds and offers one of the best user experiences on the market. In fact, it’s the best cloud storage for sync.
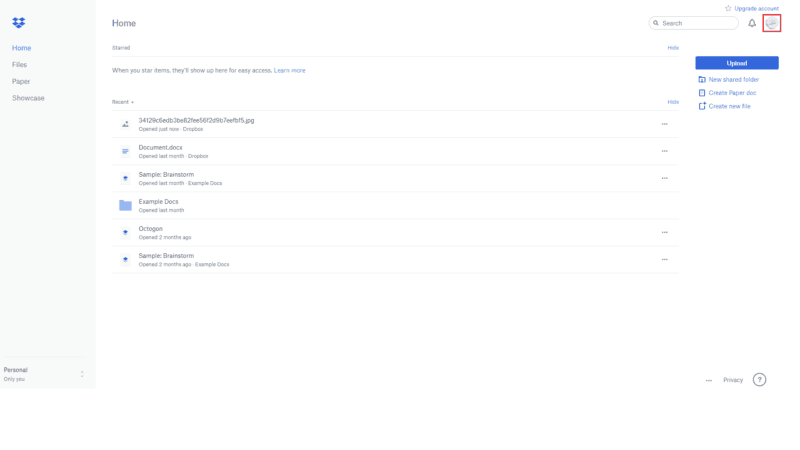
To access it like a local drive, log in to your Dropbox account using the web client, then locate the little account face in the upper right.
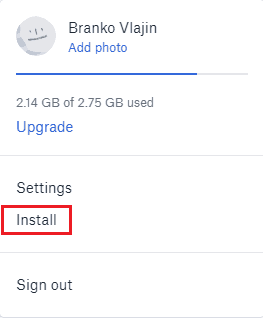
Click the “install” link in the menu.
Download and install the desktop client. When the installation finishes you can run the client from the system tray icon. It will ask you to choose how you want to sync your files. Select the option that makes files local.
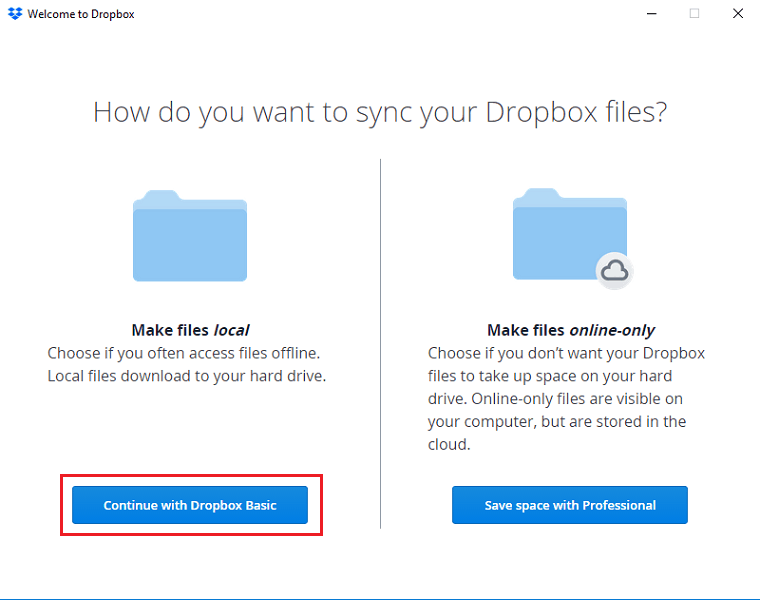
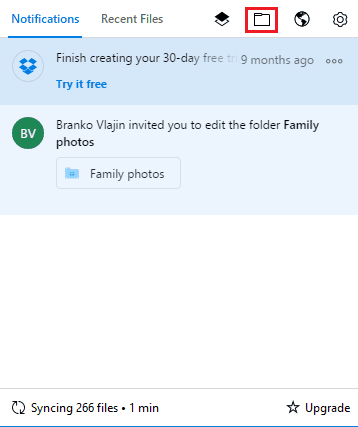
You can open the Dropbox sync folder by clicking the system tray icon, then the folder icon in the menu at the top.
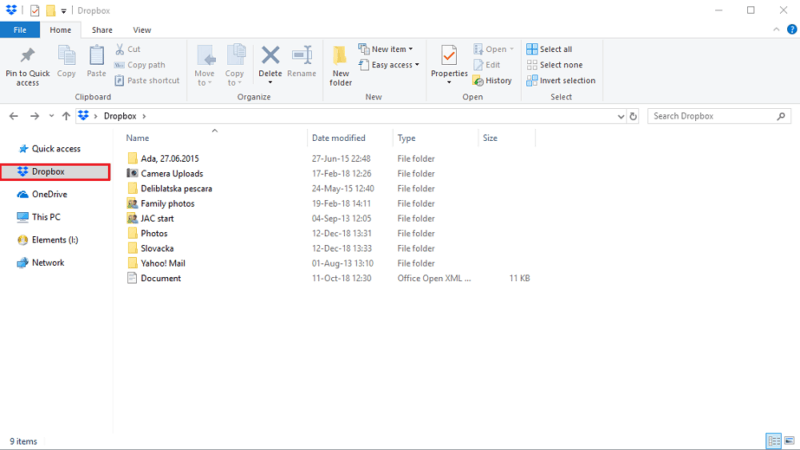
Another option is to open your files manager and select “Dropbox.”
The desktop client lets you backup your screenshots automatically, limit bandwidth and use selective sync to choose which folders you want to sync to your computer. If you subscribe to Dropbox Professional, you get smart sync, too, which you can use to see and access your files and folders without them taking space on your hard drive.
To learn more about Dropbox Professional and other features the service offers, read our Dropbox review.
Final Thoughts
Using cloud storage as a local folder is powerful because it helps you speed up your workflow by using offline apps. It takes more space, but some services, such as Dropbox, have a way around that, too, though your access might be slower.
pCloud is a great choice if you work with media files and Google Drive is great for collaboration on documents (though you can also see our list of Google Drive alternatives). You can also learn how to use cloud storage like a pro and how to access your files from anywhere with our guides.
What do you think about syncing to a local drive? Is it worth the hard drive space? Let us know in the comments below. Thank you for reading.

