How to Set Up a Network Drive: Guide to Map Cloud Storage in 2025
A network drive makes it easy to access, manage and share files stored in a cloud storage service or other devices, like an external drive, on the same network. This guide will teach you how to set up a network drive so that you can enjoy the benefits.
It doesn’t matter if you’re working on a personal project or are collaborating with a team on a big project; having an easy way to access your files on cloud storage is now a necessity. In this guide, we’ll teach you how to set up a network drive on Windows and Mac so you can access your files from any device whenever you want.
Below, we’ll cover the differences between network, virtual and cloud drives, and explain their features. We will then present some cloud services with a network drive feature. The article will also explore cloud services that need a third-party tool to be mounted as a network drive. However, before we get into the setup process, let’s learn what a network drive is.
-
04/10/2024
Updated to reflect changes in Icedrive’s pricing plans and storage offers.
-
04/15/2024
Updated to reflect changes in Degoo’s free storage offer.
-
07/09/2024 Facts checked
We have completed a full rewrite of our “how to set up and map cloud storage as a network drive for Windows and Mac” guide and now use an easier-to-read format.
What Is a Network Drive?
A network drive is a shared storage location that can be accessed by many computers on the same network. A network drive can come in two forms: It can be a drive that points to a server (on-premises or cloud storage), or a network-attached storage (NAS) solution that’s directly connected using a wireless connection (WiFi).
Every device within the network shares this storage location, allowing all the authorized users to access, upload and collaborate on files and documents. A network drive isn’t physically connected to your computer, but you can access it remotely through a network connection.
10,000+ Trust Our Free Cloud Storage Tips. Join Today!
- Demystify cloud storage terminology and key concepts in plain language
- Discover easy-to-implement techniques to securely backup and sync your data across devices
- Learn money-saving strategies to optimize your cloud storage costs and usage
Network Drive vs Virtual Drive vs Cloud Storage Drive
You will find many publications that use the phrases network drive, virtual drive and cloud storage drive interchangeably. However, these three drives are different, even though some of their features may overlap. We’ll explain each type below.
- A network drive exists on a dedicated storage device or a separate computer on your local network. All authorized users can access the network drive after inputting the required details.
- A virtual drive is a storage space that is created on a computer. It is limited to that computer only.
- A cloud storage drive is a storage space in the cloud. Anyone with login credentials or accessibility rights as well as an internet connection can access the files. You can configure who has access via the platform’s advanced sharing settings.
| Storage Type: | How It Works | Accessibility | Example |
|---|---|---|---|
| Network Drive | Separate computer or NAS on a local network | Same network | A home network where you share files and folders |
| Virtual Drive | A non-physical, software-created storage location | The same computer that created the virtual drive | Combining your local drives (like C and D) into one virtual drive and naming it M |
| Cloud Storage Drive | Remote/cloud servers accessible through an internet connection | Anywhere with an internet connection | OneDrive, Dropbox and Google Drive |
How to Map Cloud Storage as a Network Drive
Mapping a cloud storage solution as a network drive allows users to access cloud files as if they were on a local drive. Even though most cloud storage solutions advertise their services as having a virtual network drive, you can only map using a third-party application.
Google Drive, OneDrive and Dropbox are cloud storage solutions that support network drive mapping. We will use RaiDrive to map Dropbox as a network drive.
- Download RaiDrive
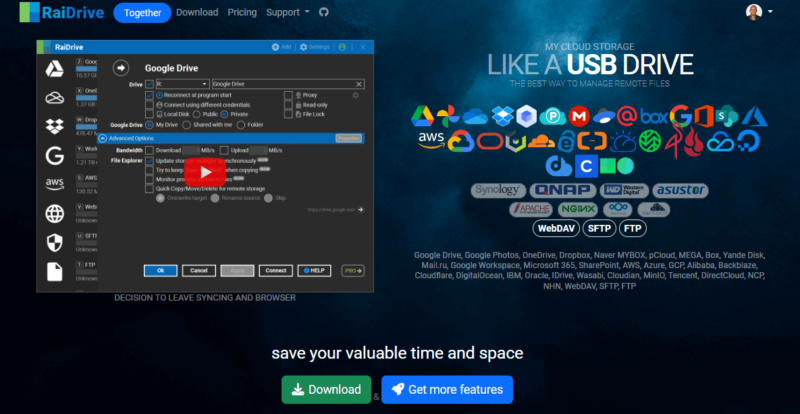
Visit RaiDrive’s website to set up a free account and download the desktop client. You can use the free trial or subscribe. Follow the setup instructions and launch the app.
- Add a Drive
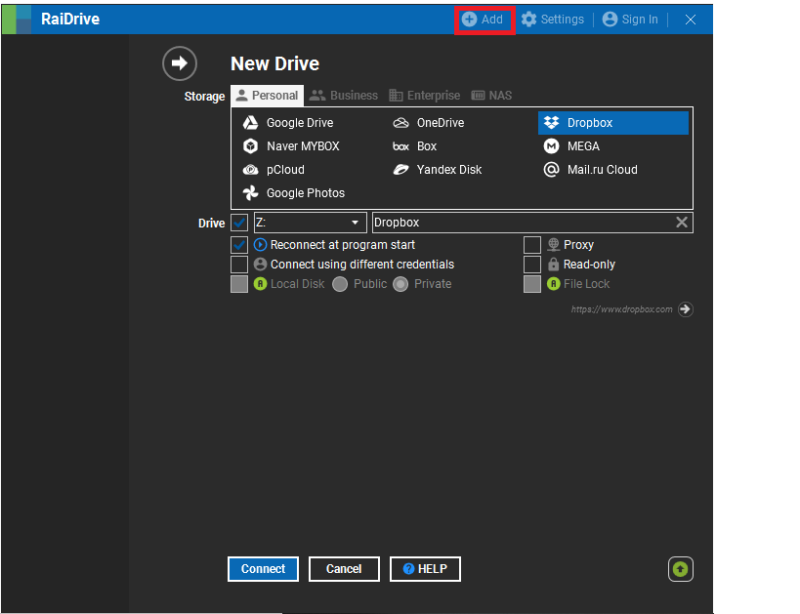
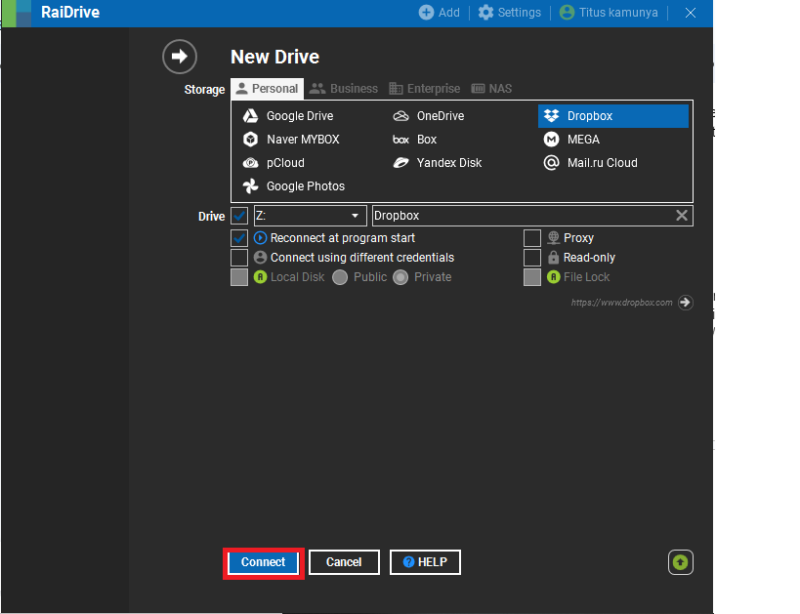
Once you launch the RaiDrive tool, you will see an “add” icon. Click the “add” icon to see various cloud storage platforms that you can link to RaiDrive. We’ll use Dropbox.
- Select the Drive Letter
The interface will give you a dropdown menu where you can select the drive letter. You can select Z or any other letter that you like. Check all the relevant boxes and click “connect.”
- Log In to Your Dropbox Account
You will be taken to a browser window to sign in to your Dropbox account or create one from scratch. Dropbox has a free plan with 5GB of storage, which is enough for this demonstration.
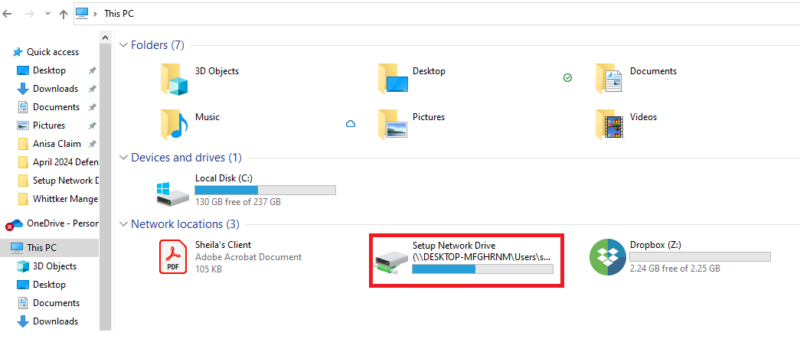
Allow RaiDrive with all the permissions options on Dropbox. Once done, the cloud storage will be configured as a network drive. To check if Dropbox has been mapped correctly, go to File Explorer, search “this PC” and open the folder. The Dropbox drive should appear within the “network locations” section.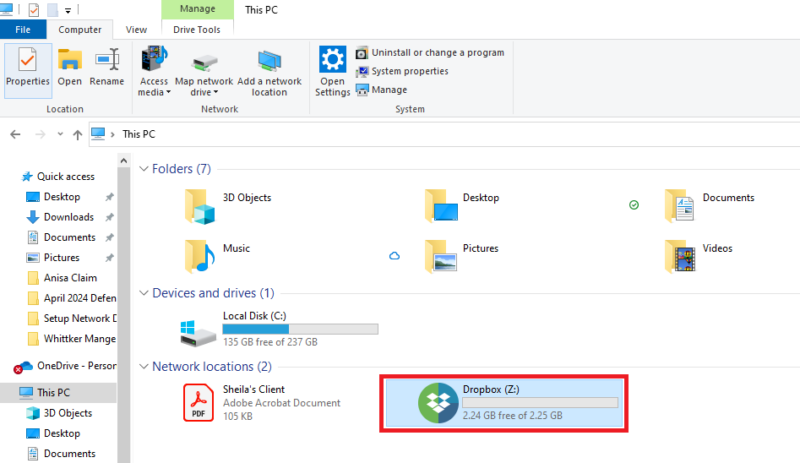
How to Set Up a Network Drive on Windows
A network drive lets users access shared files and folders over a network as if they were on a local drive. This approach is useful for home networks or big organizations that share a lot of data. Next, we’ll show you how to create a network drive on Windows 10.
Mapping a Network Drive in Windows 10
Windows 10 has a built-in feature that makes it easy to map a network drive. Follow these simple steps:
- Find the Network Drive
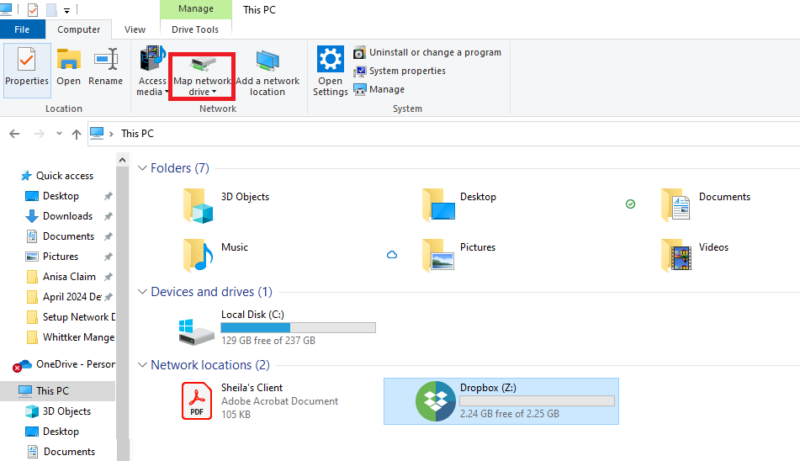
Open the File Explorer window, search for “this PC” and click “open.” Then, click “map network drive.” You can find this feature just below the top menu.
- Pick a Drive
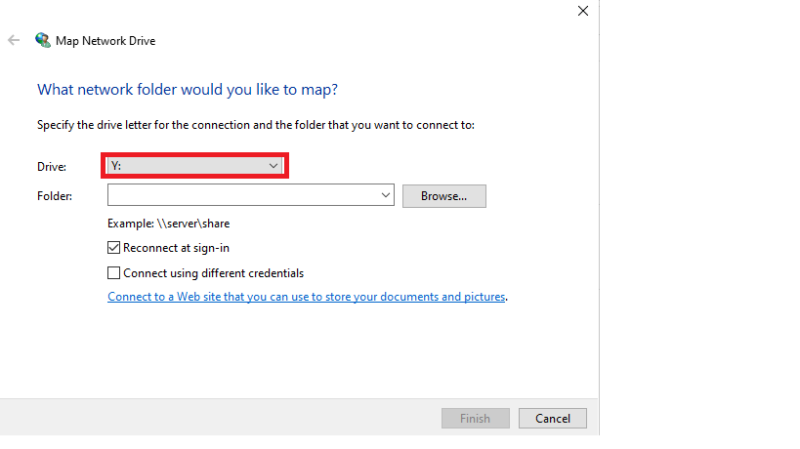
Choose a drive letter. The “map network drive” window will present a dropdown menu where you can select what drive to associate with the network drive you want to create.
- Map the Folder
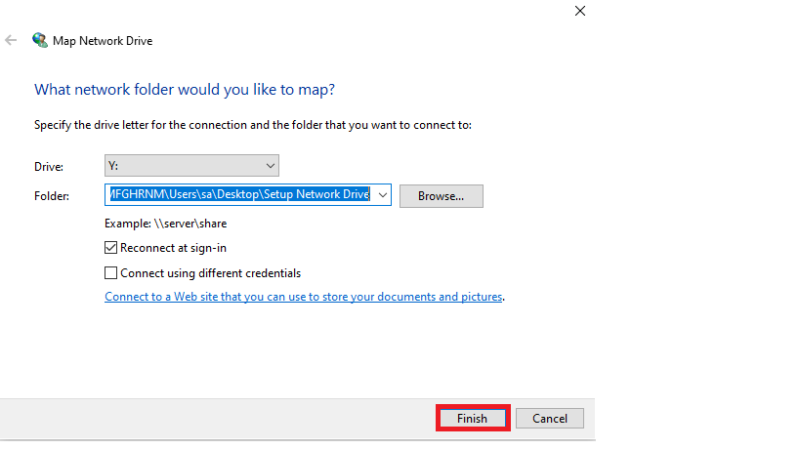
Next, you’ll map the network folder. Select the folder you want to map to a network drive. You must get the correct path and paste it into the folder path. You can get the relevant path by browsing your folders and selecting the destination.
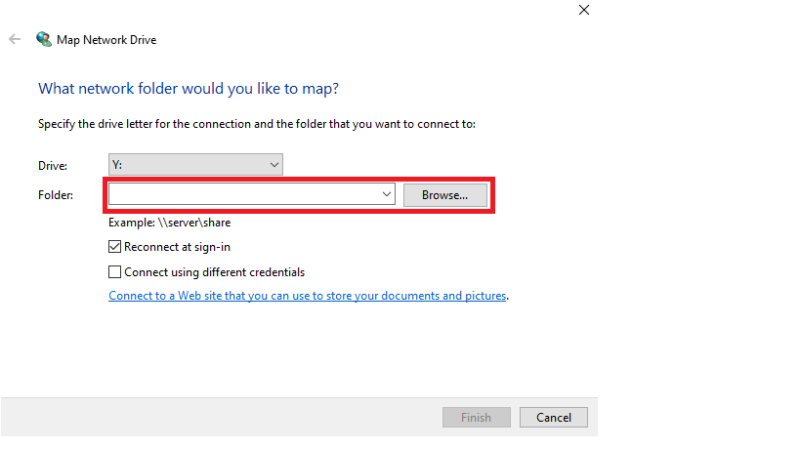
- Find the Folder Path
To locate a folder’s path, right-click the desired folder, go to “properties” and then “sharing,” and copy the path. Lastly, click “finish.”
Mapping a Network Drive in Windows 11
Mapping a network drive in Windows 11 is similar to doing it in Windows 10. However, the user interface is slightly different. These are the steps to follow:
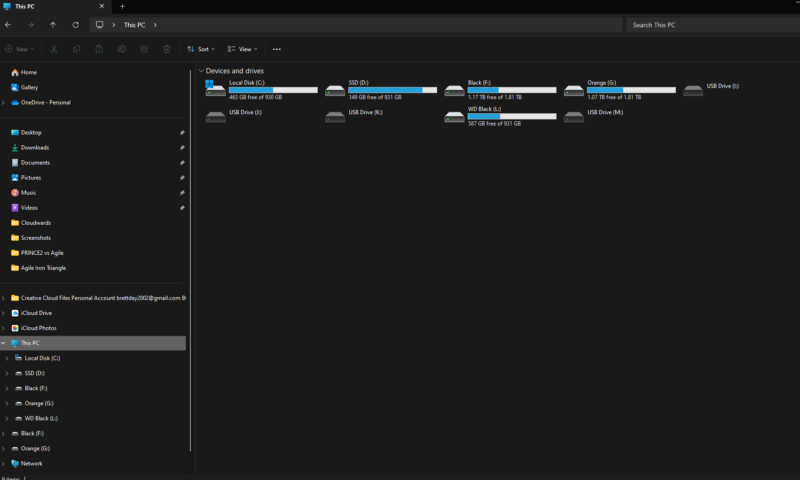
- Open File Explorer
Press the “Windows + E” keys to open File Explorer. Locate “this PC” on the left menu and open it.
- Map Network Drive
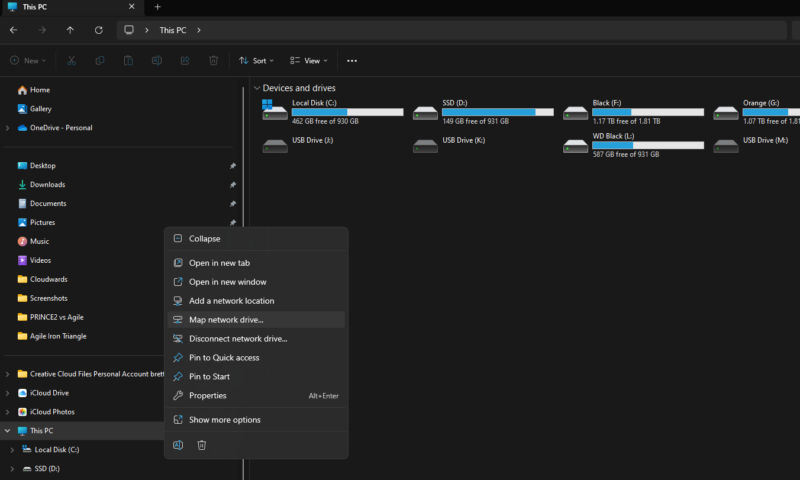
Next, right-click “this PC” and select “map network drive.”
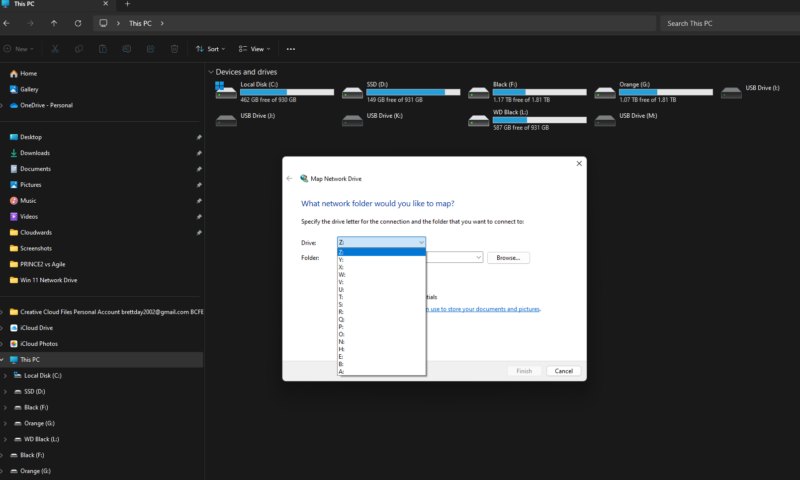
- Choose Destination Drive
Click on the dropdown menu with different drive letters to choose the destination drive.
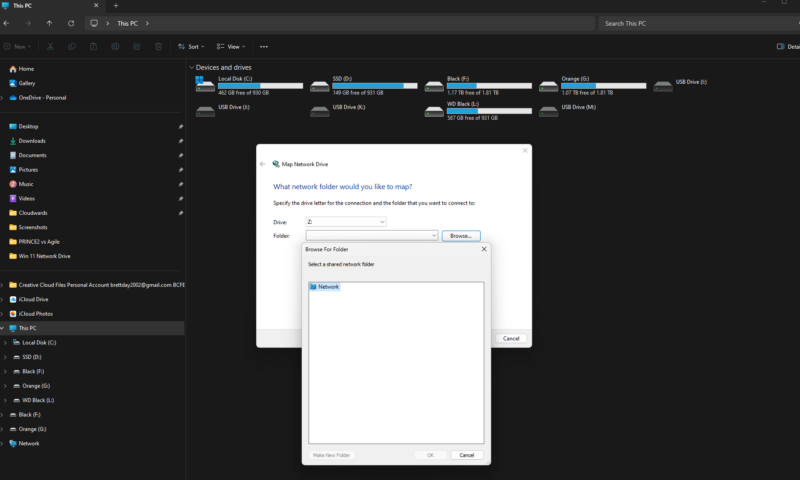
- Select the Folder
Select the folder you want to map as a network drive. To locate the path of the folder, right-click the folder, go to “properties” and then “sharing,” and copy the path. Once you have added the path, click “finish.” The mapped network drive can be seen and accessed under “network locations.”
How to Set Up a Network Drive on Mac
Devices using macOS have different user interfaces than Windows PCs. However, you can still map a network drive on a Mac and access files from different devices on the same network. Follow these steps if you’re using macOS Ventura or later:
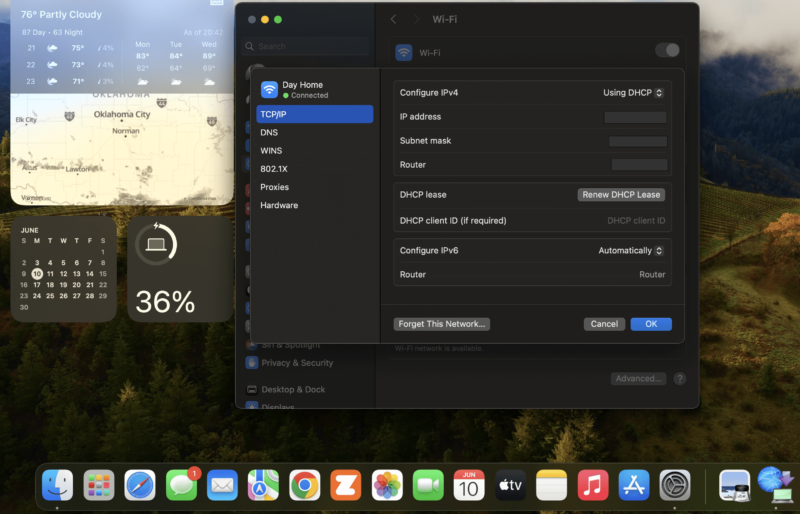
- Find Router IP Address
First, you’ll need your router’s IP address. Launch the system settings and select “network.” From there, choose your wireless network or ethernet connection. Next, click “details” and then “TCP/IP.” Your IP address will be listed on this screen.
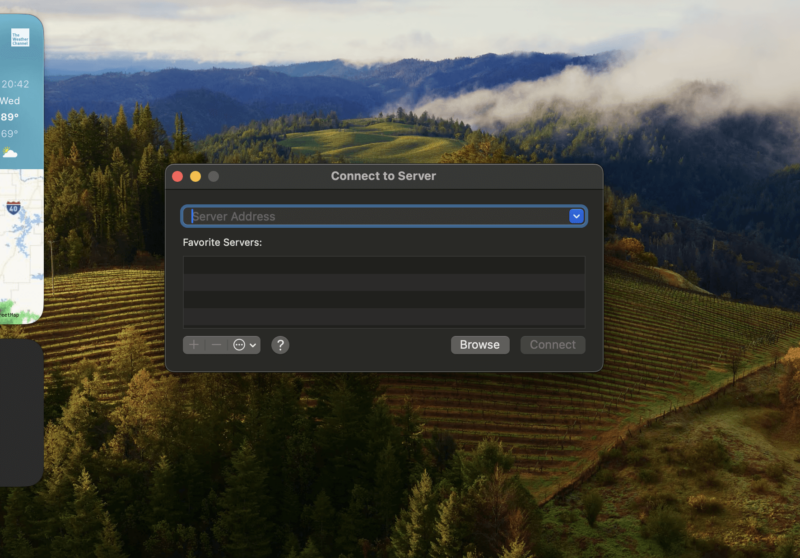
- Connect to Server
From the desktop address bar, click “go” and then select “connect to server.” You’ll be presented with a server address bar where you can paste your router’s IP address. Next, click “connect.”
- Log In and Select Network Drive
Once connected, you’ll need to log in to your router and select your network drive.
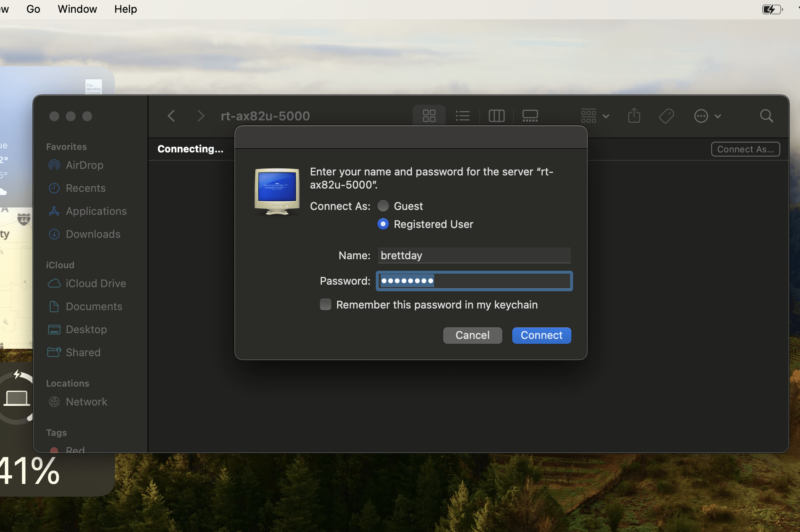
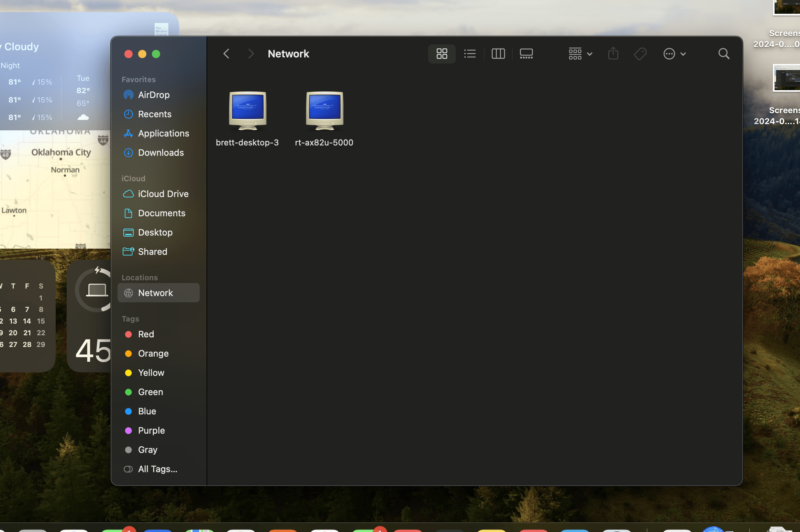
- Connect to Network Drive
The last step is to enter the “go” menu, click “connect to server” and map the drive to a folder on your Mac. You can then connect to your network drive. The new drive will be visible under the “locations” section in the Finder window.
Cloud Storage Providers With Network Drive Features
Despite their importance, only a few cloud services offer network drives. Most offer sync clients, which shouldn’t be mistaken for virtual network drives. Some cloud services, like Dropbox and Google Drive, support network drives through third-party services only. You can learn more about Google Drive in our full Google Drive review.
On the other hand, some services — like pCloud — support WebDAV (Web Distributed Authoring and Versioning), allowing robust file accessibility and management. We’ll take a look at our most recommended cloud services below.
1. pCloud
where they can collaborate and preview files.
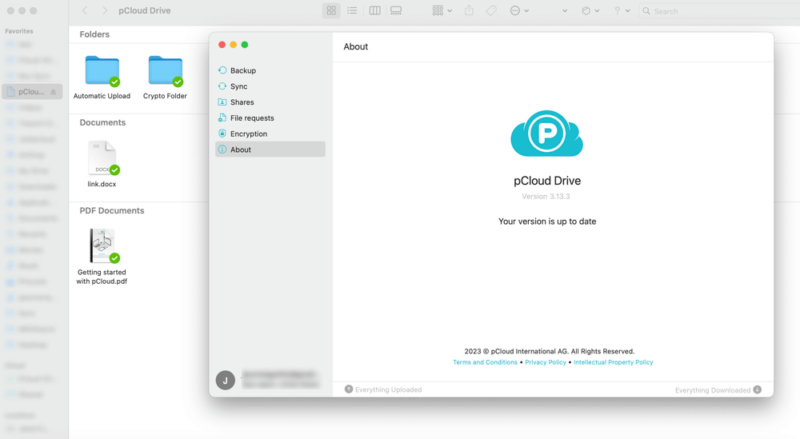
pCloud offers a virtual drive through pCloud Drive. Users can easily drag and drop files into pCloud Drive or upload them directly if they are large. The integrated file sharing and synchronization make it easy for teams to collaborate and get updates in real time.
pCloud Drive is a desktop application available for Mac, Linux and Windows operating systems. Once you register and set up pCloud Drive on your machine, the “virtual drive” feature is automatically enabled. The application’s “WebDAV” feature makes it easy to preview files while using the virtual drive. Check out our full pCloud review article to learn more about its features or test it yourself using their 14-day money-back guarantee.
- 10GB
- 500GB
- 2TB
More plans
- 10TB
- + FREE Encryption
- 2TB
- + FREE Encryption
- 10TB
- Price per user (minimum 3)
- 1TB
- Price per user (minimum 3)
- 2TB
- Encryption for pCloud Drive
2. Icedrive
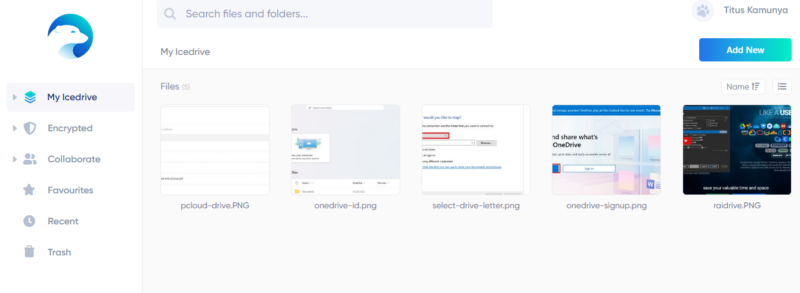
Icedrive is a cloud storage with a virtual drive that feels just like a native operating system. The desktop app installs custom drivers that connect with Icedrive’s database and create a new virtual hard disk on your machine, which you can mount or unmount anytime. Everything you do on the mounted drive is updated to Icedrive’s servers and any connected devices in real time.
The virtual drive isn’t automatically configured during installation. Enabling it on Windows is straightforward, but you need third-party apps like Rclone or Mountain Duck to configure it on Linux and macOS. See our full Icedrive review to learn about its features and functionalities, or take advantage of the 14-day money-back guarantee to test it.
- Bandwidth limit: 50GB
- 10GB
- Bandwidth limit: 250GB
- 100GB
- Bandwidth limit: 2TB
- 1TB
More plans
- Bandwidth limit: 8TB
- 3TB
- 512GB
- 2TB
- 10TB
- Additional 128GB storage for users who purchased the Lifetime Plan
- 128GB
- Additional 512GB storage for users who purchased the Lifetime Plan
- 512GB
- Additional 2TB storage for users who purchased the Lifetime Plan
- 2TB
3. Egnyte

easy to access files stored on the cloud from business computers.
Egnyte’s virtual drive is available through the Egnyte Connect desktop app. It’s automatically enabled when you download and install the desktop application. This virtual drive integrates seamlessly with macOS Finder and Windows File Explorer to ease file management tasks, such as uploading and deleting files.
The “global file-locking” feature allows users to avoid collaboration conflicts. You can enable this feature to ensure that only one user can access or edit a specific file at a time. The drive also comes with advanced “file search” features to locate files easily. Egnyte’s biggest letdown is that it doesn’t have a free plan, but the Business plan has a 15-day free trial. For more, check out our Egnyte review.
- Price per user/month/paid annually; Single document AI Q&A Secure collaboration Discretionary permissions Edge caching Compliant storage (HIPAA, FINRA, SOC2, ISO/IEC 27001) Google Workspace integration M365 co-editing (online and desktop)
- 1TB
- Price per user/month/paid annually; Everything in Business, plus: Single document AI Q&A Ransomware detection (artifact-based) Suspicious login detection Content lifecycle management Advanced workflows
- 1TB
- Price per user/month/paid annually; Everything in Enterprise Lite, plus: AI Copilot AI Search AI Workflows PDF markup E-signature Dynamic watermarking Auto-remediation
- 1TB
- Contact for custom quote; Everything in Elite, plus: AI Copilot AI Search AI Workflows Document type classification Sensitive data classification Snapshot & recovery (90-days) Ransomware detection (behavioral and artifact-based)
4. OneDrive
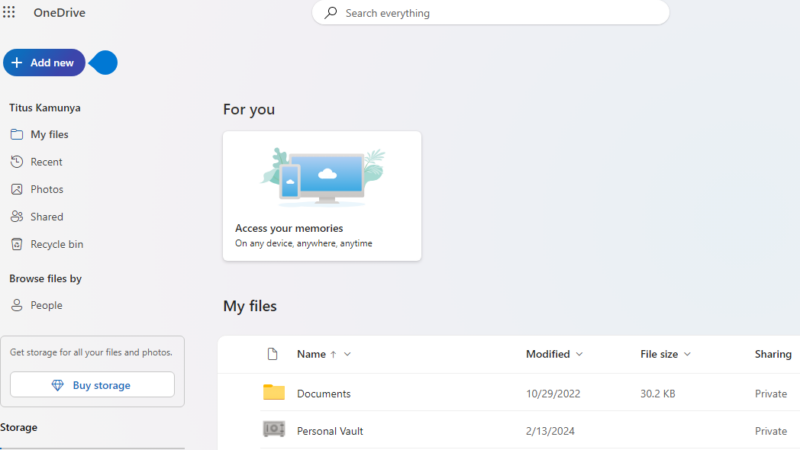
a bridge between your computer and the cloud storage.
OneDrive is a cloud storage platform from Microsoft. The desktop application comes installed on Windows and is also available for macOS. After installation and configuration, the desktop application creates a virtual drive with a designated letter on your local machine.
OneDrive provides automatic synchronization, where changes made on the virtual drive are automatically reflected in the cloud and vice versa. Check out our full OneDrive review for more details. The free plan offers 5GB if you want to test the service yourself.
- For one person
- 5GB
- 100GB
- Comes with Office 365 Personal
- 1TB
More plans
- Comes with Office 365 Home
- 6TB
- Price per user
- 1TB
- 1TB
- Price per user
- 1TB
5. Dropbox
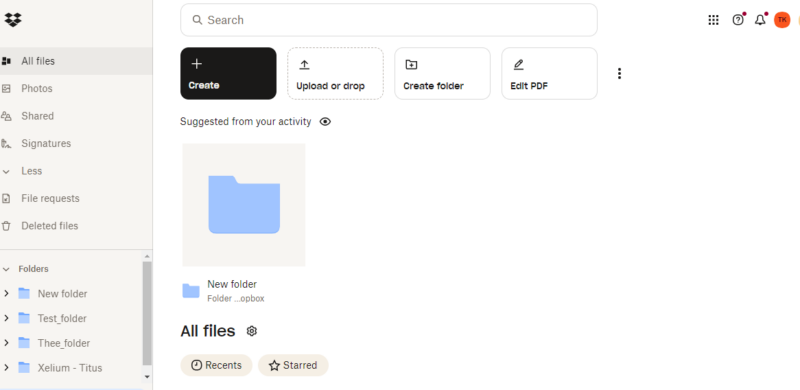
Dropbox is one of the cloud services that we have covered extensively in our articles. You can check out our Dropbox review for detailed information. However, it’s worth noting that Dropbox is a platform that requires third-party applications like RaiDrive or Mountain Duck to mount it as a virtual drive.
Such tools act as a bridge between Dropbox and your computer. After integration, the Dropbox virtual drive will appear in File Explorer with a designated letter like your other drives. Dropbox’s free plan gives you 2GB of storage, which is enough for personal use, but you can upgrade it to get more storage.
- 1 user
- 2GB
- 1 user
- 2TB
- up to 6 users
- 2TB
More plans
- (Formerly Dropbox One) 1 user Signature requests and eSignature templates
- 3TB
- 3 users minimum
- 5TB
- 3 users minimum
Final Thoughts
We have covered all the steps to set up a network drive on Mac and Windows devices, regardless of whether you’re using a cloud storage solution or a network-attached storage device.
Some cloud service solutions, like Dropbox and Google Drive, require a third-party app like CloudMounter or ExpanDrive to mount a virtual network drive. The major issue with third-party tools is security, so you’ll have to use reputable services. However, others like pCloud — which is our top pick — don’t need a third-party tool.
Have you tried mounting or mapping a network drive on your computer? How was the process? Is there a cloud storage solution with network drive features that we may have left out? Share your thoughts in the comments section. Thanks for reading.
FAQ: How to Create a Network Drive
Mapping a network drive creates a shortcut on your computer that points to a cloud storage drive or a folder on another computer on the same network. You can locate the mapped network drive using File Explorer (Windows) or Finder (Mac).
To create a network drive, simply connect your computer to a cloud storage service (like Dropbox). You can also configure a physical drive that’s attached to your router so it can be accessed via any device on your network. Our guide teaches you how to do both.
You can set up a network drive on your router by physically connecting a drive to it and configuring the drive via your router’s dashboard.


