How to Use Make.com (Formerly Integromat): Beginner’s Guide for 2025
If you have been looking for a way to connect the many software services your company uses so that you can visualize and automate workflows, enhance productivity, increase worker efficiency and save time, you’re going to love our how to use Make.com guide.
Key Takeaways: How to Use Make.com (Formerly Integromat)
- Make.com is a no-code automation development platform that makes it easy to visualize and create automations for over 1,000 platforms, thanks to its user-friendly graphical interface.
- Users will find that Make.com is incredibly powerful, but it can take some time to get used to the platform’s terminology.
- Make.com offers multiple plans, including a free plan that supports 1,000 monthly operations. There are also competitively priced paid plans for those looking to switch from competing platforms like Zapier or IFTTT.
Make.com is a powerful Integration Platform as a Service (iPaaS) that links software platforms and shares data across them. If you want to see increased productivity in your team and save time by using automations for tedious tasks, our how to use Make.com guide will demystify the platform for you.
Below, we’ll explain what Make.com (formerly Integromat) is. We’ll cover the platform’s terminology and explain how you can use Make.com. Additionally, you’ll learn how to create a Make account, generate connections with your favorite apps and build a new workflow. Follow this guide and you’ll be well on your way to saving precious time. Let’s jump right in.
-
02/23/2022
Updated the article to reflect that Integromat changed its name to Make.
-
02/02/2024 Facts checked
Our how to use Make.com guide has been updated with new information and uses, along with an easier-to-read format.
What Is Make.com (Formerly Integromat)?
Make.com (formerly Integromat) is a no-code workflow automation platform with a slick user interface. With Make.com, users can link supported apps — namely social media platforms, the best cloud data storage services, the best project management software and hundreds of other tools — to create automated workflows that can improve efficiency across an entire company.

Understanding Scenarios and Modules: Common Make.com Terms
One of the biggest issues users will run into is Make.com’s terminology. Once you get the hang of it, you’ll start creating scenarios (workflows) for project management apps and more in no time, but expect a learning curve upfront. We’ve listed several terms you’ll need to understand to get the most out of the platform.
- Scenario: The term used to describe an entire automated process.
- Module: A device, trigger, action or app in the scenario that transmits and receives data.
- Operation: The triggers and actions that build a scenario.
- Trigger: An event that kick-starts a scenario.
- Action: An event or task that occurs once a trigger is activated.
- Connection: The link between actions and third-party software platforms.
- Filter: A process that helps creators filter data for use in triggers.
How to Use Make.com Effectively for Workflow Automation
Make.com allows project managers, Scrum Masters, content creators, marketing designers and many others to ease their workloads by using premade automation templates or by creating automations for more than 1,000 apps and software platforms.
You’ll find automation recipes that can automatically post updates, email team members, assign tasks, create new records and reports from data, archive completed tasks and so on. Here, we’ll go over some popular software platforms and a few of the automations you can create to make your life easier.
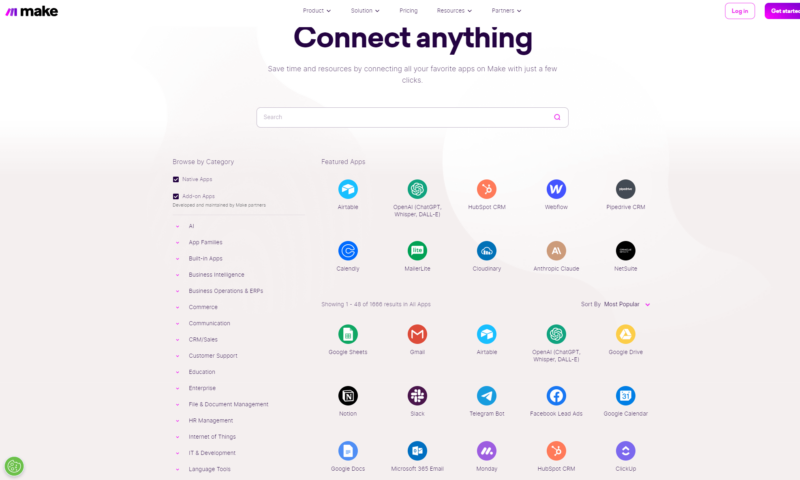
Best Apps & Integrations for Make.com
- monday.com — You can use Make.com to add users, establish columns, create items and generally make project and task management easier. Here’s our monday.com review.
- Google Drive — Users are able to create automations that can watch for comments in documents, generate shared drives, download files and more. Be sure to read our Google Drive review.
- Facebook Pages — Automations for Facebook can like posts, create and watch for comments, delete photos and posts and so on.
- Trello — Users can automate processes like archiving and unarchiving cards, assigning tasks to team members, adding card labels and generating checklists. Find out more in our Trello review.
- Slack — Make.com allows users to automate channel creation, create reminders, invite or kick users, pin messages and a whole lot more. See our Slack review for details.
- Jira — Scrum Masters can create automations to assign and unassign issues, add attachments, update statuses and retrieve changelogs. Check out our Jira review.
- Dropbox — If you use Dropbox for data storage, you can make automations that create folders, update shared links, find and restore files, watch folders for changes and then some. Read all about it in our Dropbox review.
How to Get Started With Make.com: Beginner’s Guide
- Sign Up for Make.com (Formerly Integromat)
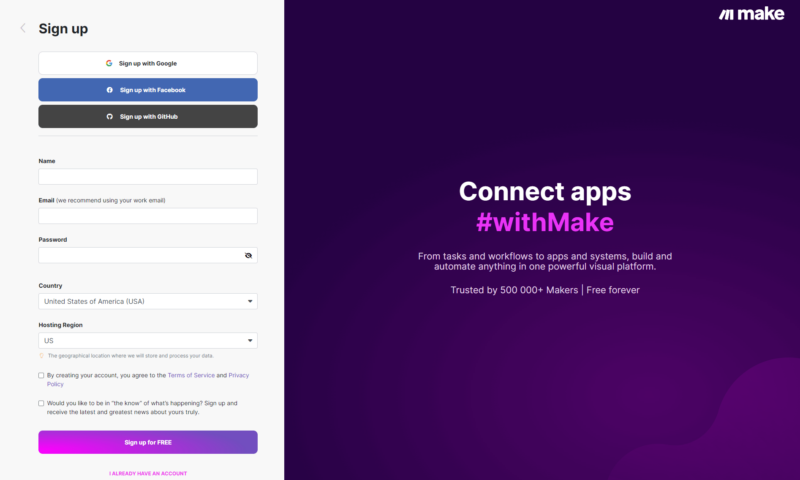
Before you can go any further with Make.com, you’ll need to create an account. You can choose whether to try the free or paid version. For this tutorial, we’ll sign up for a free account. Head to the Make.com website and click the “get started free” button in the top-right corner.

- Fill Out Your Personal Details
Next, you’ll need to add your personal details, including your name, email address, country, desired password and the host country that will store your data. You’ll also need to accept the service’s terms and conditions, and you can also opt into the Make.com newsletter if you wish.
- Summarize How You Will Use Make.com
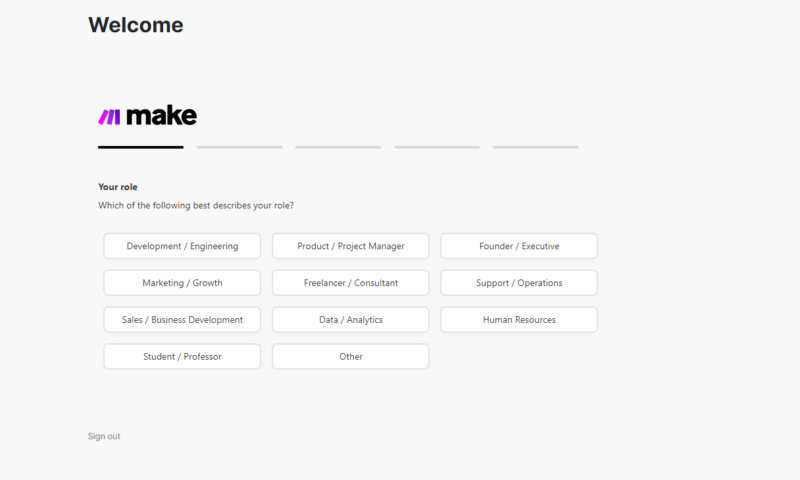
After you confirm your account, Make.com will ask you to summarize how you’ll use it. A short questionnaire will ask what role you play in your company, how many employees there are, what actions you want to automate and whether you have any experience automating actions.
- Check Out the Dashboard
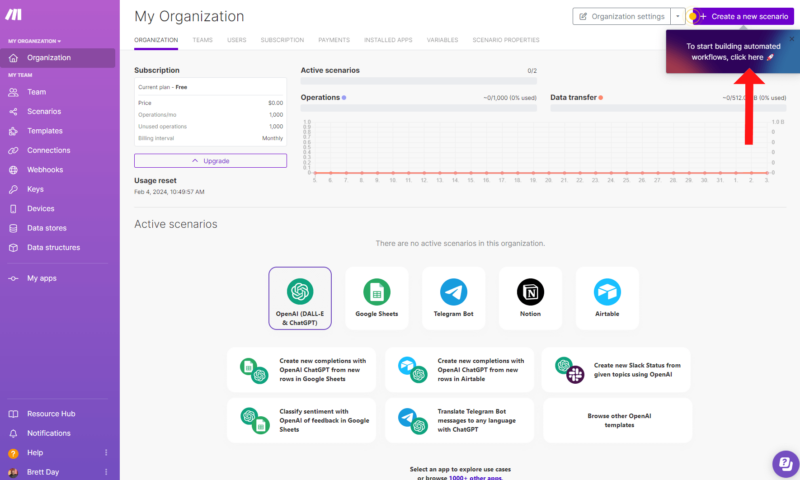
Once you answer Make.com’s questions, you’ll be whisked away to the dashboard, which is where all the fun starts. After a quick introductory tour, you’ll be asked to create your first scenario. You do this by clicking the purple “create a new scenario” button in the top-right corner.
- Go to the “Scenarios” Tab
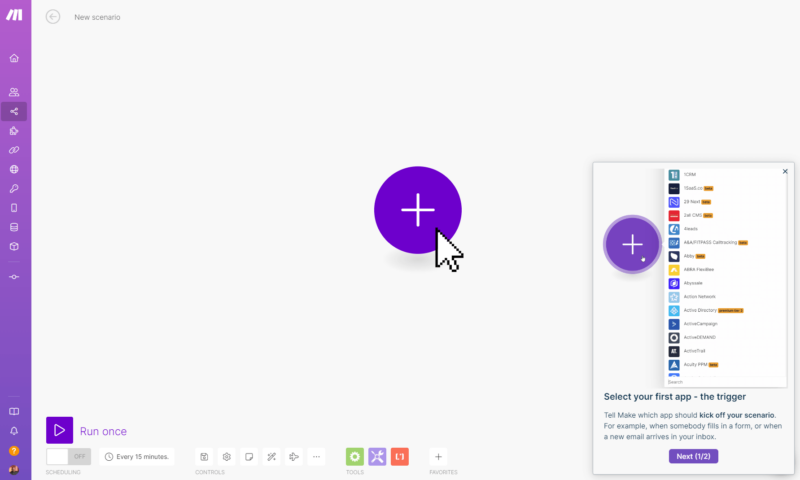
Creating a scenario can seem a little daunting at first, but fear not — the onscreen hints will help guide you. To get started, click the large “plus” icon in the middle of the screen.
- Select Your Trigger App
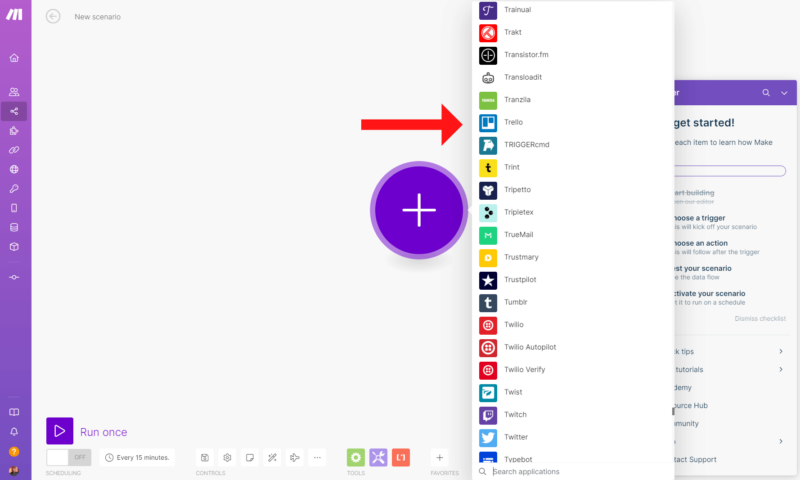
After clicking the plus icon, you’ll be presented with a massive, searchable list of triggers — applications — to choose from. For this guide, we chose Trello.
- Select the Trigger
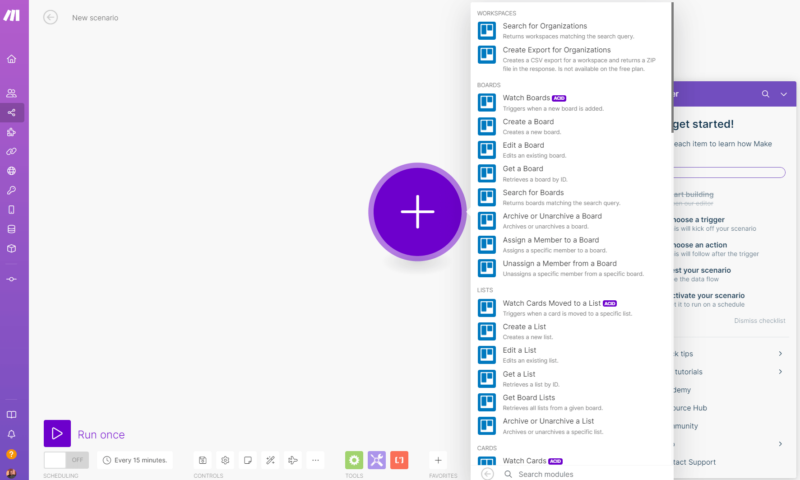
Once you select a trigger application, it’ll ask you to choose the trigger itself. Again, you’ll see a long list of options. Click the trigger that you want to use to kick-start your automation. Fortunately, the list is searchable, so finding the right trigger isn’t too time consuming. We chose the “watch cards moved to a list” trigger.
- Give Make.com Access to Trello
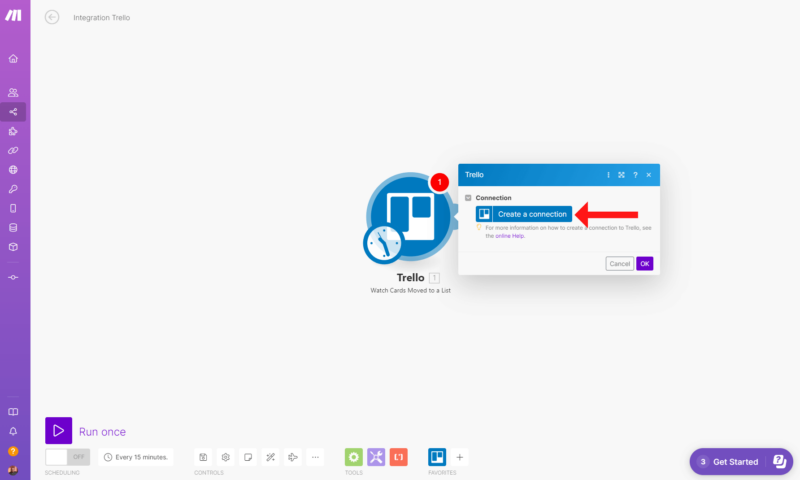
Upon selecting a trigger, Make.com will ask you to create a new connection with your chosen platform. To do this, simply click the “create a connection” box. Follow the onscreen instructions, and the platforms will connect almost instantly.
- Set the Trigger Criteria
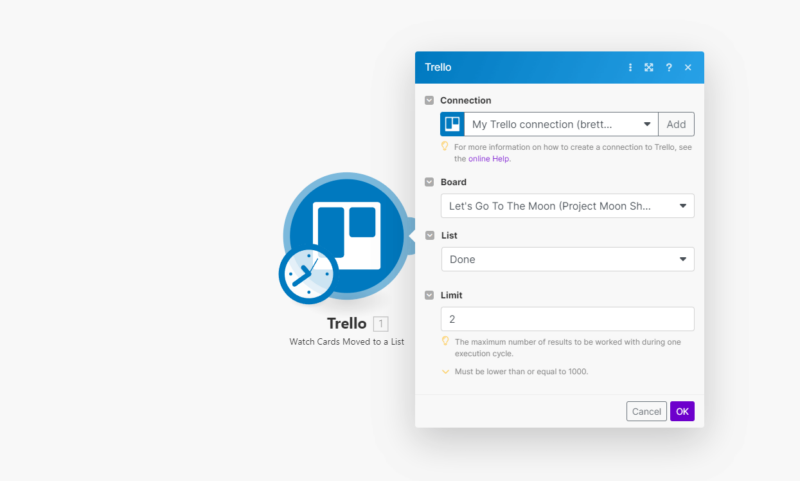
Once the connection is made, Make.com will ask you to set the trigger criteria. For this example, it asked us to choose the Trello board we wanted to use and which list to watch.
- Create the Next Step
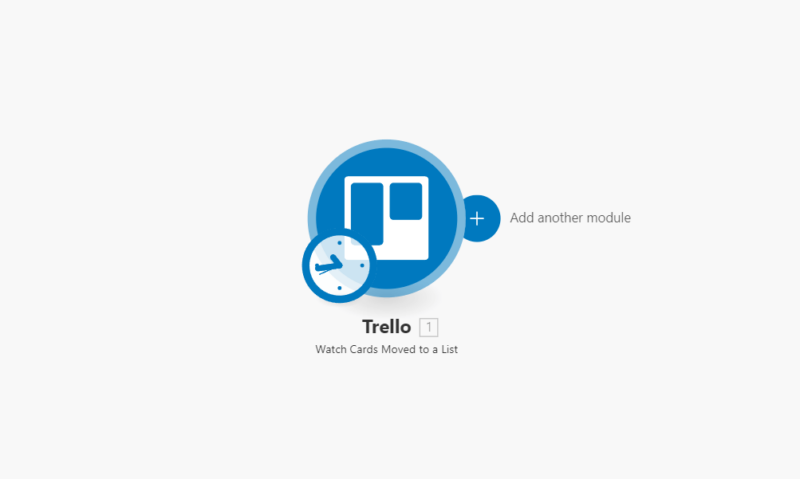
So far, we have created a simple automation, but let’s take it a step further by having it create a new document in Google Docs every time a card is moved to our watched list. To do this, click the “add another module” link that juts out from the main Trello circle.
- Allow Access to the New App
After you select a trigger — in our case, it’s “create a document” — you’ll need to grant access to the new application. The procedure is the same as the one we performed in step eight. Just follow the onscreen instructions to link your accounts.

- Set Criteria for the Action
You’ll once again need to select criteria for your new module, though things look a little more complex than before. Don’t worry, though — the options aren’t as complicated as they seem. For example, if you want to document the name of the Trello card that was moved, you’ll simply select “card ID” in the “name” and “content” fields. You can then choose where you want to save the document.

- Add a Third Step (Optional)
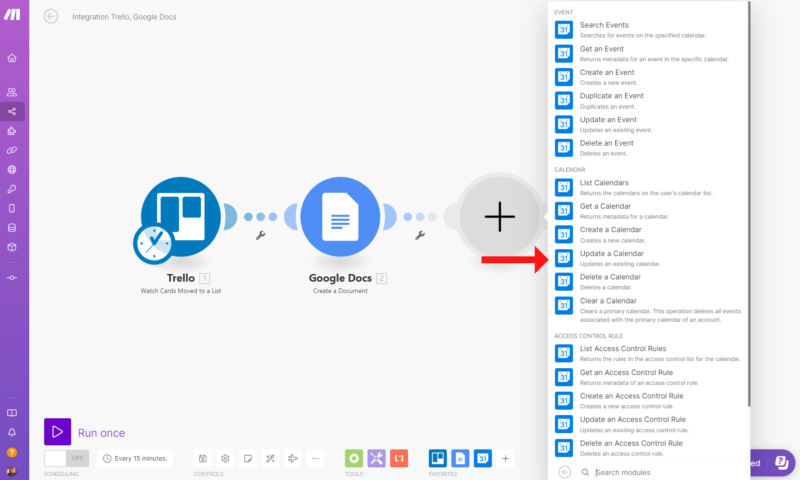
You can create multi-step scenarios easily in Make.com, so we’ll add one other module, though this step isn’t necessary. You can make your scenarios as straightforward or complex as you wish. This time, we’ll add a module for Google Calendar. The “add to calendar” trigger will show us when a card is moved to our watch list. Once you select your app and trigger, authorize the app connection.
- Set Criteria for the Action Again
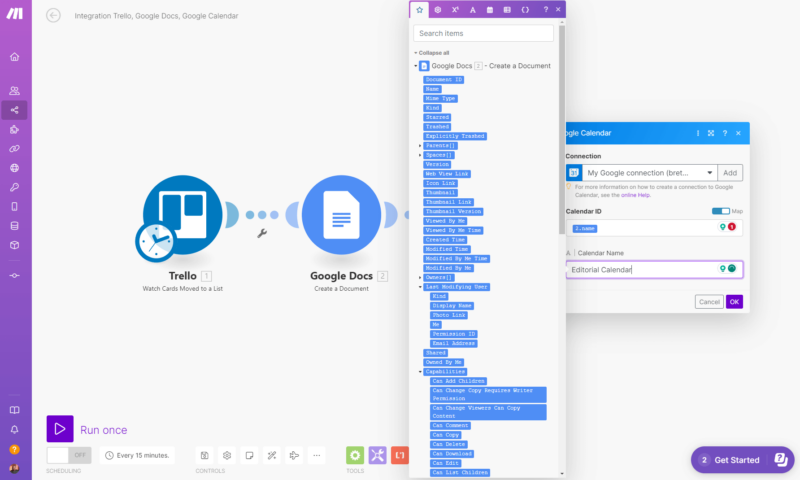
You’ll need to set the criteria for the trigger once more. As mentioned before, the options list here is extensive and looks a little scary, but you’ll be fine if you read the descriptions. We just want to add the name of the Trello card that was moved to our watched list, so we’ll choose “name” in the “event” column. You can also give the calendar a name if you want.
- Test Your Scenario
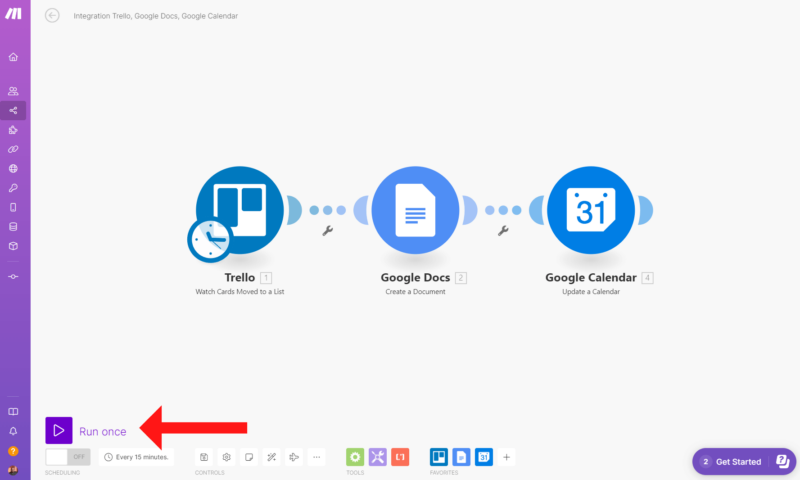
Now that you’ve built your scenario, you should test it. This is especially true if you have created a multi-step scenario. To do this, simply click the “run once” button in the bottom-left corner.
- Check Any Errors
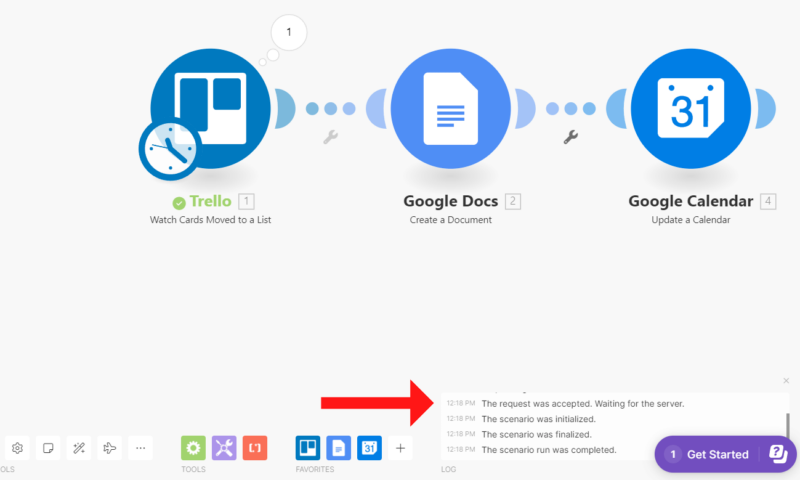
After testing your scenario, you’ll see a test status in the bottom-right corner. If all goes to plan, which it did for us, the scenario will automatically save itself. Should you have any errors, Make.com will show you what needs to be corrected. If this happens to you, fix the errors and rerun the test.
When you complete all of these steps, you’ll have an excellent automation that will help you increase efficiency and productivity. As you can see, it’s easy to create simple and complex automations with Make.com. We recommend you take advantage of the free plan to see how it works. Our experts believe you’ll find the graphical interface intuitive and pleasant to use.
Final Thoughts
If you’ve been on the fence about Make.com (formerly Integromat), we hope our guide helped to alleviate your concerns. While making automations can be tricky, Make.com has created a platform that makes the process pain-free. Take the free plan out for a spin and create a couple of scenarios; you might find that you like it better than Zapier or IFTTT.
Did you find our Make.com guide helpful? Has it inspired you to give it a try? Have you used it before, but still prefer other automation platforms? What platforms do you like to use for creating automations? Let us know in the comments, and as always, thanks for reading.
FAQ: How to Use Make.com
Yes, Make.com is the same as Integromat. The name “Make.com” came into use in 2022 after the owners rebranded to better align with customers.
Make.com is an automation builder. Make.com users can create automation recipes or use predetermined templates to automate tedious and repetitive tasks.
Make.com and Zapier are similar platforms. Our team of experts believes that Make.com is better for those needing to automate complex workflows, thanks to its graphical user interface. However, Zapier is user-friendly and can connect with more applications.
Yes, Make.com works with Google Sheets. Users can create automations to generate new columns, add sheets, perform functions, search rows, watch for changes and more.


