Kodi Guide: Everything You Always Wanted to Know
Kodi is a multi-platform home theater application focused on providing users with a completely open experience. Despite being 15 years old, the software has only really taken off in the last few years and, as such, is still a bit tricky to use at times. Cloudwards.net has decided to give you a complete guide to Kodi from defining what it is to showing you how to install it.
This general overview is more about the broad strokes, so be sure to check out our Kodi archive if you want to learn more about specific points of this great streaming option. If you want to go ahead and just download it already and figure it all out for yourself, make sure to visit the Kodi website.
What is Kodi?
Kodi is open source software that allows you to import and organize media, including audio, video and photos. That’s really all Kodi is, in essence: as a frontend for a media server.
The original form was known as XBMC, which stands for Xbox Media Center, and was created back in 2004 by the aptly named XBMC Foundation. It allowed those with a modified Xbox to install additional applications as well use it as a frontend for stored media.
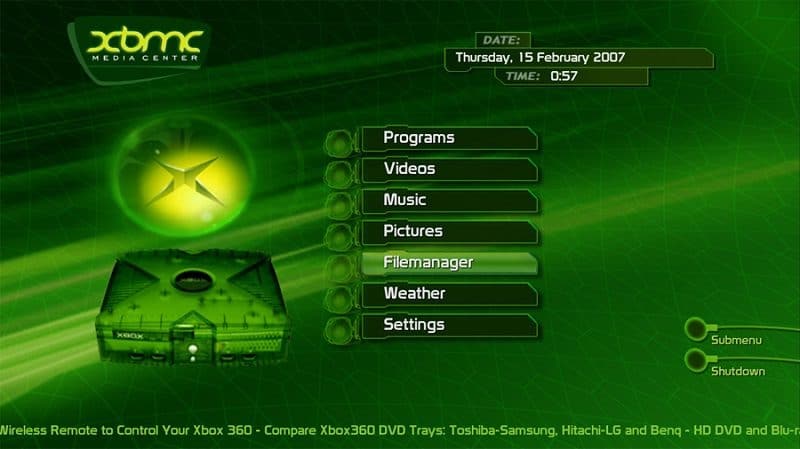
It proved wildly popular and the XBMC Foundation swiftly adapted the application to fit multiple operating systems. XBMC continued until 2014 when the name switched to Kodi, starting with version 14.
The XBMC Foundation has survived as a non-profit, continuing to develop the software through partnerships and contributions by the community. Much of its growth is due to passionate developers donating time and effort to develop both the Kodi framework as well as additional add-ons.
Over its development, additional features have popped up for the base version of Kodi. You can now completely change up its look with official skins, access web browsers thanks to the JSON-RPC based remote interface and connect a variety of different remote controls like the Logitech Harmony.

Cord cutters (people getting away from their cable addiction) will find value by building or buying an HTPC and installing Kodi as a frontend. With support for PVR with services like MythTV and NextPVR, that means you’ll be able to watch and record live TV as well.
That’s not the even best part of Kodi, though. Because it’s open source, Kodi is a bit of a playground for developers. Add-ons both official and unofficial are a cornerstone of using Kodi, opening up the possibilities for streaming, organizing and storing content.
This is largely the reason Kodi is so popular. It’s a constantly changing platform, aimed specifically towards those who like to tinker. Users can turn Kodi into whatever they envision it to be while developers can get their name out through developing add-ons for a massive platform.
Add-ons & Repositories
Add-ons are where the real Kodi experience lies. They act like plugins, allowing you to access different channels with content, organize what you have stored already or even just change the interface to suit your tastes.
While add-ons can be installed directly into Kodi, they rarely are. Add-ons almost always live inside of repositories (or repos if you want to talk the way the cool kids do). Repos are usually home to several different Kodi add-ons, allowing you to pick and choose which ones you want to install.
A repository is a store and an add-on a product. You gain access to repositories to find the add-on you’re looking for, which is a very effective distribution method for small developers.
The list of repositories for Kodi is pretty much endless. Because the platform is so open, add-ons usually exist in several version over several repos. If you’re just getting started, make sure to read our list of the best repositories for Kodi so you can find the most useful ones quickly.
Kodi includes its official repository with each download. The add-ons inside are officially supported by the XBMC Foundation and are usually kept up to date. The list can change subtly over time, but many of the add-ons inside will stay for as long as the software is alive.
The official repo is full of cool add-ons like YouTube, SoundCloud, etc. There are also several that are extremely useful to both set up Kodi and watch content on it. For recommendations, read our list of the best official Kodi add-ons.
However, the real fun starts somewhere else. One of the big draws of Kodi aren’t the official add-ons, but rather the unofficial ones. These additions, not officially supported by the XBMC Foundation, open up the real power of Kodi.
Unofficial add-ons feature everything from complete libraries of movies and TV shows to complete overhauls of the UI. If you want a few to start with, make sure to check out the best unofficial Kodi add-ons.
Despite their popularity, the XBMC Foundation can’t support these add-ons, however, as they often feature pirated content. In fact, many people think Kodi is illegal in its entirety because of the massive amount of pirated content you have access to. Which brings us to our next question…
Is Kodi Legal?
Kodi, on its own, is entirely legal. Even with official add-ons installed, the software itself is legitimate. However, if you plan on using unofficial add-ons with Kodi, you’re basically torrenting it and should treat the files in question the same way you would pirated content.
A good rule of thumb is if it seems too good to be true then it probably is. The phase reigns correct here as well. If your concerns lie within whether or not you’re pirating content, then it’s best not to download unofficial add-ons.
For many, piracy is not a concern, and it really shouldn’t be. As long as you use a VPN when using Kodi, then there is very little chance that a legal issue would arise. However, that doesn’t mean Kodi is entirely off law enforcement’s radar.
There have been a few Kodi-centric lawsuits brought before judges. Brian Thompson, for example, was a shopkeeper in Middlesbrough, UK who sold pre-built Kodi boxes fit with unofficial add-ons. The “fully loaded” systems facilitated piracy and thus were deemed illegal to sell.
Lawsuits are typically brought forth only to those who enable the crime. For example, Bell Canada took the developers of TVAddons to court over alleged unlawful distribution of copyrighted content. The suit ended in TVAddons going offline for a brief period, but no further action.

However, when using these unofficial add-ons yourself, the lines blur. Since there is no monetary gain from streaming the content, copyright laws become messy and, in most cases, aren’t a concern.
Still, though, we do recommend you use one of our best VPN picks to make sure you’re off the radar. A VPN will keep your IP address private and protect you while streaming. As Kodi opens up the gates to many different forms of content, a VPN will also allow you to access geoblocked sites.
If you have any legal concerns with Kodi, a VPN will put them to rest. For suggestions, check out our best VPN for Kodi and sign up for one today.
How to Install Kodi Officially
Kodi is available for just about every platform imaginable. There are very few situations where it can’t be installed, usually concerning your device’s hardware. A few pieces, such as Amazon tablets, don’t have an official install method, but there are ways around that.
Installing Kodi on Windows
Desktop installs are the easiest. For Windows, you can install the application through the Kodi website or the Windows Store. The Windows Store will do this automatically, but there are a few steps to take from the site.
Inside the downloads section, select “Windows” and choose your installer. The XBMC Foundation has both stable and beta builds available at nearly all times. Stable builds are wholly tested while beta builds may have some issues where fixes have not yet been implemented.
Once you find what you need, click the applicable box and download the .exe file. Like installing any other application on Windows, simply run this file and follow the prompts. The installer thankfully doesn’t include any bloatware, so there are no concerns reading the fine print.
Installing Kodi on Mac
Installing on Mac is a similar process. Go to the Kodi website and click on the appropriate installer. From there, you follow the onscreen prompts until the install process completes.
MacOS installation comes with a few stipulations. First, Kodi is not available in the App Store, so you must use the website. Beyond that, an Intel Mac with OS X 10 or higher is required (as of the release of Kodi 17.6).
Installing Kodi on Linux
Linux installation is even easier. If you don’t have Tux installed yet, then you can get KODIbuntu which will give you both Kodi and the OS in a single installer. Beyond that, you’ll have to use the terminal to install Kodi on Linux. Open it up and enter the following lines:
- sudo apt-get install software-properties-common
- sudo add-apt-repository ppa:team-xbmc/ppa
- sudo apt-get update
- sudo apt-get install kodi
Follow the prompts as you would for any other software installation, and you’re good to go. You can install beta builds and nightly builds by replacing “sudo add-apt-repository ppa:team-xbmc/ppa” with “sudo add-apt-repository ppa:team-xbmc/unstable” and “sudo add-apt-repository ppa:team-xbmc/xbmc-nightly,” respectively.
There are other steps for upgrading, downgrading and more, all of which you can find on the official Kodi wiki.
Kodi Android Installation
Android installation differs depending on which flavor your device is rocking. The most straightforward way is to head to Google Play and check if Kodi is available. If it is, install like you would any other piece of software.
If you have a smart TV with Android, then you can get Kodi as well. A few brands, such as Samsung TVs, run a version of Android, allowing you to install Kodi directly through the Google Play Store.
The XBMC Foundation recommends you only use Google Play to install if your Android device has an Intel or AMD CPU. If you have an Arm processor, then there are download links for both 32bit and 64bit versions of the .apk which you would install like any other.
If you’ve never installed a .apk file on your Android device, the process is straightforward. Just click the applicable link inside of your Android web browser, and the install would begin like it would on Windows or Mac.
Installing Kodi on iOS
iOS installation requires that you have a jailbroken device running iOS 6.0 or higher (although XBMC recommends 8.0 or higher). Many users with jailbroken iOS devices are accustomed to using Cydia to install applications, but you can load your own on using .deb files as well.
Go to Cydia and install iFile, a free file managing software. You’ll also need either Safari Download Enabler or Safari Download Manager. Those keen will recognize that you’ll need to use Safari to install, so open it up and head to the Kodi website.
Go to the downloads page, tap iOS and install the appropriate .deb file. Once the installation is complete, open the file with iFile. Inside, simply select the “Installer” option, and the package will begin extracting. After a restart, you’re good to go.
Building Your Own Kodi Box
The last option is to build your own Kodi box. There are many ways to do it, but one of the most common is to use a Raspberry Pi. This mini computer is centered around an Arm processor, allowing you configure it to almost any need.
Kodi installation is surprisingly simple. The Raspberry Pi operating system installer NOOBS has two official Kodi distributions included: LibreELEC and OSMC.
First, you need to download NOOBS onto an SD card. Raspberry Pi recommends you use a faster SD card with transfer rates of 100mb/s or higher to achieve optimal video playback. You’ll need to format the SD card to FAT32 before installing. Raspberry Pi has a small tutorial about doing so for those who never have, so read up if you have any issues.
Plug your SD card into the Raspberry Pi after NOOBS is installed. It will load, and you can select either LibreELEC or OSMC to install Kodi. Once you have confirmation, you’re all set.
If none of the above methods work for your device, you’re going to have do a bit more work. Installation is usually possible, only limited by proprietary operating systems. If, however, your device uses an established operating system, there are loopholes.
Alternative Install Methods
If you’re an Amazon Fire TV or Apple TV user, then you may want to install Kodi as well. These two devices don’t support Kodi officially, but both run forked versions of operating systems with Kodi installers. You can sideload it onto either.
For those unfamiliar with the term, sideloading refers to installing an application onto your device that isn’t offered through any official channel. Your OS and hardware allow it, but software holds you back. Sideloading bypasses those restrictions.
The process is taxing but straightforward for either device. As with most sideloading endeavors, different file managers and installers are needed to extract the package. Make sure to check out our guide on sideloading Kodi for full instructions.
Roku fits in the same category as both Amazon and Apple TV but has a distinction when it comes to Kodi. While the two run different versions of established operating systems, Roku runs its own proprietary OS.
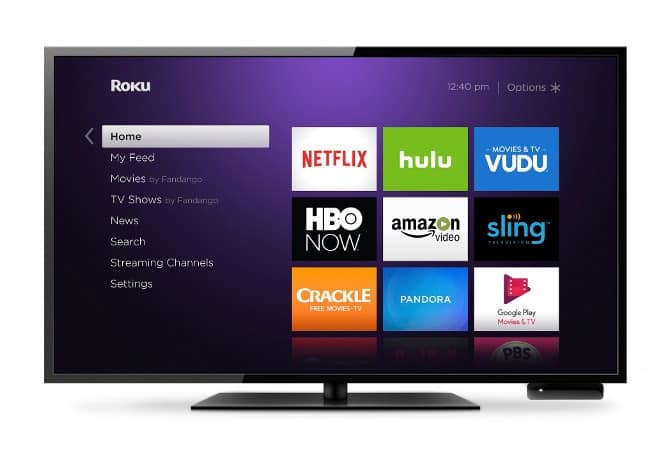
So, in short, there is no way to install Kodi on Roku. There is a way to use Kodi on Roku, though. You’ll need a Windows PC and have screen mirroring enabled, but the process is pretty simple after that. Check out our guide for full instructions, as well as our Roku beginner’s guide, if you’re not familiar with the device.
The XBMC Foundation has continued to port the application to different operating systems as time goes on. Nearly bases are covered now, but if your device doesn’t fit neatly into one category, you can find all of Kodi’s supported platforms and attempt to get it up on your device.
Setting Up Kodi
Opening Kodi for the first time is a very unfulfilling experience, especially if you had one of the lengthier install processes. It doesn’t have anything inside, so you’ll need to fill it up. First up is adding your media. If you don’t have any, feel free to skip over this section.
On the Kodi home screen, you’ll tabs for each type of media the software supports. You should have two options, one that says “enter files” and another that says “remove this main menu item.” Click on the former.
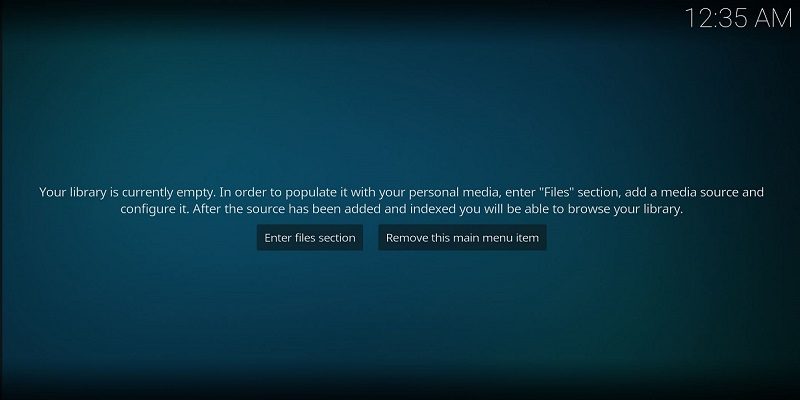
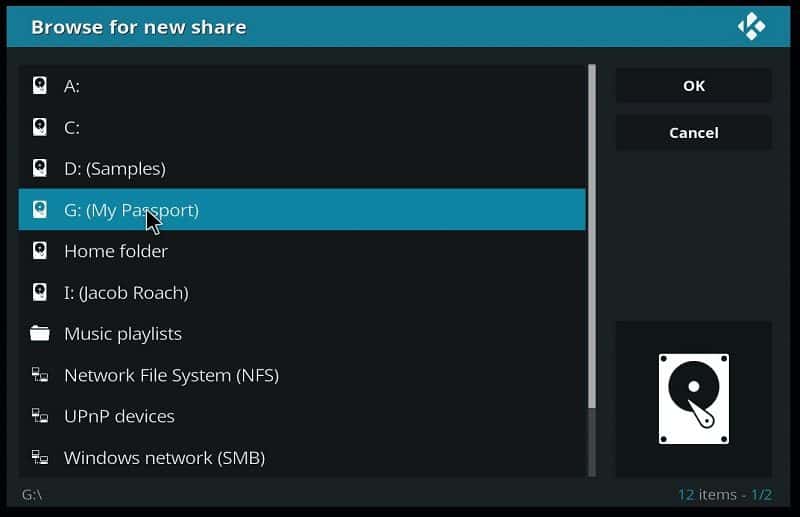
You’ll be brought to a screen to input the source. Click on “browse” and find the appropriate folder for the media you’re trying to add. Kodi will automatically scan it and update the UI in real time.
If you have multiple folders, you’ll need to repeat this process a few times. There are a few extra steps since the “enter files” button is no longer available. First, click on the category you want to add to. You should land where all your current files are stored. Keep going back in the directory until you reach the root which will display four options.
Click on “files.” Under your already added folders, you’ll have the option to add more files. Repeat the process like you would for adding your first folder. As time goes on and you add more files, you just need to right-click on the folder and hit “scan for new files” to update your library.
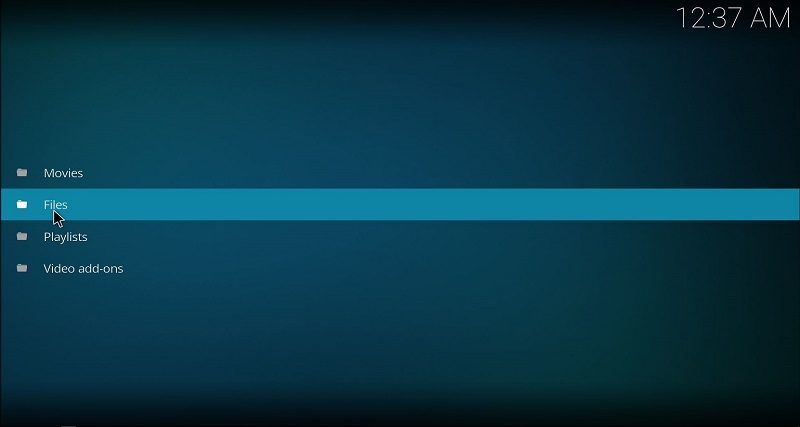
After you’re done adding all of your media, feel free to go through the menu and remove any items you won’t use.
Next is getting Kodi to look how you want it to. While v17 has gone a long way in cleaning up the UI, there are still tons of options to customize it for your tastes.
The only official way to do that is with themes. Most themes are just skins for Kodi, allowing to change a few colors or the general layout. There are some that will change up the entire interface, though.

The list is long and left largely up to preference, so feel free to browse yourself. Thankfully, Kodi makes this very easy to do. Head into your settings (cog icon) and click on “interface settings.” Select “skin” and hit “get more” and you can view all of the themes available.
Going past themes, you can also install builds onto Kodi. These are themes with add-ons tacked on, fully loaded, so you don’t have to install everything separately. The XBMC Foundation doesn’t officially support builds because of how many add-ons are inside, so you’ll need an unofficial repository to install them.
For years, the go-to was Ares Wizard. However, a legal battle has left the popular add-on biting the dust. There are still ways to install builds, though. Unfortunately, the builds are scattered among many different repositories so you’ll need to track down the ones you want.
We’ll talk more about installing add-ons and repositories in the next, but the process is the same for installing a build. It may take some time since so much is installing, but you’re essentially doing the exact same thing as you would with any other add-on.
After you import your media and Kodi is looking how you want it to, you’ll need to grab some metadata. While some files may have it already, Kodi only really looks nice if it appears the same across the board.
Kodi has a few metadata add-ons right out of the box, but there are some you should look into past that. The first is The Movie Database. This database is entirely user-driven, automatically scrubbing for new posters and fanart, as well as all other metadata.

While not essential, having such metadata gives you a few advantages while using Kodi. Many themes will utilize it to organize and display your content, a process that can easily get disjointed with it. Besides that, Kodi itself looks for actors, directors and more to put movies into categories.
Another must-have is OpenSubtitles. This database holds over four million subtitles in 75 different languages. Digital content often lacks subtitles or has, at best, only one or two languages. Using OpenSubtitles means a world of cinema will open up to you.
Installing Add-ons & Repositories
After setting everything up, you’ll need to install some add-ons. As mentioned previously, add-ons are hosted inside of repositories so you must point Kodi towards that repository in order to install it.
There are two ways to do this, either directly through Kodi or by downloading a .zip file. For some setups, the latter is necessary, but I would urge you to go for the .zip file if you have the space to spare and the navigation to find it.
Enable Unknown Sources
Kodi includes its repository with each install, and you can freely download add-ons inside by navigating to it. However, there are some roadblocks for unofficial add-ons and repositories.
You need to allow Kodi to install these from unknown sources. It’s a small step, but an imperative one. To enable this feature, take the following steps:
- Click the “settings icon” that looks like a cog
- Go to “system settings”
- Hover your cursor over “add-ons”
- Tick the “unknown sources” slider to the right
You’re now free to install any unofficial add-on. Some builds of Kodi have this feature already enabled, but it’s good to check either way. After you enable it the first time, you should never have to do it again.
Installing From a .Zip File
Installing from a .zip file requires you download it locally. To do so, simply head to the URL where the repository is located and download. For example, you can download the Kodil repo (http://kdil.co/repo/) by going to the URL and selecting “kodil.zip.”
There are times when you will find more than one file inside of the index. Usually, the one you need is either named the same as the repository or is larger. Common sense will prevail, but if it doesn’t, download all of the files and try each until you find what you need.
Once you’ve downloaded the file, open up Kodi and take the following steps:
- Click “add-ons”
- Go to the “add-on browser” (open box icon)
- Click “install from zip”
- Navigate and select the saved .zip file
After waiting a few moments, you’ll get an add-on enabled notification. The repository is installed, and you can use the “install from repository” option on the same screen to select the add-ons you want.
Installing from URL
Some Kodi setups, such as those installed on a Raspberry Pi, won’t allow you to install via a .zip file. While you can load the file onto the device, it’s difficult to find it. The much more convenient method is to install via a URL.
This method accomplishes the same goal as installing from a .zip file except Kodi is downloading the file instead you doing it manually. For that to happen, you have to point Kodi towards the correct URL.
Go to the Kodi home screen and do the following:
- Click the “settings icon”
- Go to “file manager”
- Select “add source” from the left column
- Click “<none>”
- Enter the “URL” for the repository you want
- Give it a name
Following that, you do the same thing as installing from a .zip file. This process merely points Kodi towards the destination. Once again, install add-ons using the “install from repository” option.
Best Utility Add-ons
Before grabbing content to stream, you may want to install a few that will make navigation simpler. The best of the lot come from the official Kodi repository so you won’t need to dig around too much to find them.
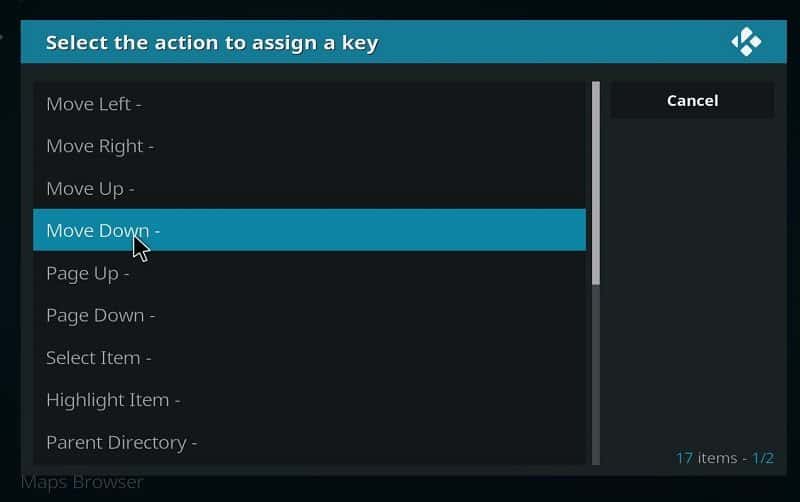
An important one is Keymap Editor. This add-on provides a GUI for mapping controls on a remote. While editing is possible without the add-on, Kodi’s interface isn’t the most user-friendly. Since Kodi is built on a 10 foot UI, a remote is desirable, and this simple add-on makes setup dead simple.
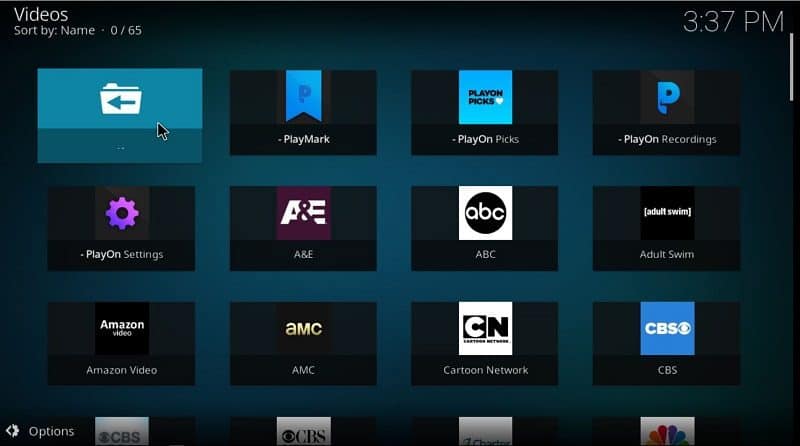
The layout is another weak point of Kodi. While v17 has vastly improved the interface, there is still plenty of room to grow. PlayOn Browser achieves this goal while maintaining the same navigation system.
The most significant change is from file names to images. Kodi normally just displays a list of file names when navigating. Showing icons and names as opposed to a list is a small but significant change that does a lot for getting around Kodi.
After you’ve found what you need, LazyTV will keep content streaming, so you never have to go back through. The primary function of the add-on creates a playlist of unwatched TV shows automatically. This either works in chronological order by playing the next episode after the last watched or by randomly playing episodes of shows that don’t need to viewed chronologically.
Outside of that, the add-on will also notify you if there’s an unwatched episode before the one you’re trying to watch. This small utility keeps you on track especially if you watch shows with many episodes and no seasons.
Best Streaming Add-ons
The best part of Kodi is streaming, and not just from official sources. Unofficial add-ons open up the content spectrum. This is the key feature of Kodi for many and what has made it so famous in recent years.
Every add-on we’re about to list delves into piracy. As mentioned before, Kodi is legal; theft is not. You need a VPN to protect yourself while using Kodi, unofficial add-ons or not. It’s a small insurance policy for digging into the gray areas of the law.
Exodus was a favorite streaming add-on for years. However, it’s death brought rise to a new behemoth: Covenant. This add-on scraps sources from around the internet to find nearly every TV show or movie you could imagine.
You may even find a few streams for movies in theaters if you’re lucky. Covenant is a fully featured add-on, and you can find nearly everything you need inside of it. Make sure to read our Covenant install guide to learn how to set it up.
Covenant has gone on and offline recently, leaving some uncertainty in its future. For now, it’s great, but you may want to consider alternatives in the case of Covenant going offline permanently. The best alternative we’ve found is Elysium. This add-on does the same thing as Covenant, but with slightly different layout and folder structure.
While you can find most of what you want in either of the add-ons, the best case scenario is to use them in conjunction. Between both, you’re likely to find a stream as both have a different list of sources to scrub. Make sure to read our Elysium install guide to set it up on your device.
Both Covenant and Elysium lack a sports section. While there are many sports add-ons available, the best we’ve found is Bennu. This add-on is a resurgence of Phoenix, a staple sports streaming platform for years. Bennu only holds archived games, though. If you need some live add-ons, check out our best sports add-ons for Kodi.
Conclusion
Kodi is one of the best applications for media junkies. Its versatility as both a media center and streaming platform makes it very powerful for both casual and power users. If you haven’t considered cord cutting yet, Kodi makes it look very tempting.
Just remember always to use a VPN when using Kodi. The small insurance goes a long way in securing your privacy and allowing you access geoblocked content. If you want more, make sure to check our Kodi archive. We have everything from tutorials to best-of lists like how to install Kodi on Roku and dealing with buffering issues.
Do you use Kodi or plan on installing it now? Let us know in the comments and, as always, thanks for reading.

