How to Cancel NordVPN in 2025: Simple Step-By-Step Guide
With a solid feature set and great performance, in most cases, NordVPN is a great way to add security to your internet connection. However, the VPN struggles with latency on farther away servers, and if you’re impacted by this issue, you’re probably looking into how to cancel NordVPN.
NordVPN is an all-around excellent VPN service. It tops our speed test as well as our list of the best VPNs. With apps for almost all platforms, and negligible impact on performance when running in the background, you may be wondering why you’d need to know how to cancel NordVPN.
The main reason people want to cancel NordVPN is the latency issues they experience connecting to far-away servers. Tunneling through to a location that’s not physically close to you can lead to slower speeds and a sub-par experience. Also, while we praised NordVPN for its affordable long-term pricing in our NordVPN review, there are cheaper VPNs.
If you’re looking to cancel your NordVPN subscription, there are a few things you need to know. You’ll need to cancel the automatic payments first, and if necessary, get a refund on your subscription. Here is how to cancel NordVPN.
How to Cancel NordVPN: Credit Card and PayPal Subscriptions
You can cancel your NordVPN subscription in several ways, depending on how you chose to pay when you created your NordVPN account. If you paid with a credit card or PayPal account, your subscription will renew automatically each month, so the first thing you need to do is cancel the autorenewal.
Protect Your Privacy. Get Our Free VPN Guide Now!
- Comprehend the essential role a VPN plays in safeguarding your digital life
- Gain a deep understanding of how VPNs function under the hood
- Develop the ability to distinguish fact from fiction in VPN promotions
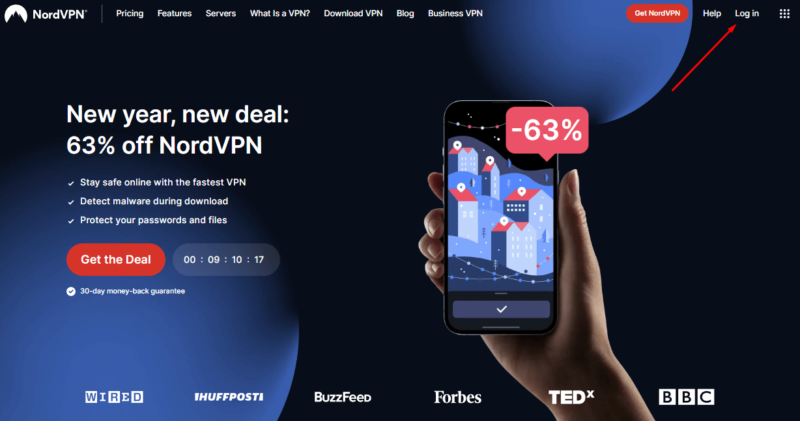
- Go to NordVPN’s Login Page
Go to the NordVPN website and click “log in” in the top-right menu.
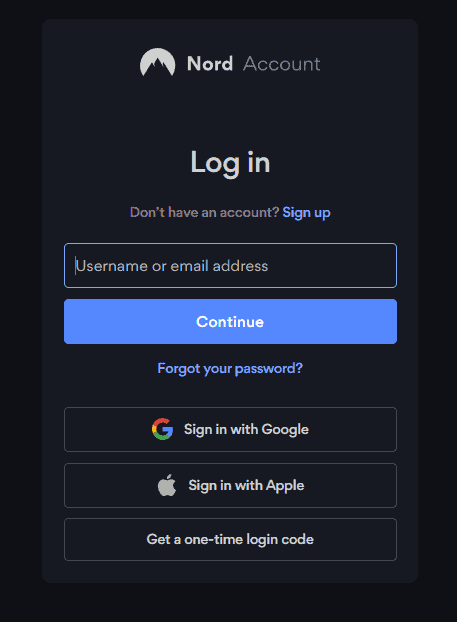
- Log in to NordVPN
Enter your username or email address, and password, and click “log in.”
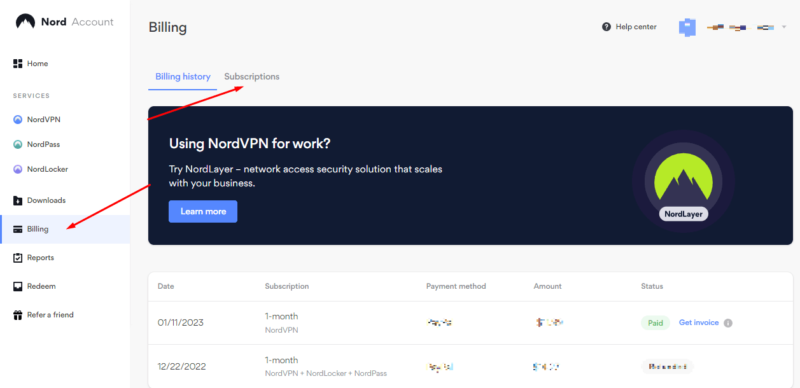
- Go to the Billing Section
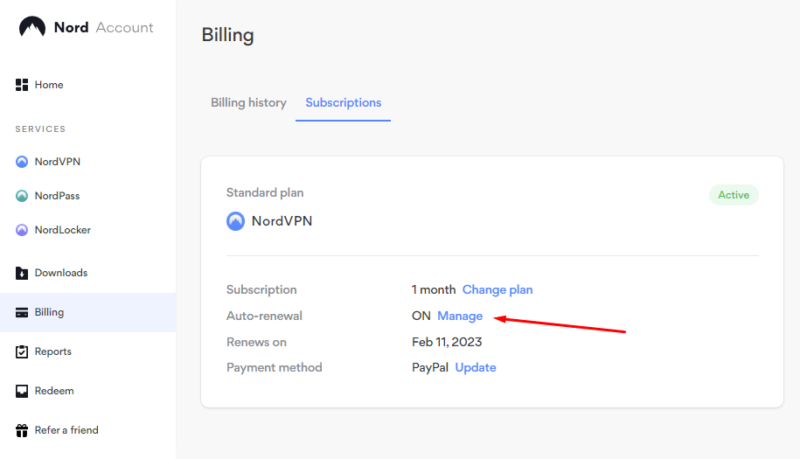
From the left side menu, click “billing,” then click the “subscriptions” tab.
- Go to the Auto-renewal Settings
In the subscriptions page, you will see that auto-renewal is set to “on.” Click “manage” to open the auto-renewal settings.
- Cancel Auto-Renewal
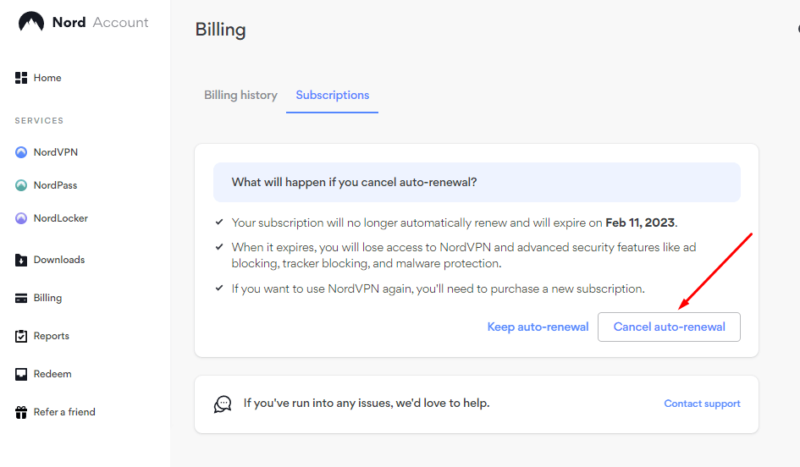
From the auto-renewal settings, click “cancel auto-renewal.” Wait for a few seconds, and you’ll be taken back to the billing section, where you can see that automatic payments are now off.
Ending Automatic Renewal With Other Payment Types
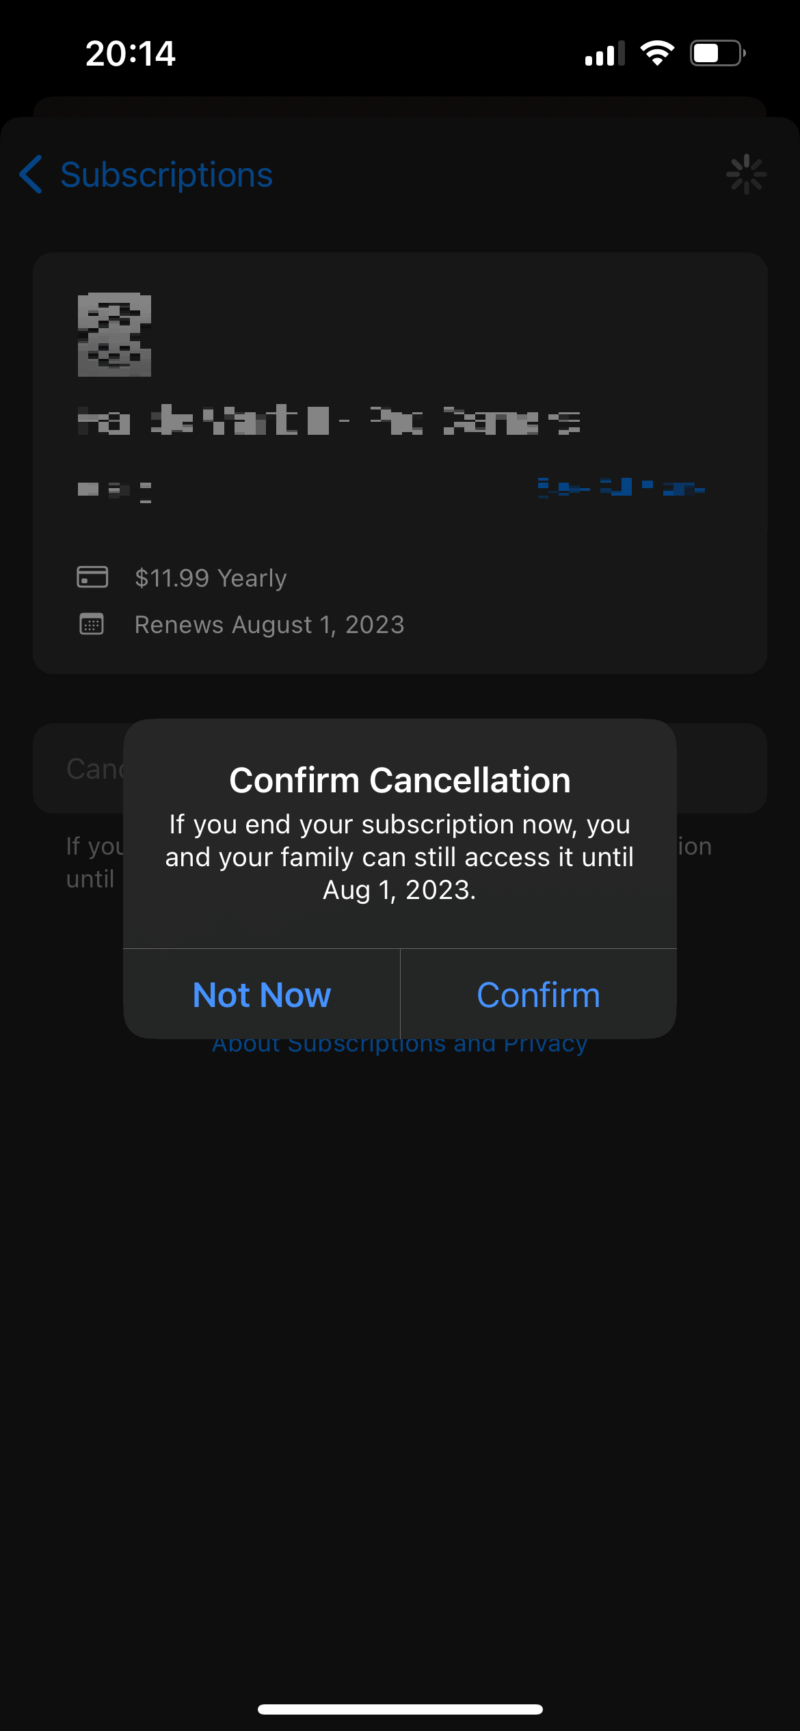
There are more ways to pay for a NordVPN subscription than just a credit card or PayPal. You can also create a NordVPN account through a mobile app store. To cancel a subscription made through the Apple App Store or Google Play Store, you need to go through that respective store. Here is how to do that — we’ll use the App Store as an example.
- Open Your Device’s App Store
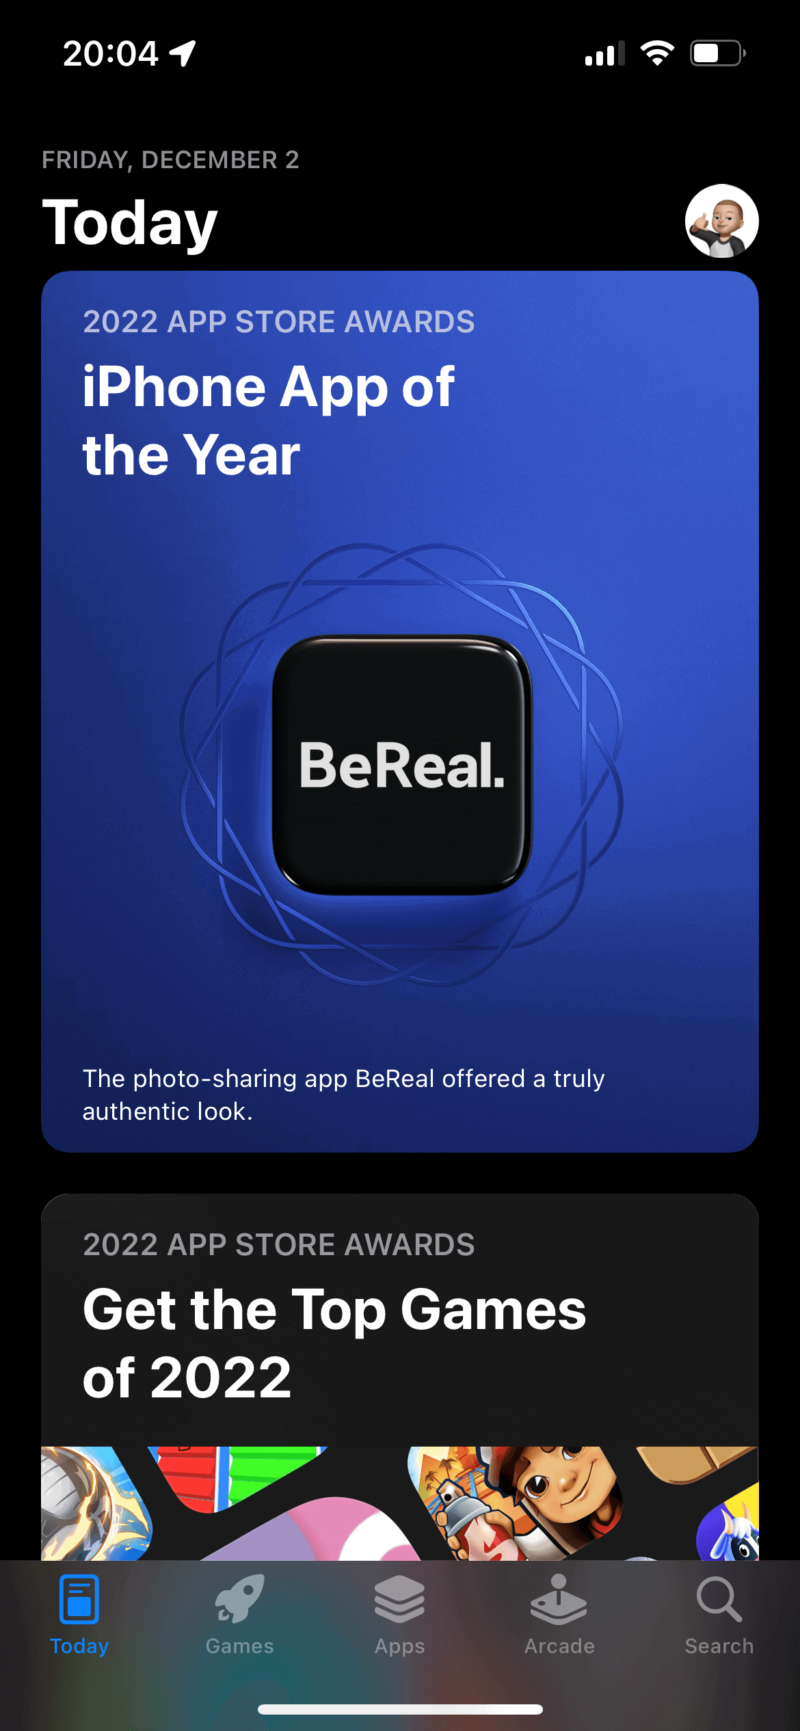
Open the App Store on an iOS device, or Play Store on an Android device.
- Go to the Subscription Settings
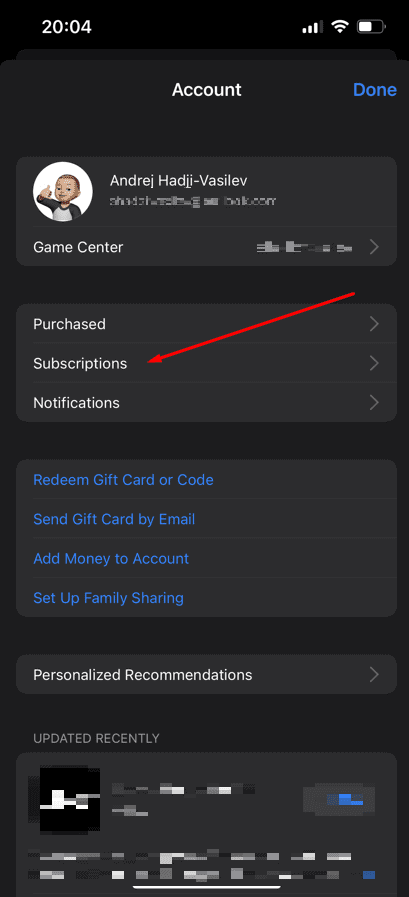
This step differs slightly between iOS and Android. If you’re on iOS, tap your profile icon in the top right, then tap on “subscriptions.” If you’re an Android user, tap your profile icon, tap “payment and subscriptions” and then tap “subscriptions.”
- Cancel the NordVPN Subscription
When you get to the subscriptions page, select NordVPN and follow the instructions to cancel your subscription. Your subscription will remain active until the last day of the subscription cycle.
NordVPN also allows you to subscribe for a Nord account with crypto currencies via CoinGate. This payment method doesn’t renew automatically, so you don’t need to cancel auto-renewal — just don’t pay for the next month and you’ve effectively canceled your subscription.
Getting a Refund On Your NordVPN Subscription
If you already have a subscription and want to cancel NordVPN before said subscription expires, NordVPN has a 30-day money-back guarantee that can get you a full refund.
You will need to reach out to NordVPN’s customer support, but the process is rather straightforward. We discuss more about how to use the NordVPN refund policy in our NordVPN free trial article, as well as our article on how to get a NordVPN refund.
Final Thoughts
If you’re looking for an easy and affordable way to get secure internet access with excellent speeds, look no further than NordVPN. It’s remarkably easy to use, has an app for almost any device and is rather affordable. If, however, you want to cancel your subscription, you can do so easily from your account page.
In case you want to try another VPN after canceling NordVPN, check out Surfshark or our Surfshark review for a choice slightly more affordable. Curious about Surfshark? Its 30-day refund policy means you can explore all its features worry-free and decide if it’s the right fit for you.
How long did you use NordVPN before deciding it wasn’t for you? Is the latency throughout the server network your main issue, or is there a different reason for canceling? Let us know in the comments and, as always, thank you for reading.
FAQ
It is very easy to cancel NordVPN — all you need to do is head to your account settings on the NordVPN website and turn off automatic renewal. You won’t be charged again once your subscription expires.
To cancel your NordVPN subscription, you should head to NordVPN’s website, log in to your account and disable automatic renewal from your account information page.
This depends on the specific VPN provider you use, but in most cases (including NordVPN), the whole process is as simple as logging in to the provider’s website and canceling your subscription from the account settings.
Yes, you can cancel NordVPN at any time. Note that if you’re outside the 30-day money-back guarantee period, it is unlikely that you will get a refund for the time that’s left over until your next billing period.


