How to Back Up Emails in 2025: Quick Outlook & Gmail Guide
Whether you plan to shift to a different email account or are simply afraid to lose your email data, backing up your emails should be a priority. This article shows you how to back up emails from Gmail and Outlook email clients.
Your email account contains lots of valuable personal information, from important contacts and email attachments to your bank account details. Backing up your emails will keep your data safe in case of accidental deletion, device breakdown or loss of account access. In this article, we show you how to back up emails and recommend the best cloud backup to use for the job.
The best way to back up your important emails is to download them to your device and upload them to the cloud. Cloud backup keeps your data safe while storing it away from your PC. Therefore, you can access and retrieve your data from any device at any time, as long as you have the password to the cloud backup service.
-
02/16/2024 Facts checked
Rewritten to incorporate up-to-date information on how to back up emails on Outlook and Gmail.
-
03/30/2025 Facts checked
Added pCloud as a third cloud provider for backing up your emails.
How to Download All Your Emails
The easiest way to back up an email account is to download all your emails to your device. It’s worth noting that the method you use to download your emails will vary depending on your email client. Let’s look at the steps for downloading emails for Gmail and Outlook.
How to Download Your Gmail Emails
You can download all your emails from Gmail at once in a few simple steps. This gives you a full record of all your Gmail activity.
- Log In to Your Google Account
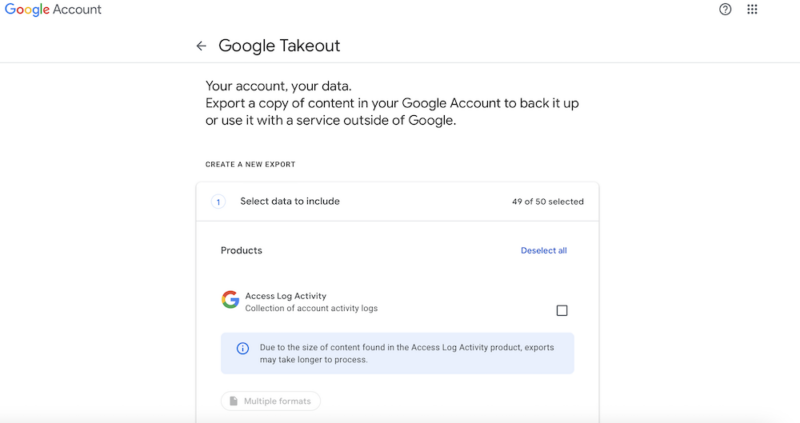
Go to takeout.google.com and log in to your Google account. This “Google takeout” page will give you a list of all your activity on Google, including your activity log and your YouTube watch and search history.
- Deselect All the Selected Items
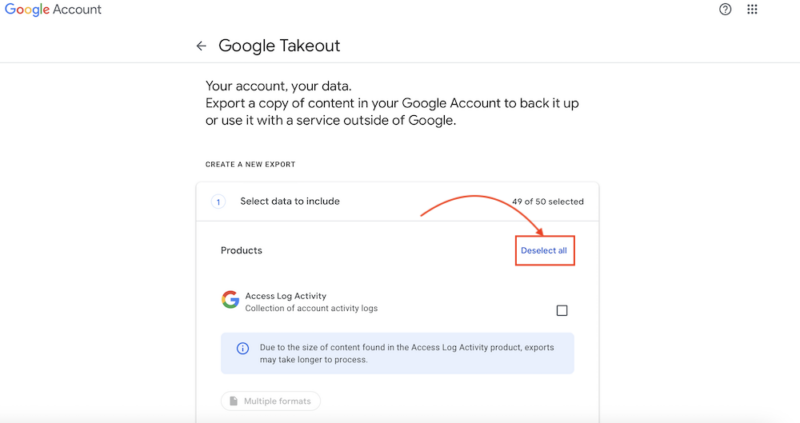
You’ll find that every Google service you use is automatically selected. This includes YouTube videos, Google Photos, documents, your account history and more. Be sure to deselect all of them first to avoid downloading any data that you don’t need.
- Scroll Down and Select the “Mail” Checkbox
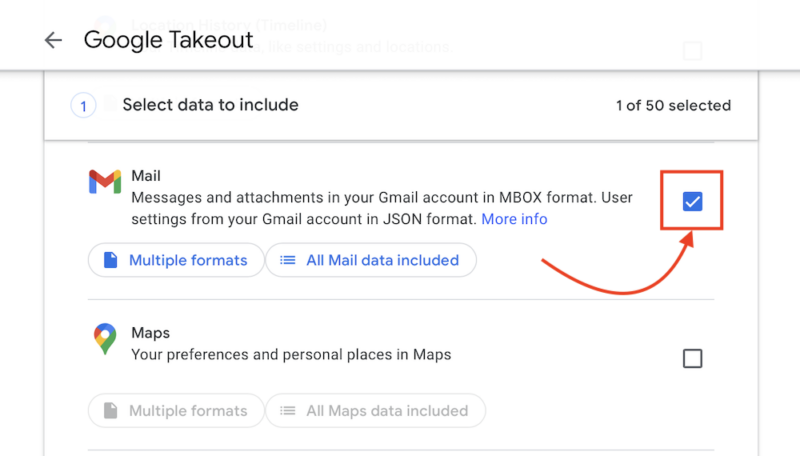
Scroll down the list and find the “mail” option. Click on the checkbox to select it. The list is arranged in alphabetical order, so it should be easy to find. After selecting it, scroll down and click the “next step” button.
- Choose Your Download Options and Export the Files
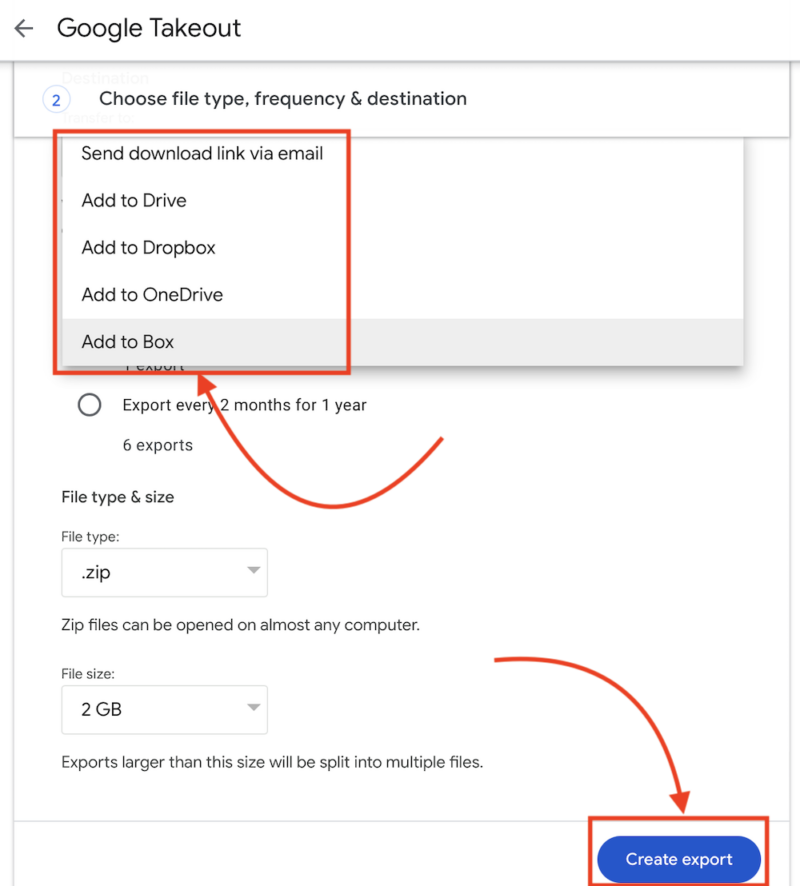
Choose the destination, file type, file size and download frequency to use for your emails. Click the “create export” button to start the download process. Since this procedure can take hours or days to complete, you’ll get an email notification once it’s done.
How to Download Your Outlook Emails
The short steps below will make it easy to download all your Outlook emails simultaneously, giving you a complete record of your files and emails from Outlook.
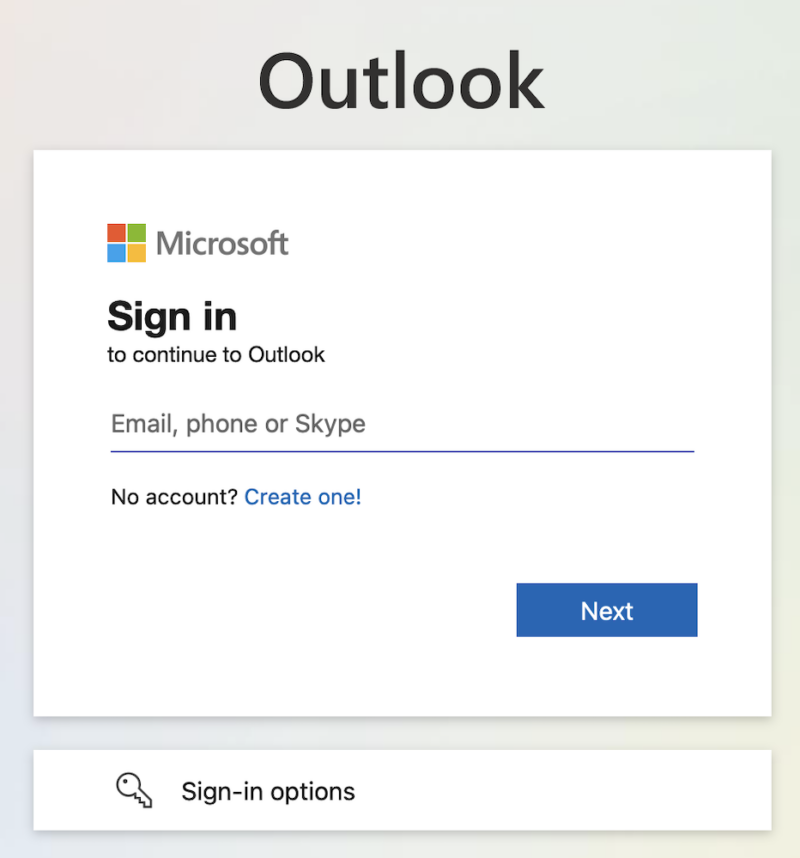
- Log In to your Outlook Account
Log in to your Microsoft Outlook account to access your Outlook emails.
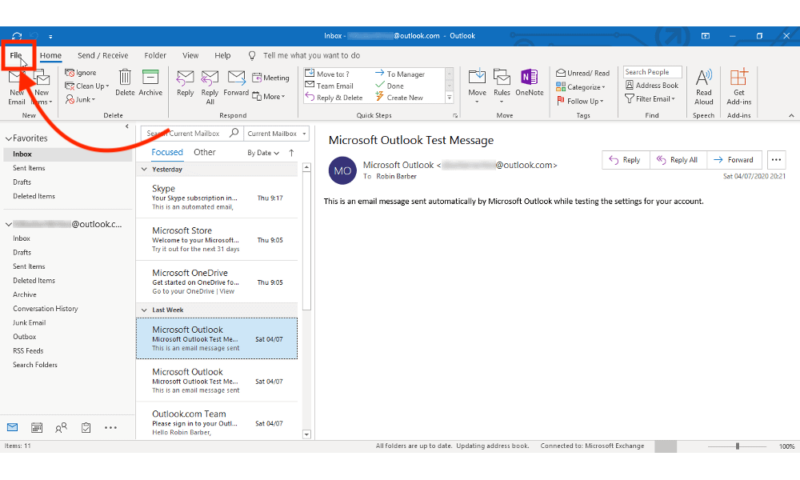
- Click the “File” Tab
Find the “file” tab on the ribbon at the top of the page and click it.
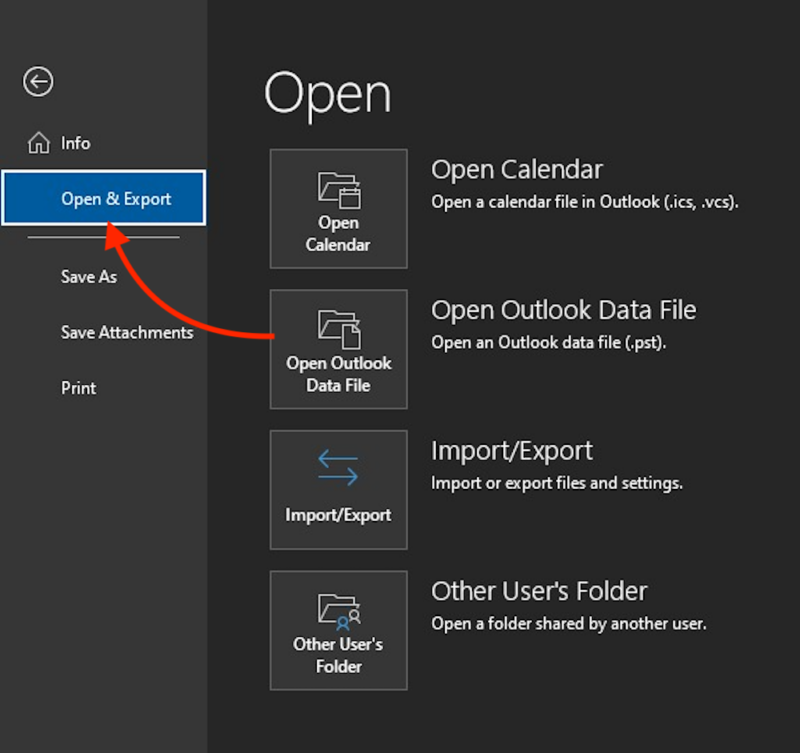
- Select the “Open & Export” Option
An “account info” tab will open. Click the “open & export” button to reveal the next step.
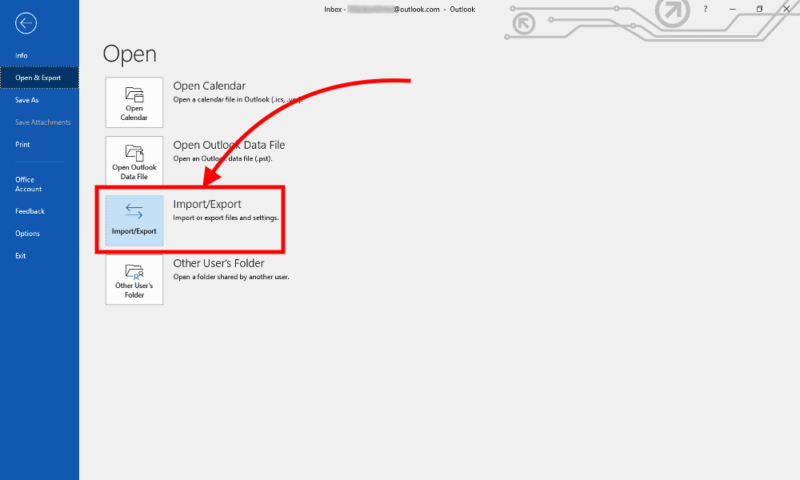
- Select the “Import/Export” Button
Navigate to the “import/export” button and click it.
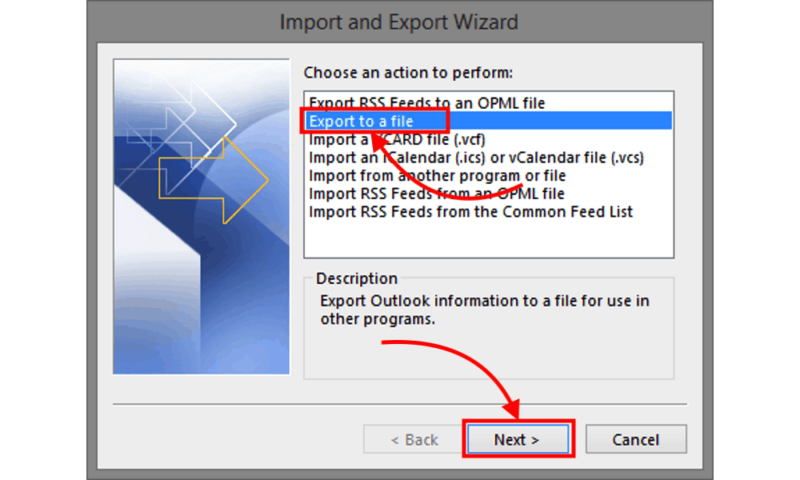
- Click the “Export to a File” Option
A window will open with several export options. Choose “export to a file” and click the “next” button.
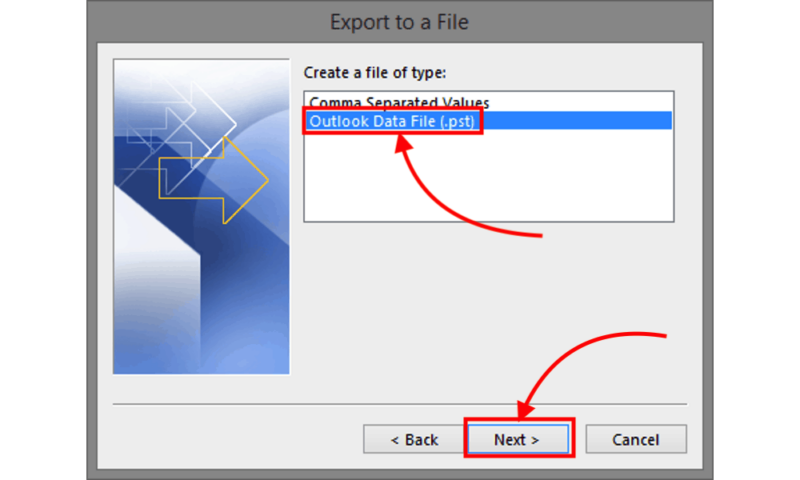
- Select the “Outlook Data File” Option
Select the “Outlook data file (.pst)” option and click the “next” button.
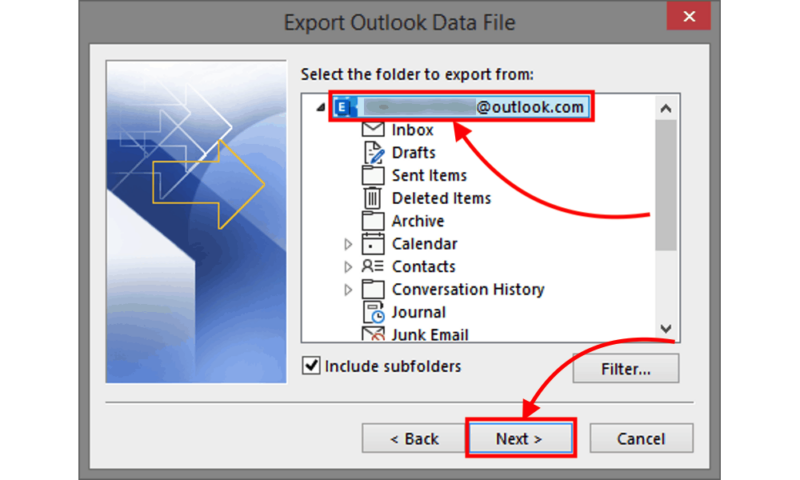
- Select the Folder to Export From
The next window shows you all your Outlook folders. Since you’re downloading all your email messages, select your email address at the top of the list and click the “next” button.
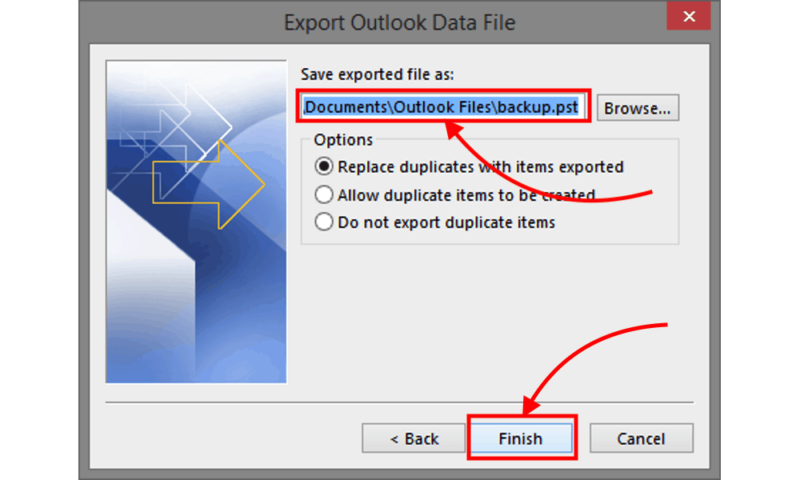
- Choose a File Name
Input a name for the file and click the “finish” button.
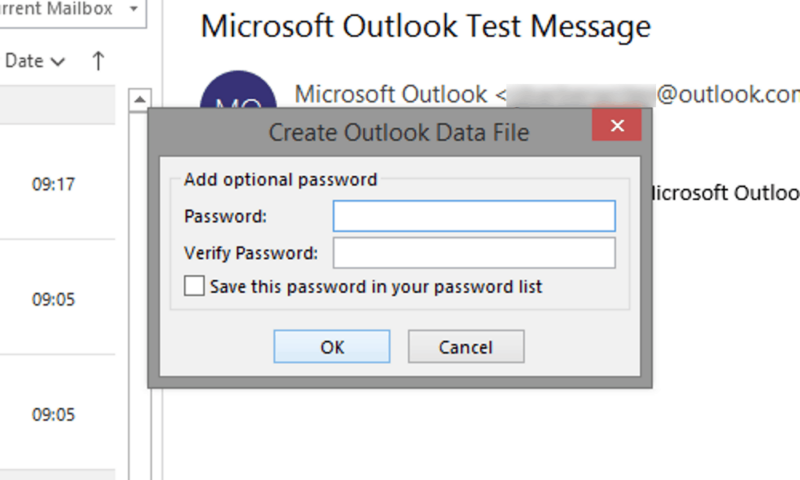
- Add Your Outlook Password
You’ll see a prompt to add your password and authorize the download. Add the password and click the “OK” button.
How to Back Up Your Saved PST File to the Cloud
Once you’ve downloaded all your emails into a PST file, you can upload them to a cloud backup or cloud storage device. The main difference between cloud storage and cloud backup is cloud backups automatically and continuously copy all the data in a specified directory or folder. On the other hand, cloud storage services may limit the file types that you can upload.
These are the steps for uploading your PST file to the Backblaze cloud on a Windows computer.
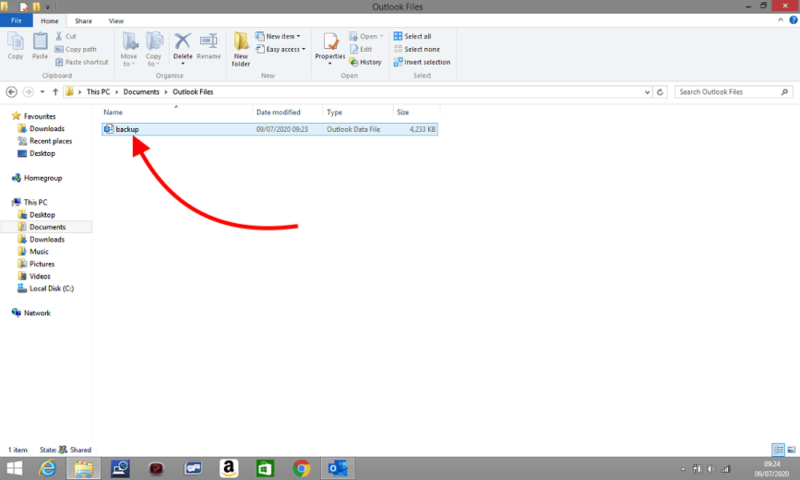
- Locate the PST File on Your PC
When the download is complete, it will be saved as a PST file in your preferred location. This is typically the “documents” or “downloads” folder.
- Add the File to the Correct Folder
If the PST file was saved to a location outside the folder that you set your cloud service to back up automatically, move it to the correct folder. You could also upload it to your browser manually if you haven’t configured the preset for automatic uploads.

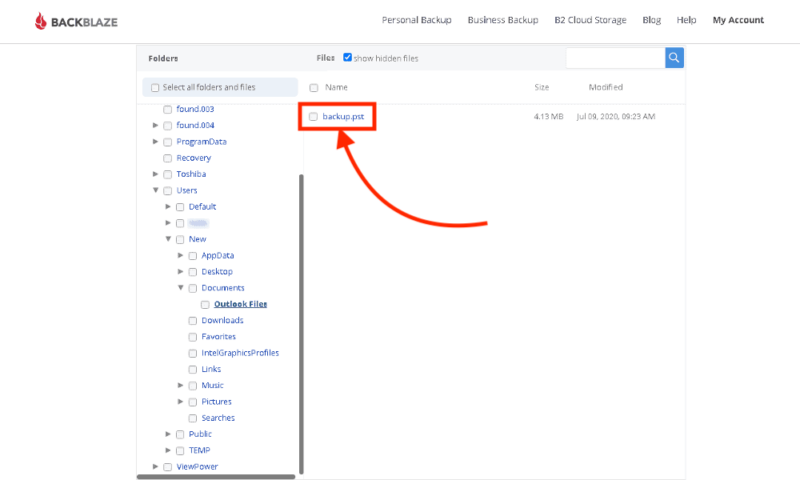
- Open Your Backup Service and Find the File
As mentioned above, backup services automatically save your files in specific folders. Open the service and make sure the file is saved there.
The Best Cloud Backup for Emails
The ideal backup service should be affordable while offering top-notch security. A service with encrypted email access is the better choice since it offers an added layer of security. It should also have a basic “password protection” option to keep your data and email address safe from cybercriminals.
Additionally, your cloud backup service should arrange your data in easily accessible folders. This helps you keep all your information organized while letting you easily retrieve the desired data when necessary. Our experts tried out several backup services and came up with this list of the best email services. Here are our top picks.
1. IDrive
cloud backup and storage capabilities.
IDrive acts as a cloud backup or cloud storage service. It’s the most secure option that’s loaded with backup features for users who prefer more customizable tools. It has sync and file sharing functions that make it compete with the best cloud storage tools on the market.
IDrive has limited storage capacity and may not be ideal for users who live far from the U.S. Even so, it’s reasonably priced considering the features it offers. Our full IDrive review explains why it’s worth your investment.
- No credit card required.
- 10GB
- One user.
- 100GB
- One user, multiple computers. Plans starting from 5TB up to 100TB. Big discount for first-time signup.
- 5TB
More plans
- 5 computers, 5 users. Starting at 5TB up to 500TB. Big discount for first-time signup.
- 5TB
- Monthly Plan storage starts at 1.25TB up to 50TB Unlimited users, multiple computers and servers. NAS devices. 250GB storage. Starting at 250GB up to 50TB. Large discount for first-time signup.
- 250GB
- 5TB
2. Sync.com
but could use a friendlier interface.
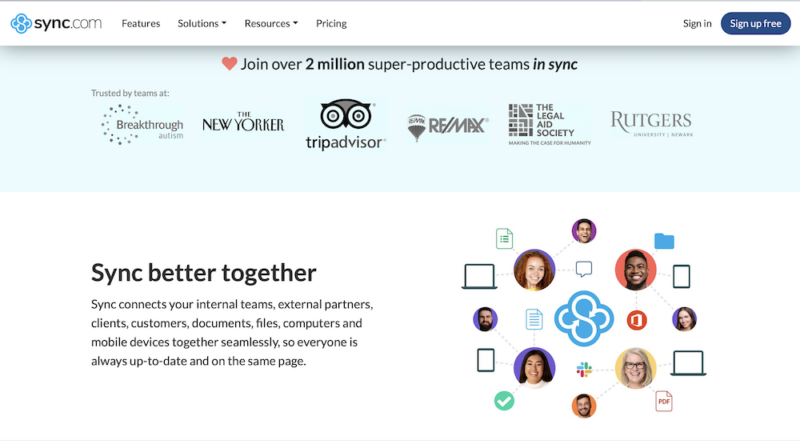
Sync.com is a cloud storage service that offers zero-knowledge encryption and other robust security features. It’s fairly priced with affordable plans and lots of storage space. It also gives you control over how your files are synced and shared with others.
On the downside, Sync.com has slow sync speeds, and its user interface could be friendlier. Other than that, it’s a great cloud storage service for you to try out, especially if you prefer cloud storage to cloud backup services. Read our Sync.com review for more details.
- 5GB
- 2TB
More plans
- 6TB
- Price includes 3 users
- 1TB
- Monthly price for 1 user (3 users minimum) Yearly price for 3 users
- Unlimited GB
- Minimum 100 users, custom requirements, account manager, training options
3. pCloud
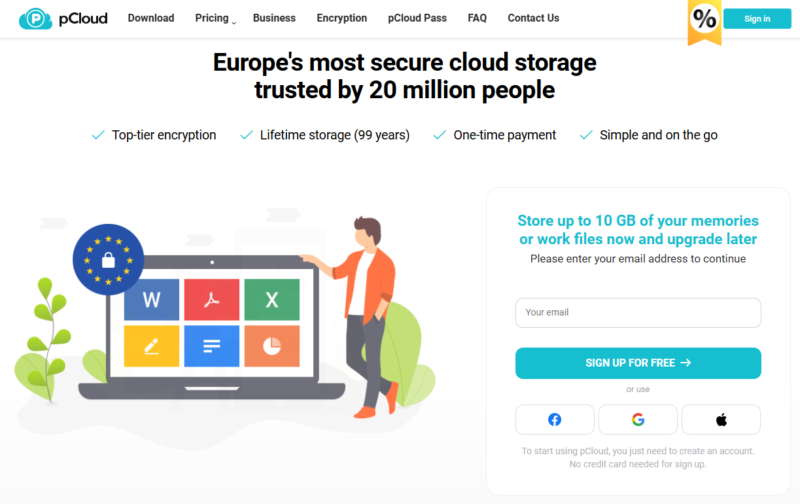
pCloud is another great cloud storage service for backing up your files. There aren’t any file size limits and it has some impressive syncing speeds, which makes it perfect for storing large backup files. You can also get a 10GB free plan, if you’re looking to store a smaller backup for free.
pCloud also offers zero-knowledge encryption, though it costs extra and only applies to a single folder. You simply upload the backup file to that folder and it has extra protection from prying eyes. However, the extra cost does make pCloud a more expensive option if you’re specifically looking for security. Read our full pCloud review for more details on the service.
- 10GB
- 500GB
- 2TB
More plans
- 10TB
- + FREE Encryption
- 2TB
- + FREE Encryption
- 10TB
- Price per user (minimum 3)
- 1TB
- Price per user (minimum 3)
- 2TB
- Encryption for pCloud Drive
Final Thoughts
Backing up your emails is essential if you don’t want to lose the files and information on your account. Downloading this information to your device isn’t enough. You need a reliable cloud backup service to keep your data safe and accessible. This article has highlighted the steps on how to backup emails.
Have you ever used a cloud backup service? Which is your go-to cloud backup tool? Would you recommend it to other users? Let us know in the comments below, and thank you for reading.
FAQ: How to Backup Emails
The best way to back up emails is to download all of them from your email client and upload them to the cloud. That way, you can access and retrieve your data from any device at any time, as long as you have the password to the cloud backup.
You can back up old emails by downloading them from your email client and then uploading them to your cloud service of choice. You can also save the backup file on an external hard drive as a secondary backup plan.
Yes, you can back up emails to a hard drive. However, we don’t recommend this as your only backup since the drive may crash or get lost. It’s safer to use this option as a supplementary measure to a cloud backup strategy.


