How to Use NordVPN in 2026: Easy Step-by-Step Instructions
NordVPN is one of the most popular VPNs thanks to its wide server network and excellent security features. Find out how to use NordVPN and how to get it up and running without hassle.


Written by Wisdom Sablah (Writer)
Reviewed by Aleksandar Kochovski (Writer)
Last Updated:
All our content is written fully by humans; we do not publish AI writing. Learn more here.
Key Takeaways: How to Use NordVPN
- NordVPN is easy to download, install and set up. You can complete the process in a few minutes for the PC app.
- To create an account, you’ll need to choose a plan. However, the service offers a 30-day money-back guarantee, so it’s a win-win.
- It’s easy to change your preferences on the app.
NordVPN is one of the world’s leading virtual private network (VPN) providers. With over 5,200 servers in 60 countries, the service lets you browse the internet at blazing speeds without compromising your data or security. If you’re wondering how to use NordVPN (or how to use a VPN in general), we wrote this post for you.
How easy is it to set up and use this premium VPN service? Well, this will mostly depend on whether you want to make use of its many advanced features. However, for most users, using NordVPN is as easy as clicking a button.
In this post, we’ll provide a step-by-step guide to help you through the process, from signing up to using the virtual private network.
An Introduction: How Do I Use NordVPN?
NordVPN claims on its website that using its service is “as easy as preparing your morning coffee.” Our experience backs up that claim, at least to an extent. The basics of the VPN are super easy to grasp, but some of the more advanced options aren’t as straightforward.
Protect Your Privacy. Get Our Free VPN Guide Now!
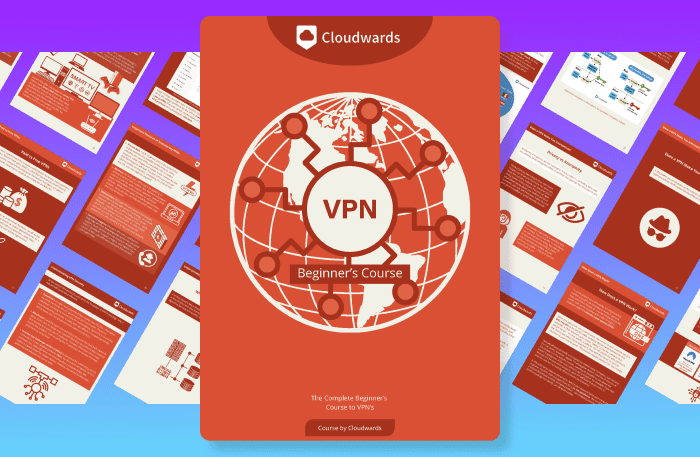
- Comprehend the essential role a VPN plays in safeguarding your digital life
- Gain a deep understanding of how VPNs function under the hood
- Develop the ability to distinguish fact from fiction in VPN promotions
For one, the VPN is intuitive and simple to set up, with only three key steps to the setup: signing up, downloading and installing. The VPN has a wide range of features that let you customize the service.
However, while some of them are as easy as pushing a button, the specialty servers might require a few steps to get them up and running. We’ll explain how to get started with NordVPN below, but first, let’s see what you can do with the VPN.
What Does NordVPN Do?
In essence, NordVPN helps you browse the internet safely and anonymously by hiding your IP address and routing your internet traffic through an encrypted tunnel. This is something all VPNs do, but NordVPN has a few tricks.
Basic Features
Basic features include an automatic kill switch that blocks your internet connection as soon as it drops. You’ll also get an app kill switch, which allows you to choose the apps that automatically shut down when your connection fails.
What’s more, you get dark web monitoring, a feature that scours dark web marketplaces to see if your personal information has been compromised. Another feature worth mentioning is DNS leak protection, which ensures that your DNS requests are not exposed to your ISP, revealing the websites you visit.
NordVPN is an excellent choice for streaming, because you’ll get access to popular sites, including Netflix, BBC iPlayer, Hulu, and Amazon Prime Video. Plus, the VPN prevents bandwidth throttling by your ISP, making it easy to stream at lightning speeds.
Advanced Features
This VPN service also has some less common features, including split tunneling and multi-hop connections. With split tunneling, you can decide which apps route their traffic through your VPN and which access the internet directly.
On the other hand, multi-hop connections, also known as double VPN, route your connection through two VPN servers. This encrypts your data twice, making it harder for intruders to access it. That way, if one VPN connection fails, the other one provides cover.
But there’s so much more the VPN does. For an in-depth review of NordVPN’s features, check out our comprehensive NordVPN review. Now, let’s look at how to get it up and running.
How Do I Sign Up and Download NordVPN?
Follow these steps to sign up for NordVPN.
- Visit NordVPN’s Website
Go to NordVPN’s website and, on the homepage, click the “Get NordVPN” button. You’ll find it at the top-right corner of the site.

- Choose a Plan
Browse the list of plans and select one that fits your budget. Two-year plans are often cheaper in the long run, and keep an eye out for deals and discounts. Note that you can’t create an account without choosing a plan, but there’s a 30-day money-back guarantee, so you’ll have a safety net in case you change your mind.

- Create Account and Select Payment Method
If you don’t already have a NordVPN account, enter your email address to create one. Then select a payment method and fill in your details. Be sure to review your order summary before confirming your purchase. NordVPN usually adds a NordPass premium subscription, so you can remove it if you want.


Once you’re done signing up and paying, download the application. NordVPN has an app for just about any platform and operating system, including Windows, iOS, Android and Linux.
Although the NordVPN app is not as streamlined as ExpressVPN, it’s still easy to use. Downloading the mobile app is also simple. You’ll find the app on the app stores of your mobile devices. For the desktop client, follow these steps:
- Go to NordVPN’s Website
Click the “download VPN” button. You’ll be taken to a page where you’ll see an option to download the app for Windows. If you’re a macOS or Linux user, scroll down to find download buttons for your device. For this tutorial, we’ll continue with Windows. To proceed, click on the ‘download app” button at the bottom left of your screen.

- Install the VPN App
Head to where you saved the file and double-click it to begin the installation. You’ll get a prompt from Windows asking if you agree to NordVPN making changes to your PC. Click “yes” and agree to the subsequent prompts to complete the installation.

- Log in to Your Account
When you launch the NordVPN app for the first time, you’ll be asked to enter your login details. When you click the login button, you’ll be taken to NordVPN’s site to enter your NordVPN account details: your username or email address and your password.


How Do I Set Up NordVPN?
Now that you’ve downloaded and installed the app, here’s how to customize it to suit your taste.
- Navigate to “Preferences”
If you’re running Windows, click the gear icon in the top right corner. Click the options bar at the top left of your screen. You’ll see the “settings” section as shown below.

- Click “Auto-Connect”
Click the “auto-connect” button and choose your default settings, including your preferred location. This menu also inexplicably houses the VPN protocol settings, so if you need to fiddle with those, you’ll find them here.

- Turn on the kill switch
From the settings menu, click “kill switch” and turn the Internet Kill Switch on. To configure the kill switch for specific apps, turn the App Kill Switch on and add them.

- Activate split tunneling
Click “split tunneling” on the settings menu and turn it on. You can disable or enable the VPN for selected apps by clicking the “add apps” button in the bottom right corner.


How Do I Connect & Use NordVPN?
After you log in, enable “auto connect” and you’ll be connected to a VPN server and an IP address right away. You don’t have to manually select an IP address and VPN protocols. That said, if you want to choose a server, follow these steps.
- Choose Your Server From the Map
You can choose your server from the list of countries on the left panel. If you can’t see your country of choice, use the search button. Alternatively, hover over the large map and choose the location you want to connect to from the server list. The app displays the load on each server. We recommend picking the one with the fewest users.

- Click the “Quick Connect” Button
Another option is to hit the “quick connect button” at the bottom right. The VPN will automatically connect to a location that best fits your needs. If you’re connected, the pin on the country map will turn green and the red “unprotected” display opposite the “quick connect” button will read “protected.”

- Connecting to specialty servers
You can access Double VPN, Onion Over VPN, and P2P using the “specialty servers” button. If you can’t see Double VPN in the list, you might have to switch your protocol to OpenVPN UDP in the auto-connect menu.


Final Thoughts
NordVPN’s app is simple to set up and use. Although the UI isn’t as intuitive as ExpressVPN, it’s still attractive and unique. It took us a few minutes to complete the setup process. If you want to explore other VPNs, check out our roundup of the 10 best VPN providers.
NordVPN is great a VPN that works in restrictive countries like China or Russia. It’s one of the best VPNs for Instagram and other censored social channels. Take NordVPN for a test drive with peace of mind, knowing you can request a full refund within 30 days if it doesn’t meet your expectations. If you’d rather use a more beginner-friendly VPN, try ExpressVPN.
Have you tried downloading and setting up NordVPN? Did you face any challenges? Would you recommend NordVPN? Share your experience in the comments below, and as always, thank you for reading.
FAQ
Sign up for an account, download and install the app on your device. Then choose the server you want to connect to.
To enable NordVPN, choose the “quick-connect” option to connect to the nearest server, or click on a server location from the map interface or server list.
NordVPN works just as well on laptops as on desktop, and it has native apps for Windows, macOS and Linux users.