How to Backup Your iTunes Library in 2025: iCloud vs External Drive
Mac users can copy almost any music, video, podcast or audiobook to their iTunes media folder and then play it through the iTunes app. This is great, but if your Mac computer gets damaged, you could lose it all. To prevent this, read on and learn how to backup iTunes with an external hard drive, with iCloud or backup software.
Although anything you’ve purchased through the iTunes store will always be available for download, any third-party files are at risk of being lost due to damage or accidental deletion. Luckily, there are three great methods to backup your iTunes library, regardless of where the files are.
Key Takeaways:
- Any files that you didn’t download through iTunes are at risk of being lost without a backup.
- External hard drives are a good way to make cheap backups quickly.
- The iCloud music library is free to use if you’re an existing Apple music subscriber.
- Third-party online backup providers are another way to create backups but can be more expensive.
The first method is to create a local backup on an external hard drive. This will require you to connect the drive and manually update the backup regularly, or it won’t protect everything. However, it can provide lots of cheap storage space to save a copy of all of your songs.
On the other hand, the other two methods use cloud storage and online backup services to keep your music safe, including iCloud or a reliable service like IDrive. These may require a subscription fee if you need more than a few gigabytes of space but will keep a copy of your iTunes library available at all times, as long as you have internet access and know your password.
Backup iTunes: Consolidate & Organize Your iTunes Library
Before you backup anything, you should first consolidate your iTunes library. This just means copying all of your music files into the iTunes media folder, so nothing gets left out of the backup. Doing this manually would take a long time, so Apple made a button that’ll automatically consolidate your files to your media folder.
10,000+ Trust Our Free Cloud Storage Tips. Join Today!

- Demystify cloud storage terminology and key concepts in plain language
- Discover easy-to-implement techniques to securely backup and sync your data across devices
- Learn money-saving strategies to optimize your cloud storage costs and usage
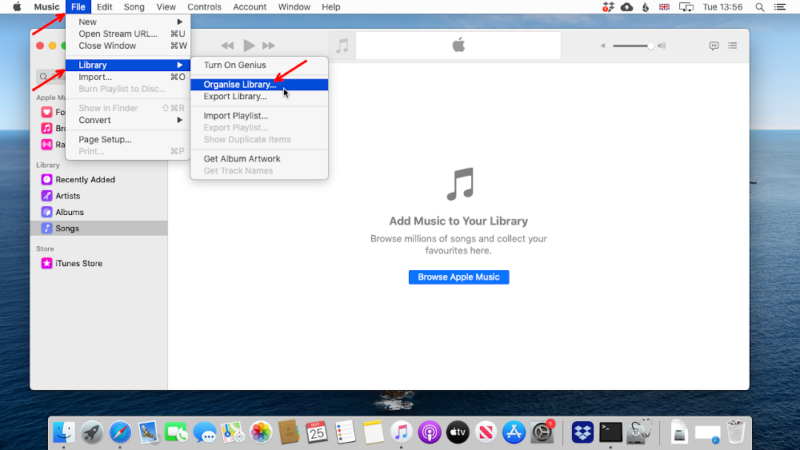
- Open the “Organize Library” Settings
In either the music app for macOS or the iTunes app for Windows, click on “file,” “library,” and then “organize library.”
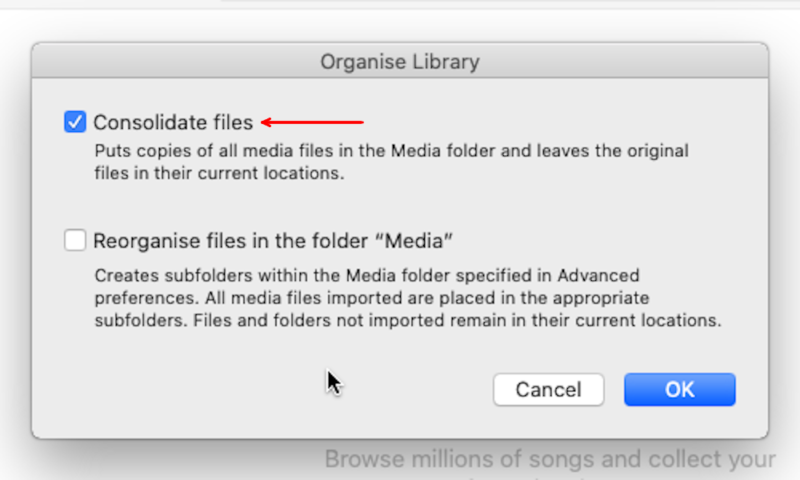
- Select “Consolidate Files”
Check the box next to “consolidate files” and click on “OK” to consolidate your iTunes library into the iTunes media folder.
How to Backup Your iTunes Library to an External Hard Drive
Once all of your files are in your iTunes media folder, you can copy the folder to your external hard drive to keep as a local backup. You’ll need to keep this hard drive safe and update your backups manually, but it’s a cheap and easy way to restore your files if anything goes wrong.
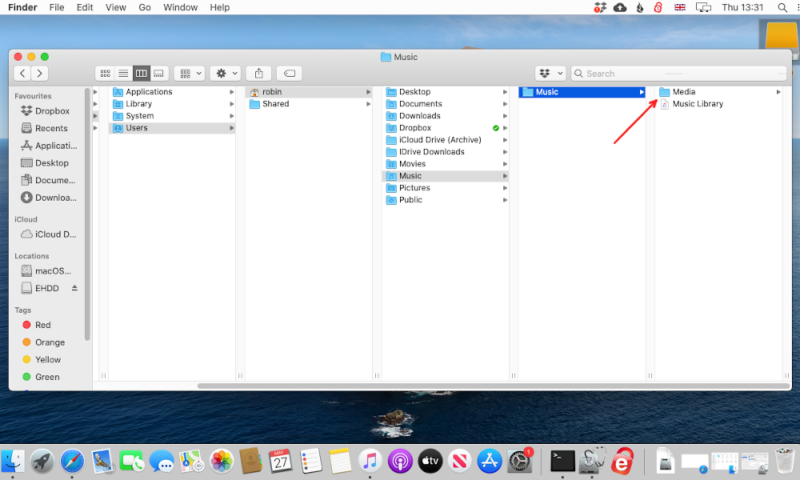
- Find Your iTunes Folder
Go to your iTunes media folder in Finder. By default, this’ll be in [disk]/users/[user]/music/music/, but you can check for it in your iTunes preferences.
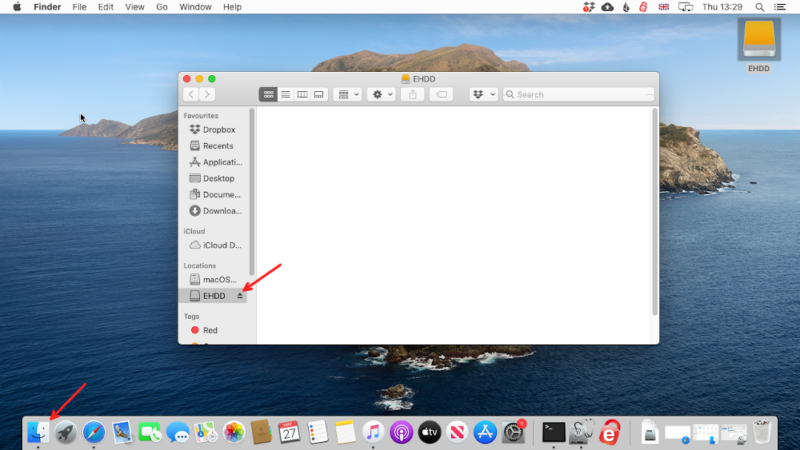
- Open Your External Hard Drive
Plug your external drive into your Mac and open it through Finder.
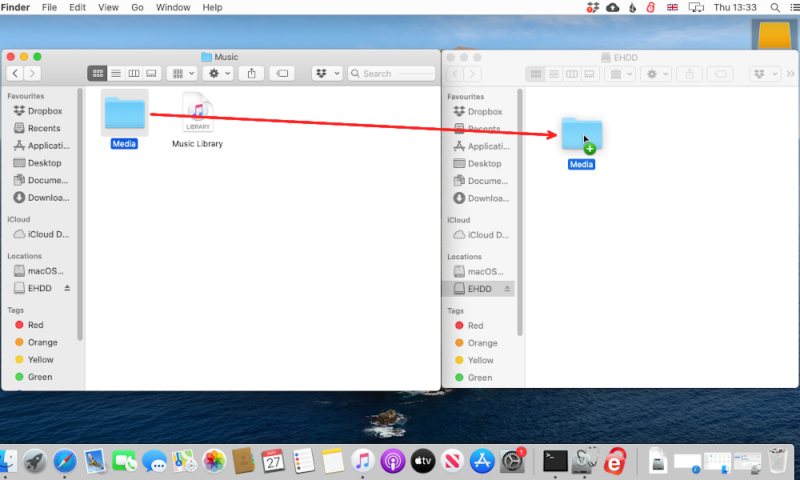
- Drag the Media Folder Into Your Drive
Drag and drop the media folder into your external hard drive and wait for it to copy over. Then you can eject your drive and disconnect it from your device.
How to Backup Your iTunes Library to iCloud
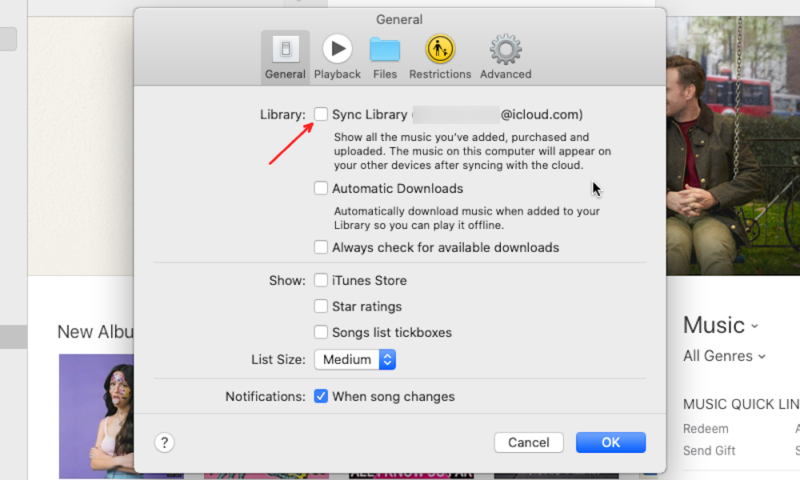
If you’re an Apple music or iTunes match subscriber, then you can sync your iTunes account to your iCloud music library. This will keep up to 100,000 files of up to 200MB each in the cloud, with anything purchased in the iTunes store not counting toward the total. Simply follow these steps to sync your library.
Backup Your iTunes Library With Dedicated Backup Software
There’s plenty of good backup software for Mac, but it can sometimes be a little confusing for a beginner to use. However, you can follow these five steps with most providers to backup your iTunes library. For this example, we’ll use IDrive, the best online backup for music and our overall favorite backup service.
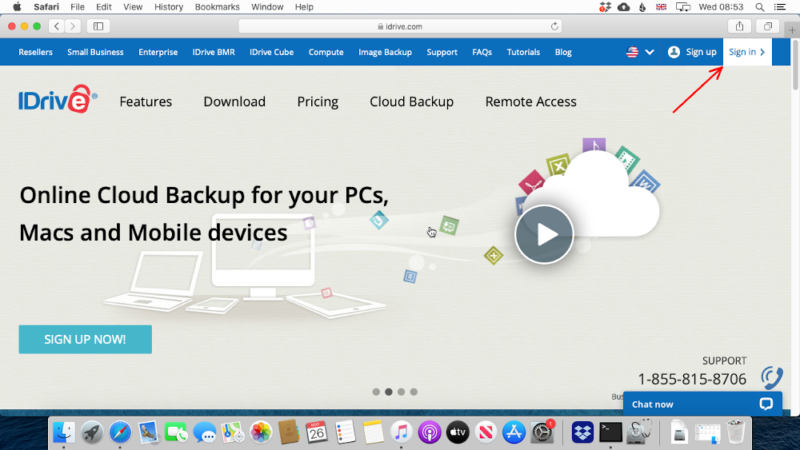
- Sign in to Your Account
Go to the online backup provider’s website and either sign in or create a free account.
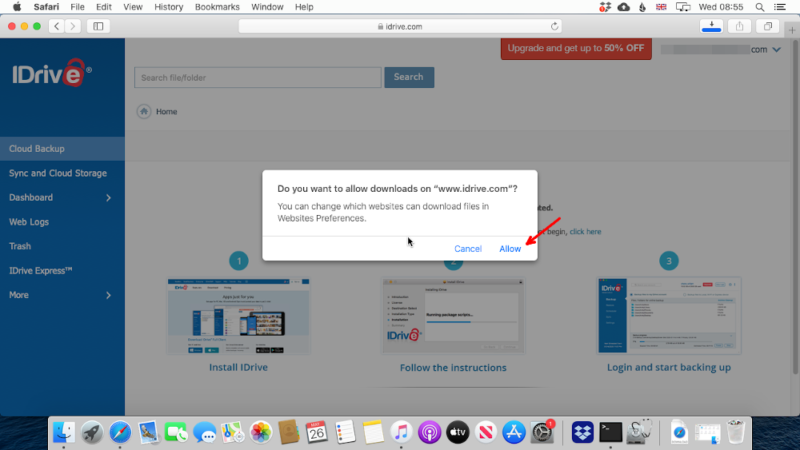
- Download the Backup Software
There will be a button to start the download. Click on this and then follow the on-screen prompts to install it, giving the provider any necessary permissions.
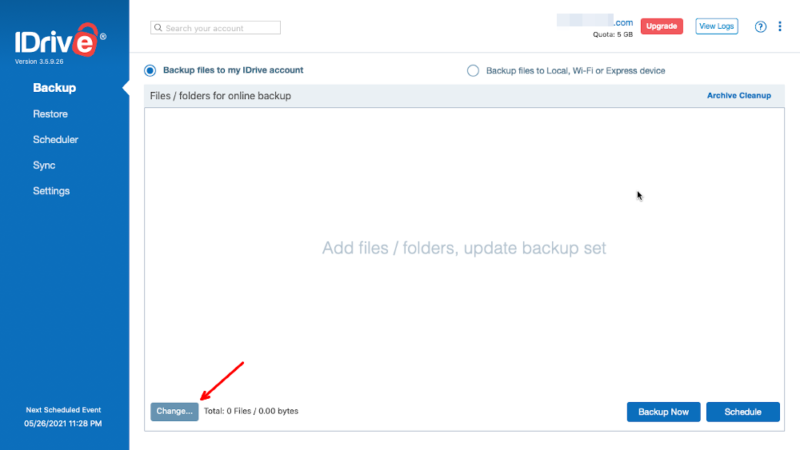
- Add a Folder to the Backup
If it doesn’t find your iTunes folder automatically, you can manually add it instead. First, click on “change.”
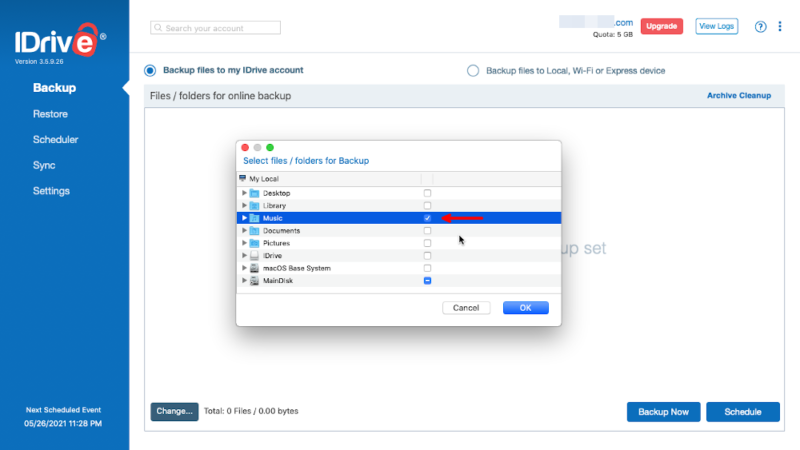
- Find Your Music Folder
In the window that opens, select the folder that contains your iTunes music library — by default, it’ll be in the “music” folder.
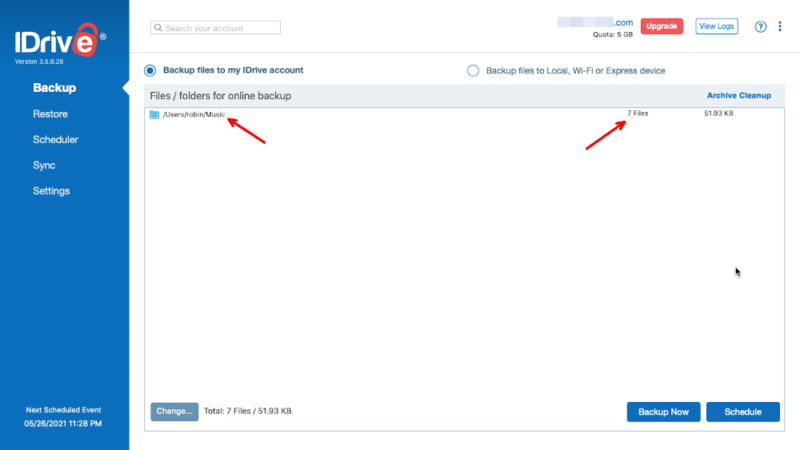
- Check That Everything Is in the Backup
The iTunes folder should now be on the list, and the file count should be close to the number of files in your library. If it isn’t, consolidate your files and try again.
Final Thoughts
Whether you prefer your backups to be on an external hard drive or in the cloud, there’s no reason you can’t keep your music files safe. Just remember to check the location of your iTunes folder and consolidate everything before you begin.
If you want to protect more than just your music and movies, then you should check out our other guides on how to backup photos on your Mac, how to backup your Mac and how to backup a Mac to an external hard drive. These will help you keep your data safe from damage to your Mac computer or any digital accidents.
Do you store lots of music on your Mac? How have you backed up these songs? Did you use one of these three methods: external hard drive vs online backup? Let us know your thoughts in the comments section below. Thanks for reading.
FAQ
Your iTunes library is inside your music folder. Simply copy that folder to wherever you want to store the backup or include it when you create a backup with apps like IDrive.
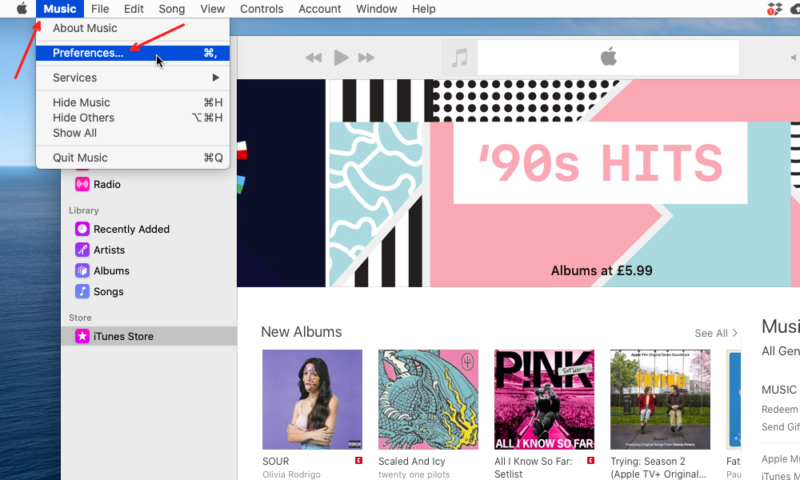
In the “general” tab of your music preferences, there will be an option to sync your library to the iCloud music library. You’ll need iTunes match or Apple music to use this, and if you don’t have either, it won’t let you enable the option.
When you connect your external hard drive, it will show up in your Finder. Open that drive and your iTunes folder, then copy the music files to the hard drive.


