How to Create & Delete Google Photos Shared Albums in 2025
Creating and deleting a Google Photos shared album can be done in a few simple steps. In this guide, you’ll learn how to create, delete and manage a shared album in the Google Photos app.
If you’re looking to create and delete Google Photos shared albums on your Android device, read our guide to learn how. Thankfully, Google Photos shared albums are pretty easy to manage, but a few features can help you do it more effectively — including link sharing, managing comments and likes, and controlling who can view your photos.
We’ll go over these features in this guide and show you how to create and delete a shared album in Google Photos.
Key Takeaways: Shared Albums in Google Photos
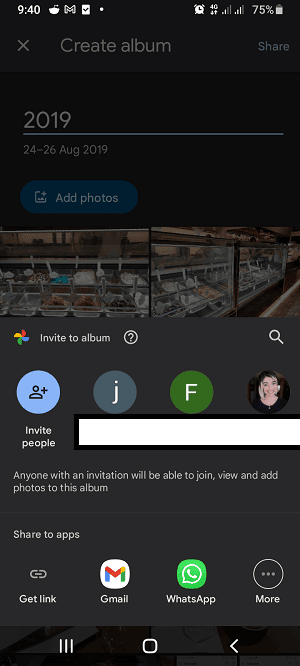
- You can create a shared photo album in Google Photos by organizing photos into an album and sending an email invitation or link to other people.
- Deleting a shared album makes it impossible for others to view the photos and videos that were in it, and removes the photos and videos they previously added to it.
- You have several options to effectively manage your shared albums, including enabling and disabling link sharing, limiting the album to specific people and disabling album collaboration.
To learn more about Google Photos and how it compares to other photo management software, read our best cloud storage for photos guide. If you’re looking to share and sync all kinds of files, including photos and videos, read our best cloud storage services guide.
What Are Google Photos Shared Albums?
With Google Photos shared albums you can organize your photos and videos into albums, then share them with anyone by inviting them or sending them a link. This lets other users view and add photos to your album.
10,000+ Trust Our Free Cloud Storage Tips. Join Today!

- Demystify cloud storage terminology and key concepts in plain language
- Discover easy-to-implement techniques to securely backup and sync your data across devices
- Learn money-saving strategies to optimize your cloud storage costs and usage
Google Photos is one of the best software choices for managing photos and videos. Like Google Drive, it’s offered by Google, but designed specifically for managing photos and videos. To learn more, read our guide on how to move files from Google Drive to Google Photos.
Google Photos offers several ways to manage a shared album: making it available to a specific person or people, enabling link sharing, and controlling who has permission to add photos or videos to your album. We’ll go over some of these features, but let’s start with how to create and share an album in Google Photos.
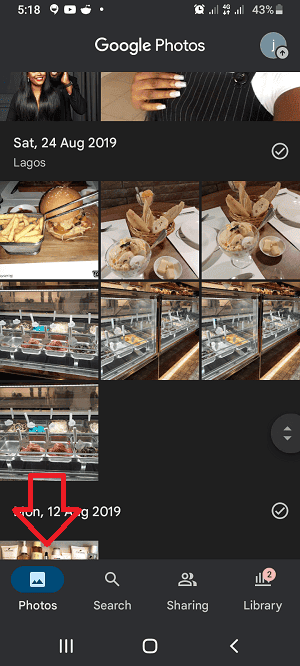
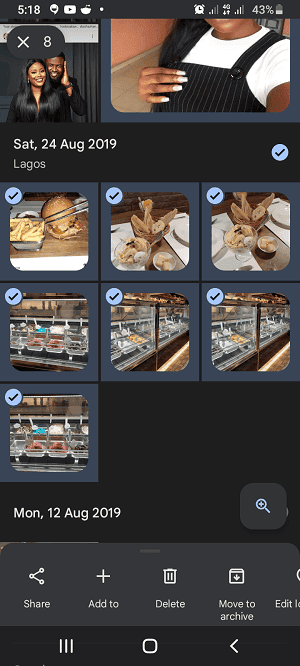
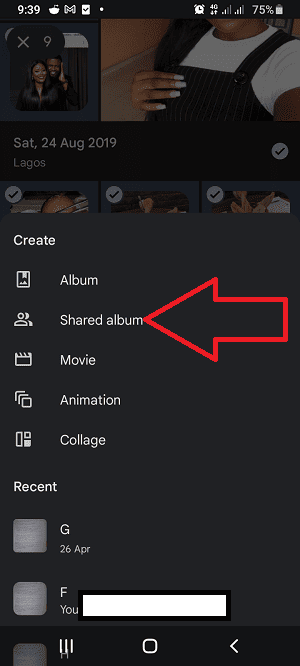
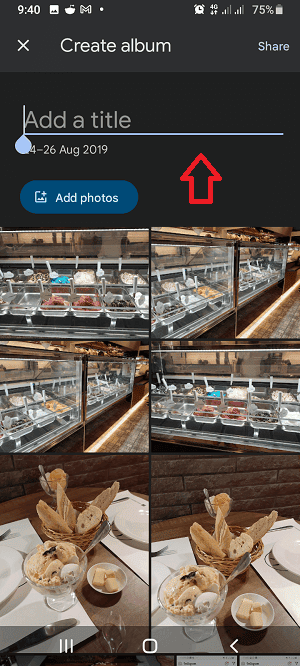
How to Create a Shared Album in the Google Photos App
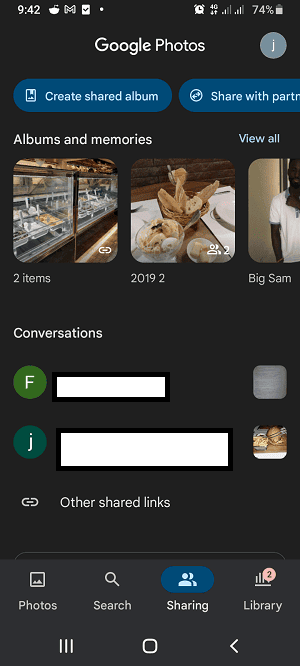
Follow these steps to create a shared album in the Google Photos app.
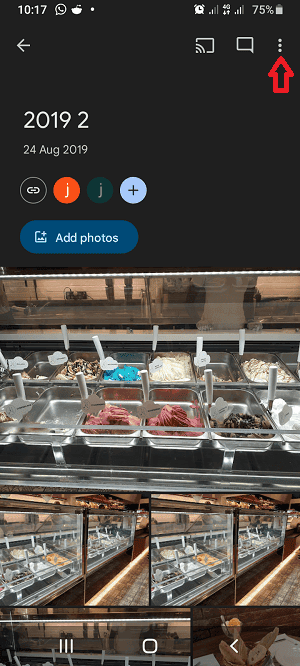
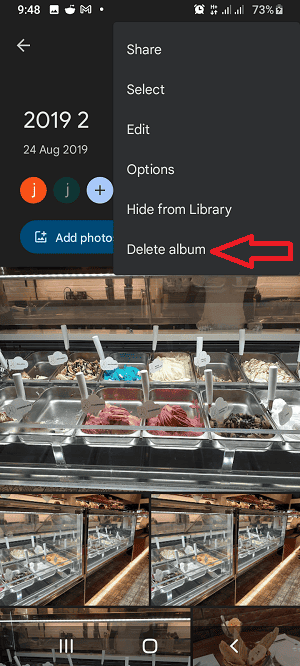
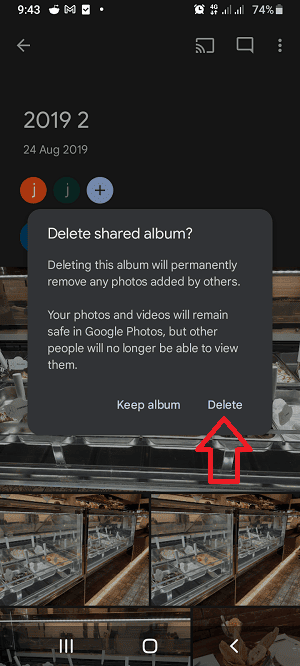
How to Delete a Shared Album From Google Photos
Deleting a shared album automatically removes all the photos added by others and makes all your photos inaccessible to others. However, your own photos and videos will still be available to you in the Google Photos library. Follow these steps to create a shared album in Google Photos.
Manage a Shared Album on Google Photos
It’s not enough to just create a shared album. You also have to control who can view the photos and add comments and likes. Failing to do so can lead to a lot of frustration, such as someone adding photos that you don’t want. Here are some features that can help you manage your shared albums more effectively.
1. Limit Access to Your Google Photos Album
You can share your album with specific people. These users will be able to add other people to the album. If you have notifications turned on, Google will notify you when new users are added. You can also choose to let others add photos, comments or likes to your album.
2. Link Sharing
You can share albums with others by sending them a link instead of adding them to a list. Anyone with this link can also share it with others. To stop sharing an album, remove all album members and turn off link sharing. This will make it impossible for people with that link to access the album. Turning link-sharing back on creates a new sharing link that you can share with others once again.
3. Stop Sharing an Album
When you stop sharing an album in Google Photos, the album will no longer be accessible to other people, and this will remove the photos and comments they’ve previously added. To stop sharing an album, remove all the people you’ve shared the album with and turn off link sharing.
4. Stop Others From Collaborating
The “collaborate” button allows other members to add photos, comments and likes to your album. Turning off this button prevents this; however, they will still be able to view your album.
5. Edit Shared Albums
The “edit” option allows you to update your shared album in several ways. Except for adding pictures and videos, however, only the person who created the album can make these changes.
You can add new photos, change text within the album, add and remove maps and locations to the album, change the cover photo of your album, and change the order of photos, videos, text and locations in your album.
Final Thoughts
As you can see, creating and deleting a shared album in the Google Photos app doesn’t take much — as long as you understand how shared albums work — whether you’re sharing them with friends, family or colleagues. Since the shared albums most likely contain your favorite photos and important memories, it’s important for you to know how to manage them effectively.
Were you able to create and delete shared albums in the Google Photos app? Did you face any challenges while managing the shared albums? Let us know in the comment section below, and as always, thanks for reading.
FAQ
They’re not private by default, but you can make them private by turning off link sharing and removing other members from the album.
If you’re not the admin of a shared album, you can gain access to the album via a link or an invite the admin sends you.
A shared album is an album you share with other people, while a regular Google Photos album is used for just your own photos.


