How to Restore iPad From iCloud Backup in 2025: iOS Restore
Ensuring you can always access your files and data is important in our digital world. That's why backing up and restoring everything on your Apple device is a must. Follow us as we show you how to restore an iPad from iCloud and how to access all your iPad backups.
You never know when disaster may strike and you’ll need to restore all your information on your new or current device. That’s why it’s a good idea to backup your iPad and all your data. Restoring a backup from an iOS device is simple, and it’s the same process either with an iPhone, iPad or iPod touch. In this article, we’ll take you through each step, teaching you how to restore your iPad from iCloud.
Key Takeaways:
- Before restoring your device, you must backup your data.
- Those who are restoring their current device will then need to reset it and remove all of their data.
- You can also restore your iPhone, iPad or iPod from your Mac.
- The time it takes to restore your device will depend on how much data you have.
There are several scenarios where you may need to restore your iPad. While Apple hardware tends to be reliable, it’s not exempt from malfunction. Also, accidents like water damage can destroy an iPad beyond repair.
You also have to factor in the possibility of losing your device or having it stolen. Not only is your iPad gone without a full backup, but so is all the data that exists on it. A full backup and restore of all your data and settings removes the heartbreak that comes with losing it all.
The good news is that restoring your iPad takes very little effort on your part, and even the least tech-savvy individual can do it — with a little guidance from us, of course.
-
08/17/2021
Added how to restore iPad from Apple Music.
How to Restore iPad From iCloud Backup
Restoring your iPad from iCloud is a relatively speedy process. Before you do that, though, there are some things to check to ensure that your data is already backed up, and you don’t lose everything on your device. To begin the process, connect to a WiFi network.
The first six steps apply to users resetting their device. New iPhone users can begin the process from step seven.
Step by Step: How to Reset and Restore iPad From iCloud Backup
- Go to Settings and Locate iCloud
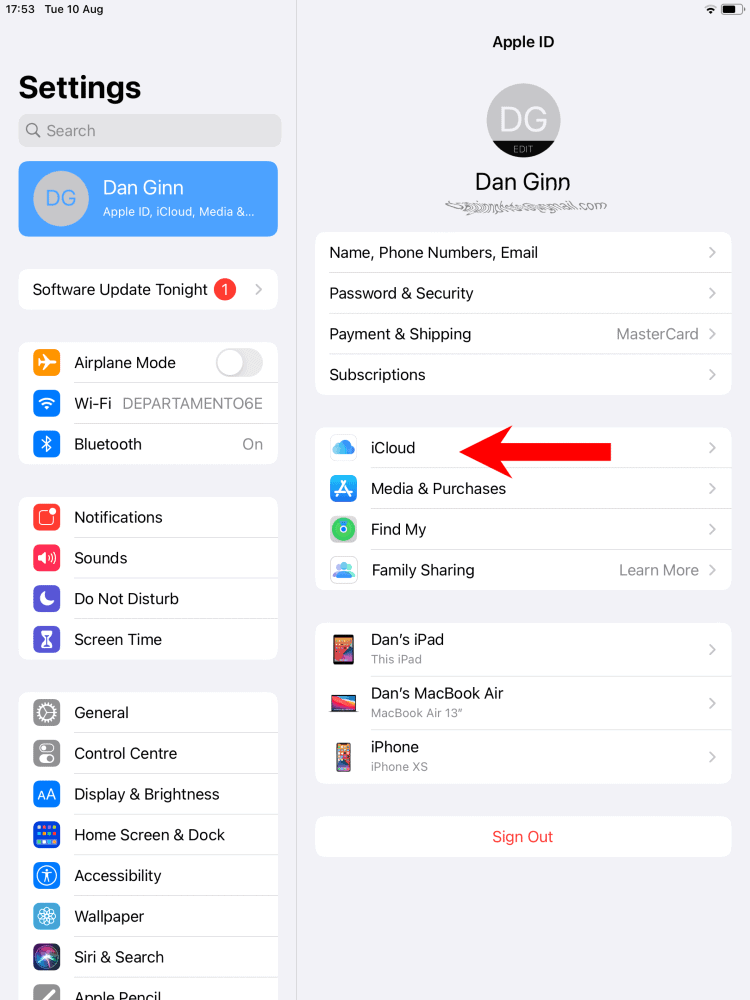
First open “settings,” select your name and tap “iCloud” on the next page.
- Select Manage Storage and Locate Backups
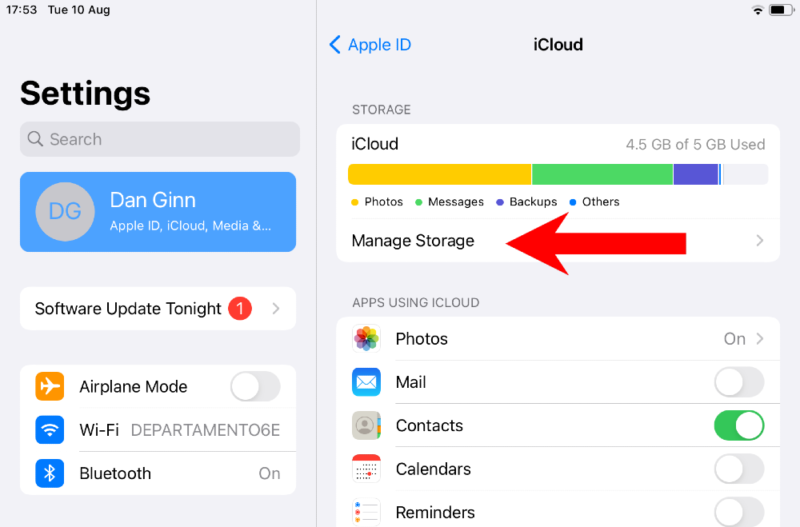
In the iCloud settings, you’ll see how much storage space you’ve used and how much you have remaining. Underneath is the “manage storage” tab, where you can locate and tap “backups.”
- Find Your iPad
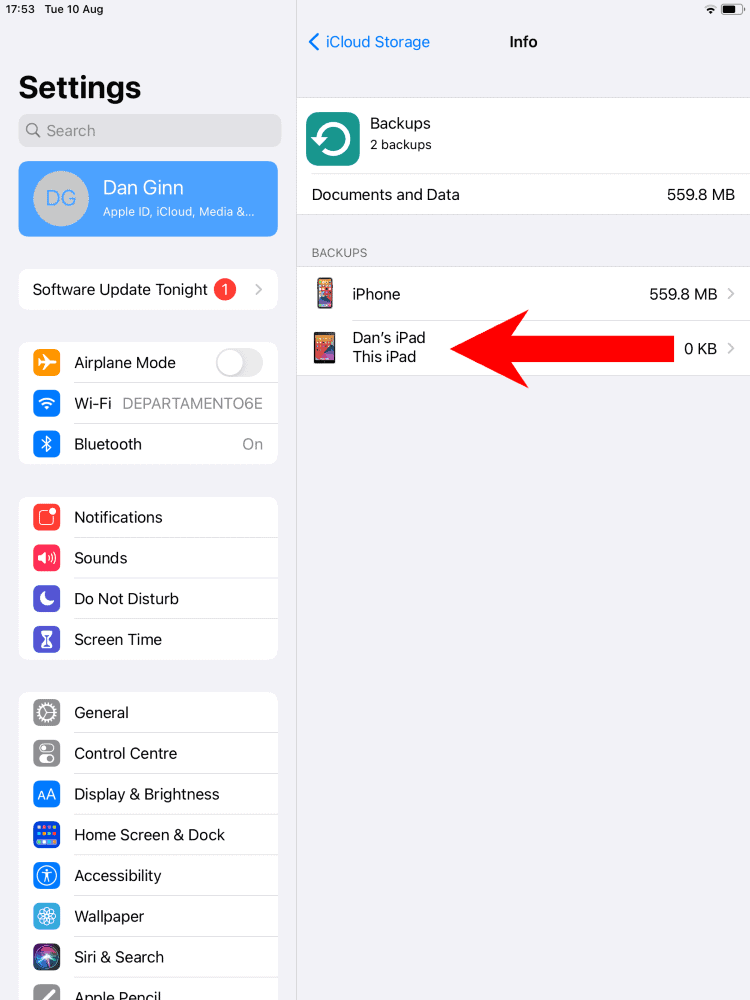
Next, you should see your iPad in your list of backed-up devices. If you don’t, it means you need to perform a backup before you can restore it (check out our tutorial on how to backup your iPad to iCloud). If your iPad is there, select it to move to the next step.
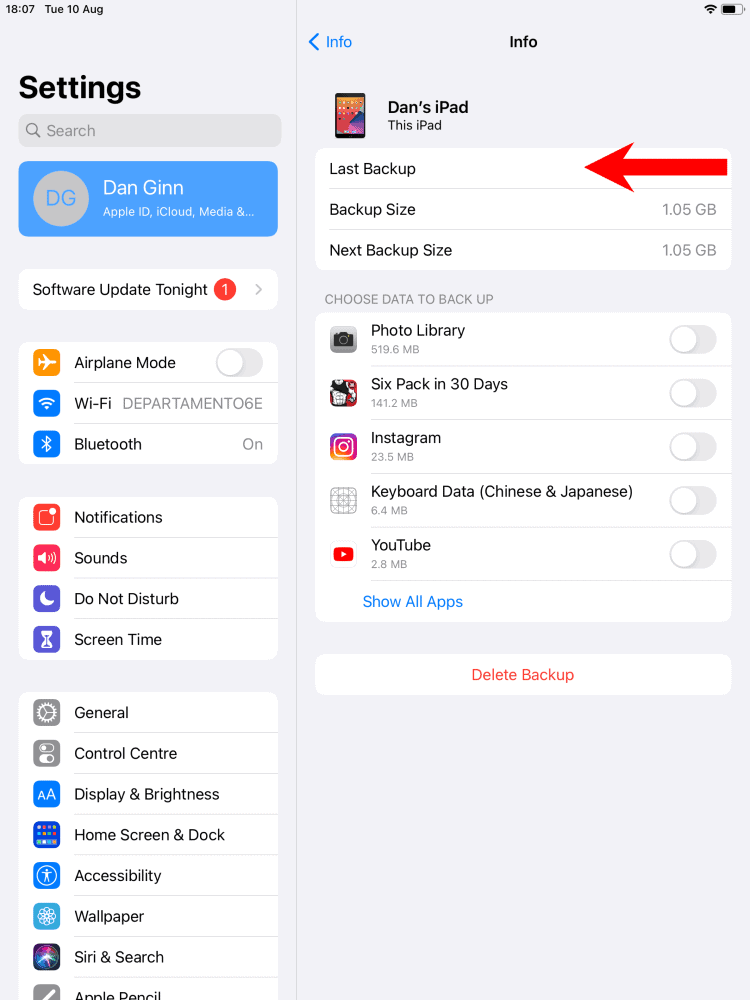
- Check the Time of Your Last Backup
After selecting your iPad, you’ll see “last backup.” If the time of your backup fits with your expectation, it means your data is safe and you can begin the steps to restore your iPad.
- Return to General Settings
Now with your iPad fully backed up, head back to “settings” and select “general.”

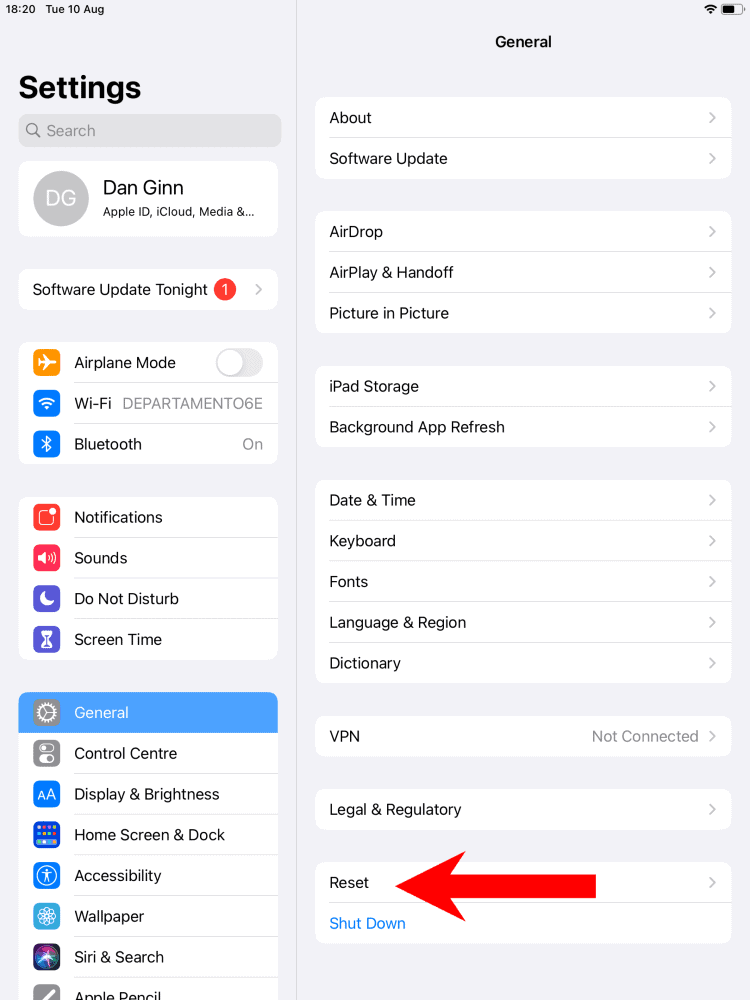
- Reset Your iPad
In your general settings, scroll down to the bottom and select “reset.” Next, tap “erase all content and settings.” Note that doing this will restore the device to its factory settings, and all your information — including things like photos, videos and messages — will be removed from your iPad.
- Select a Backup to Restore
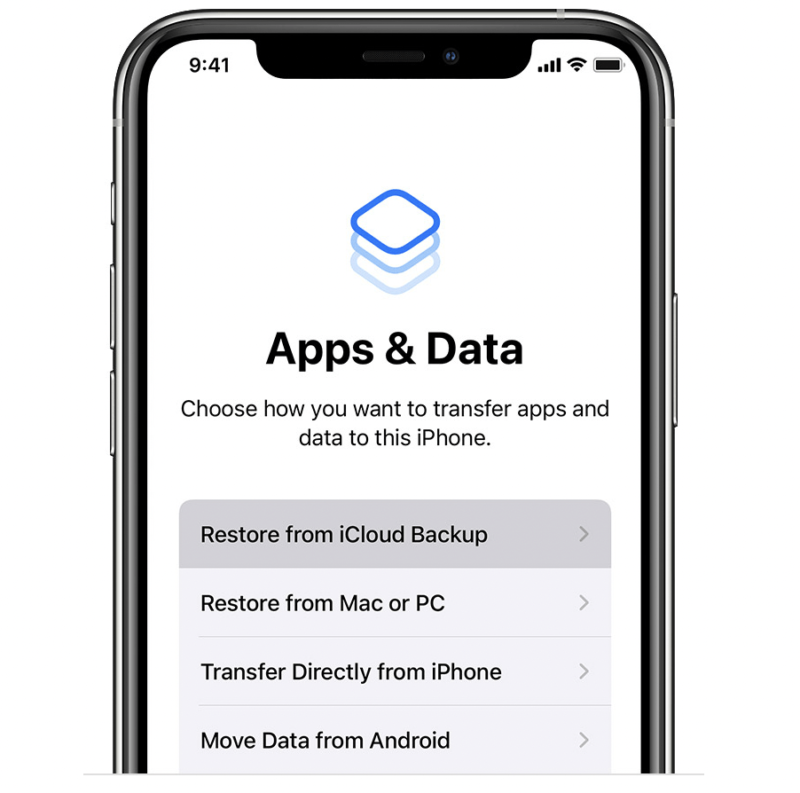
Sign in to your iCloud account using your Apple ID and password, where you’ll see all the backups you previously made. Select the one you want to restore and wait for the restore to complete.
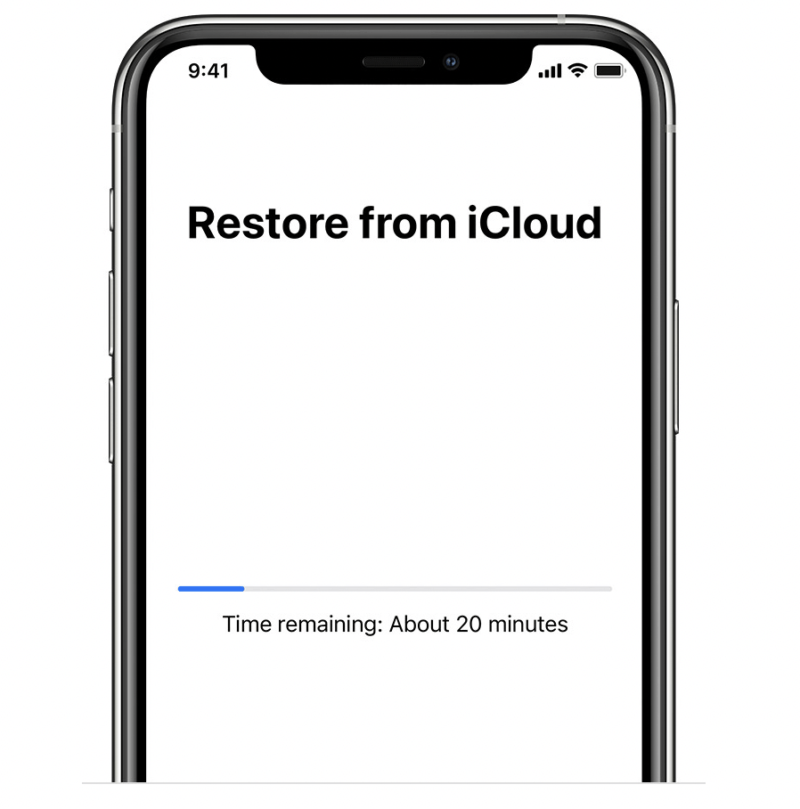
At this stage, you have nothing left to do. Your iOS device will tell you how long it’ll take for the restore to complete. Once it’s finished, some apps and settings may still take some time to download. Don’t worry, though, since you can begin to use your iPad while waiting for the downloads to finish.
How to Restore iPhone, iPad or iPod From Mac
You can restore any iOS device directly from your Mac. You’ll need to connect your iPhone, iPad or iPod to your computer using either a USB-C or Thunderbolt connection, depending on how old your Mac is. Once you’re connected, here’s what you need to do.
For Windows devices, you would use iTunes to do this.
Step by Step: Restore iPhone, iPod or iPad From Mac
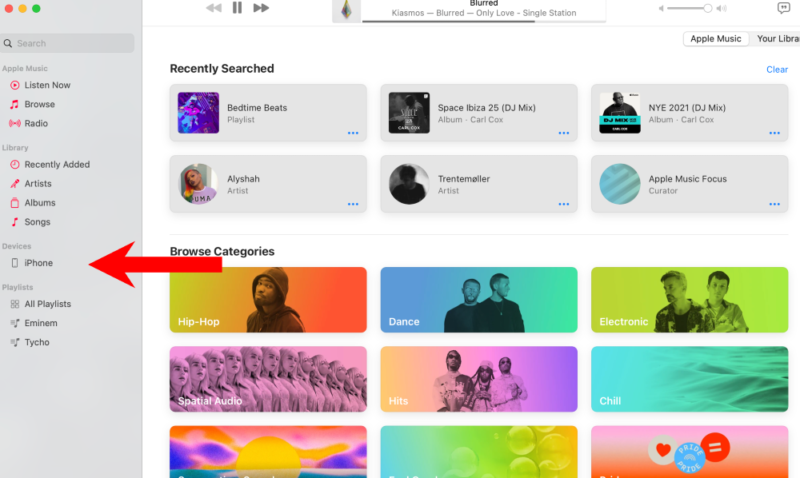
- Open Apple Music and Locate Your Device
Open “Apple Music” on your Mac. On the left-hand side, you’ll see your iOS device. Select it to move to the next step.
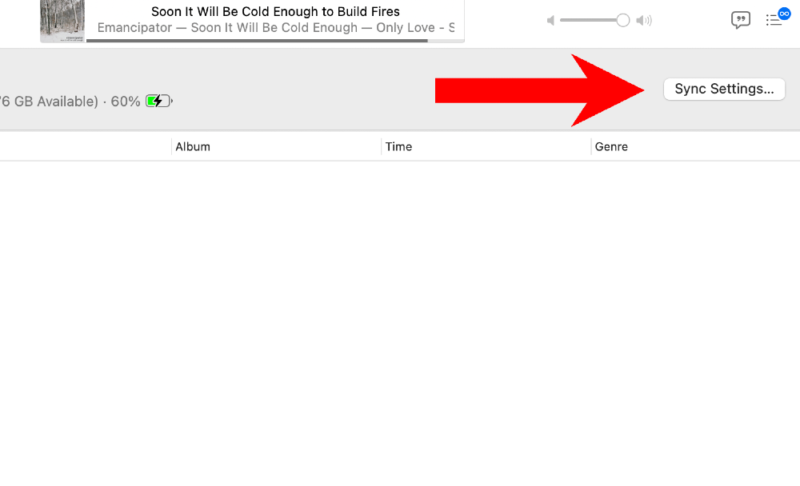
- Select Sync Settings
In the top right-hand corner of the next page, select “sync settings.”
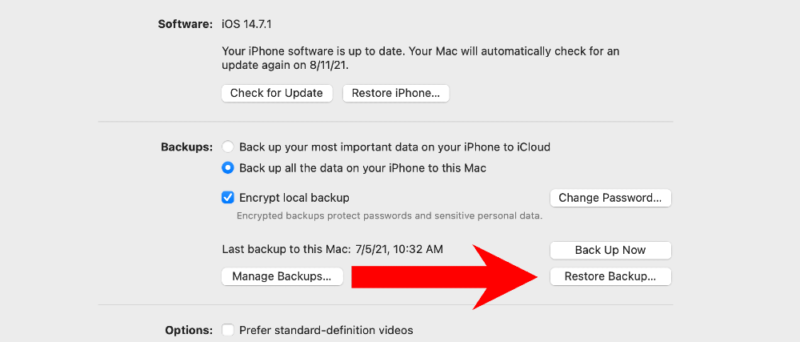
- Select “Restore Backup”
Once you’re in “sync settings,” select “restore backup.” If you encrypted your backup, you’ll need to enter your password. From there, you can begin restoring your backup.
Final Thoughts: Restore From iCloud Backup
As you can see, restoring your iPad is a relatively speedy process. Doing so can help you get back up and running in no time, allowing you to access your favorite files and restore them to just how you left them. You can also follow the same process if you’re restoring another iOS device, such as an iPhone or iPod touch (check out our tutorial on how to backup an iPhone to iCloud).
How did you find this tutorial? Did we do a good job of making the process as smooth as possible for you? You can let us know in the comments below. Feel free to add any other thoughts and suggestions. Thanks for reading.
FAQ
Sometimes the system can malfunction, especially if the restore takes a while. You can restart your iPad and begin the process again, which often helps. If the issue persists, try restoring your backup using your Mac.
No matter what type of data you’re restoring from iCloud, the process is the same. Follow the steps below to restore your device.
The amount of time it takes to restore a new device from iCloud varies. It all depends on how much data needs restoring. Naturally, the more data you have, the longer you can expect to wait for the restore to complete.


