How To Set Up Kindle Devices in 2025: Basic Kindle, Paperwhite, Oasis & Scribe Setup Guide
If you’ve purchased your first Amazon Kindle, you might need help getting it ready for use. This guide will teach you how to set up Kindle devices so you don’t have to worry about accounts or settings ever again.
It’s easy to set up Kindle devices, but there’s still room for confusion when you first start using the device. In this guide, we’ll take you from turning on your Kindle for the first time to buying and reading books from the Kindle store.
Although there are a lot of Kindle models, the setup process and operating system is the same for all of them, which means these steps apply whether you have a basic Kindle, Kindle Paperwhite, Kindle Scribe or Kindle Oasis. If you haven’t bought a Kindle yet and aren’t sure which one to get, check out our full Kindle model comparison for all the details.
Key Takeaways:
- You can buy books directly from Amazon with your Kindle account or load e-book files onto the device manually.
- Spending time to adjust the settings of your Kindle will result in a much-improved reading experience.
- You can set up parental controls and family sharing that your Kindle can be used by your whole family.
If you’ve gone through the initial setup for your Kindle but want to learn more about how to load books onto it from sources other than your Amazon account, you can head to our Kindle user guide instead.
If an Amazon tablet is what you’re looking for, check out our Kindle vs Fire comparison, which compares the Amazon Fire Tablets (formerly Kindle Fire) to the ebook readers.
Set Up Kindle: Register Your Kindle With an Amazon Account
The first thing you have to do with your new Kindle is go through the setup and registration process.
How to Register Your Kindle With an Amazon Account
- Turn On Your Kindle and Select Your Language
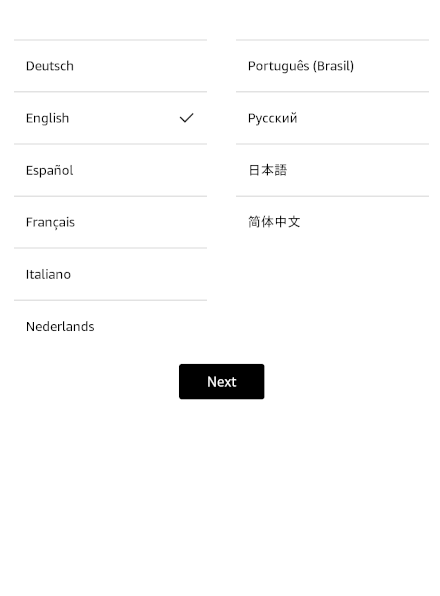
Turn on your Kindle by pressing the power button on the bottom, at which point you’ll be asked to select a language. Tap the one you want, then tap “next.”
- Select Your Region
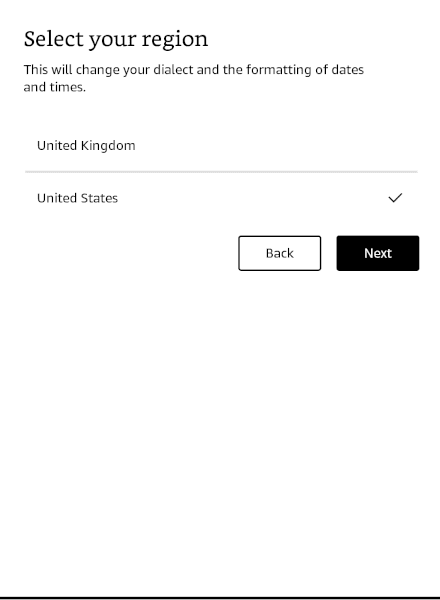
You’ll be presented with a list of regions based on the language you selected. Tap on one, then hit “next.”
- Wait for the Kindle to Restart
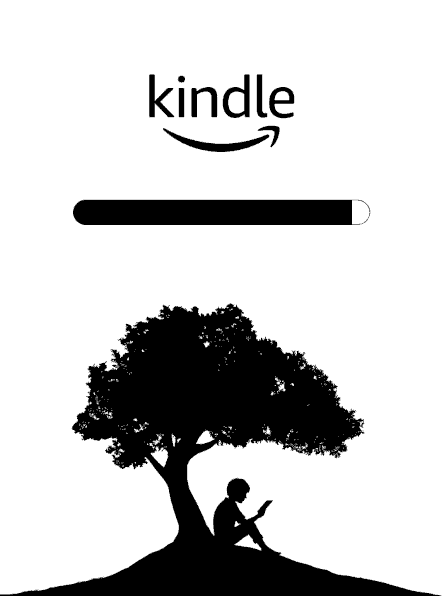
Your Kindle will now restart itself and you’ll see a progress bar on top of the standard Kindle background. Wait for it to finish.
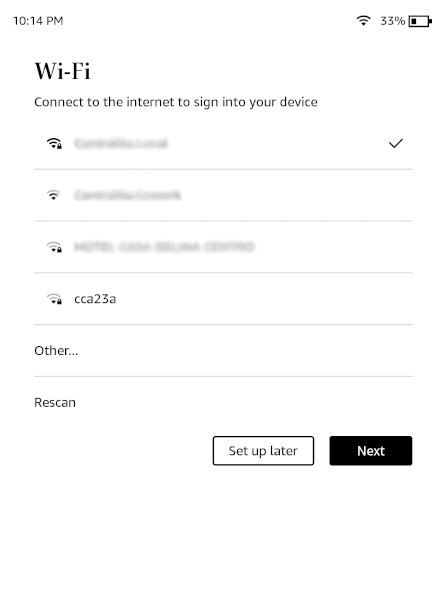
- Connect to a WiFi Network
Once your Kindle starts back up, you’ll see a list of available WiFi networks. Tap on a wireless network you have the password for and follow the instructions to connect to WiFi.
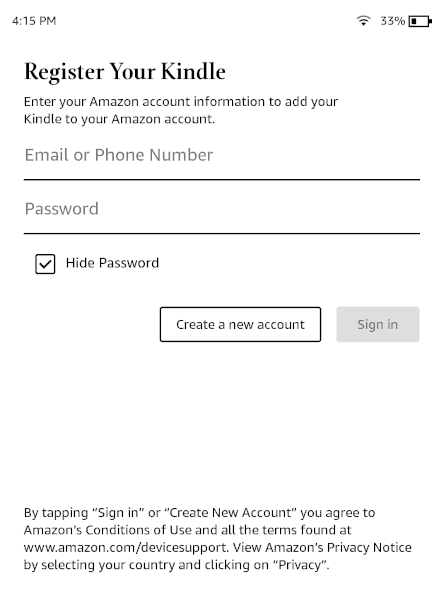
- Log in to Your Amazon Account
Now you need to enter your email address or phone number as well as your password to log in to your Amazon account and register your Kindle. If you don’t have an Amazon account, tap “create account” instead and follow the instructions to set up your account and add a payment method.
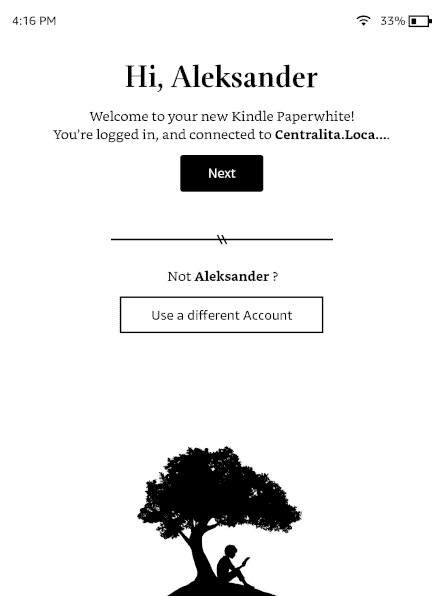
- Confirm Your Account
Once you’re logged in, you’ll be taken to a welcome screen where you just need to tap “next” as long as it’s displaying the correct name.
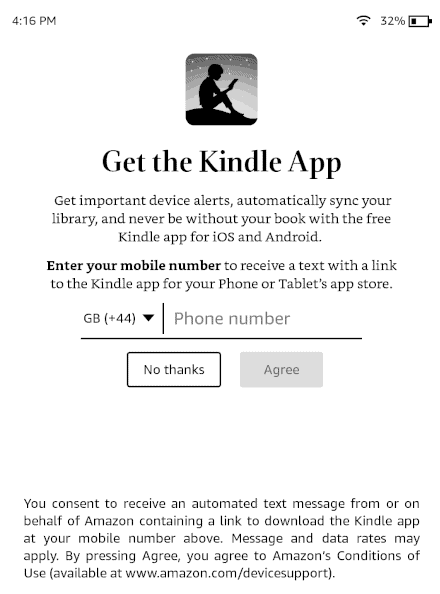
- Download the Kindle App
Next is a screen that asks for your phone number to send you a link to the Kindle app. This is pretty pointless as you can just go download it yourself, so just tap “no thanks” if you don’t want the link, or type in your phone number and tap “agree” if you want it.
- Wait for the Kindle to Finish Setting Up
Now that you’ve registered your device, all you need to do is wait for it to finish setting up, which you’ll notice when the home screen becomes populated.
How To Change the Settings on Your Kindle Device
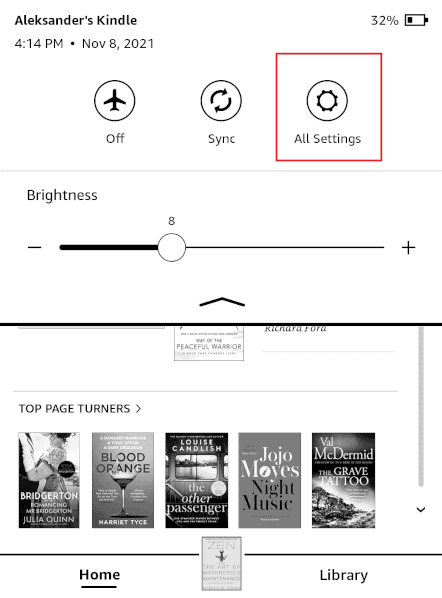
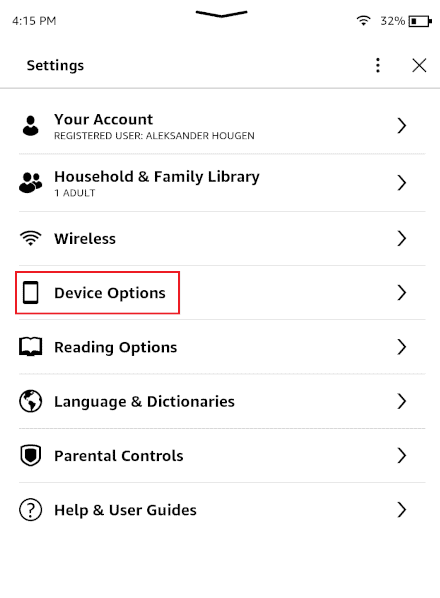
Although your new Kindle is ready to be used, there are settings that you might want to change from the default values before you start reading. We’ll go through these in sections based on where you can find them on your Kindle.
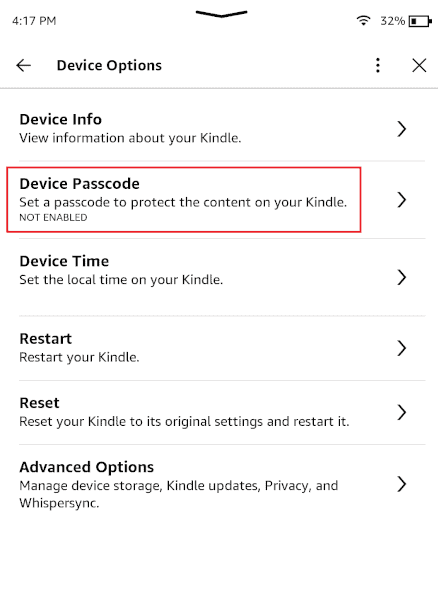
Device Settings
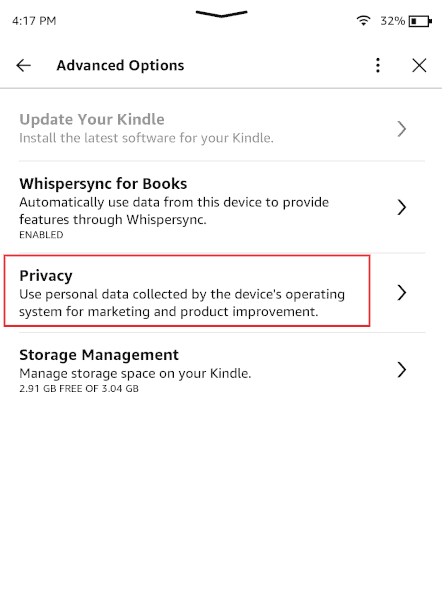
First up are the device settings. There’s not too much going on here, but if you have an ad-supported Kindle, you can disable ad personalization (you’ll still see ads, just not ones tailored for you) and set up a passcode, which is a must for security if you’re purchasing books on your Kindle. You can also set your time zone if you need to change it after setup.
Account Settings
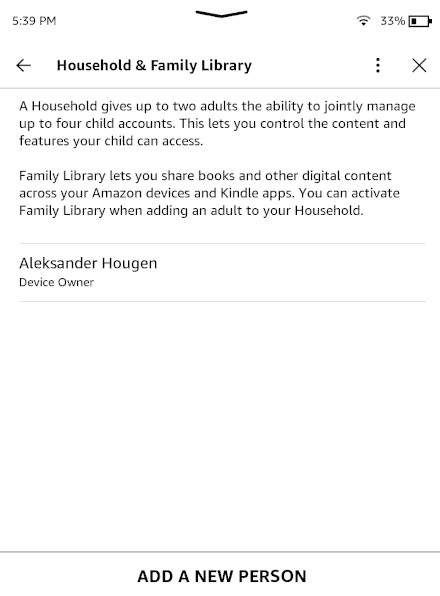
Next up are the account settings. Here you can link your Goodreads account, which syncs your Kindle and your reading list and lets you post quotes and discussion threads from your e-reader. You can also set up a family library, which lets you share books with family members (one other adult and up to four children).
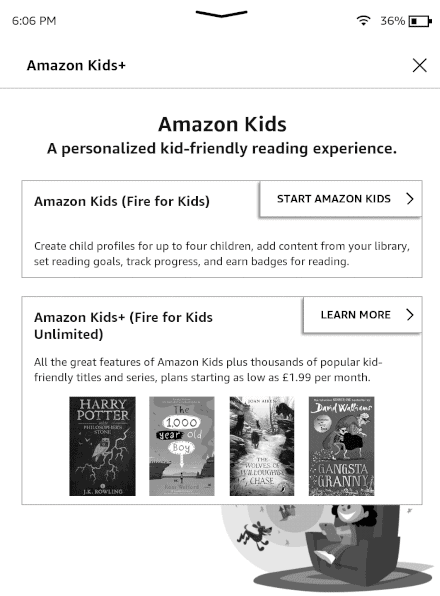
If you’re setting up a regular Kindle for a child — as opposed to a “Kids” edition — you might want to also set up Amazon Kids (formerly Kindle Freetime). It enables a range of features and content aimed at children, which you can learn about in our guide to Amazon Kids.
You can also put restrictions on the device through the parental control settings and filter ads with content that might be unsuitable for younger children.
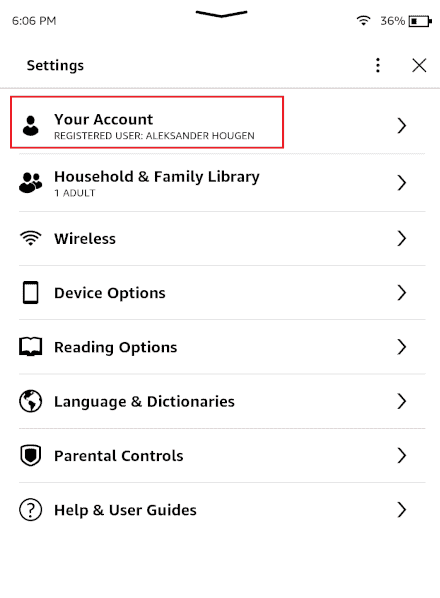
- Head Into the Account Settings
Tap the top entry in the list that says “your account.”
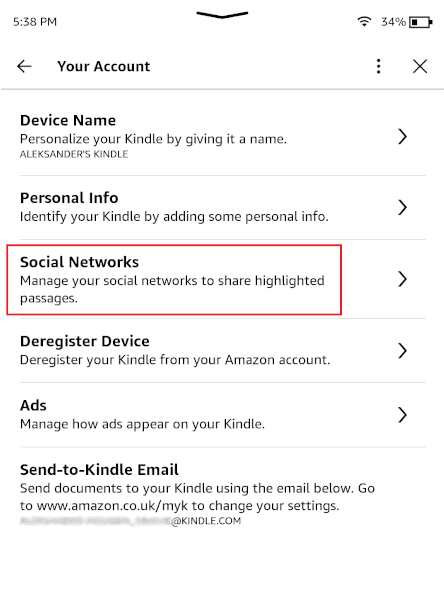
- Connect Your Goodreads Account
Tap “social networks,” then on “Goodreads.” Enter your account information.
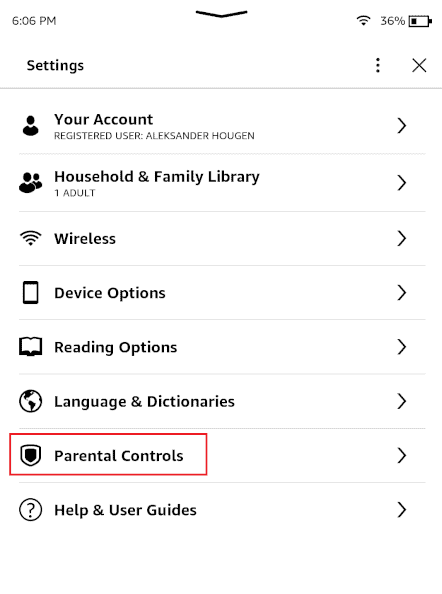
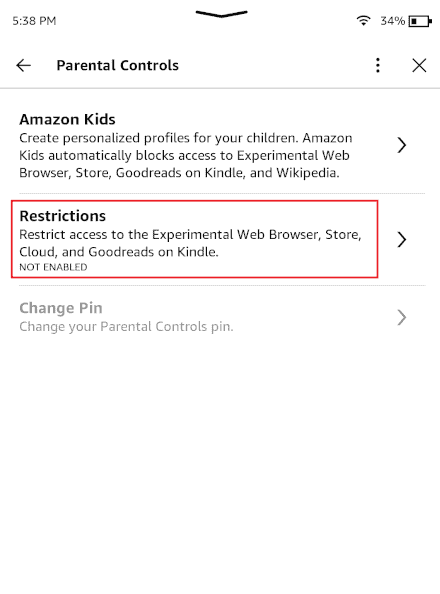
- Enter the Parental Controls Settings
Back in the all settings menu, tap “parental controls.”
- Restrict Access to Features
If you’re setting up the Kindle for a child, you might want to restrict what they can do with it. Tap “restrictions” and turn off access to the web browser, store, cloud and/or Goodreads.
- Set Up Amazon Kids
Back in the parental controls menu, tap “Amazon Kids,” then on “start Amazon Kids” and follow the on-screen instructions.
- Set Up Your Family Library
Navigate back to the first settings menu, then tap “household & family library.” To add a new person, tap “add a new person” and follow the instructions for adult or child accounts.
Reading & Display Settings
Finally, we get to the settings that will affect your reading experience on the Kindle the most, namely the display and reading settings. You can change the theme of your Kindle, the font and text size used, the layout, how reading progress and the time is displayed, as well as several other settings, like whether to show popular highlights in the book you’re reading.
Unlike the previous settings, you can only access these options from inside a book. Since you’re just setting up your Kindle, you can use the Kindle User Guide, which is automatically in to your library.
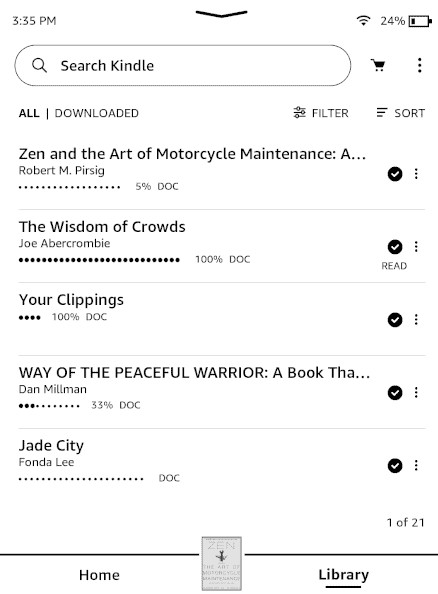
- Open a Book From Your Library
To access the display settings, you need to open a book from your library. Simply tap “library” at the bottom of the screen, then tap on any of your books, even the user guide.
- Enter the Display Settings
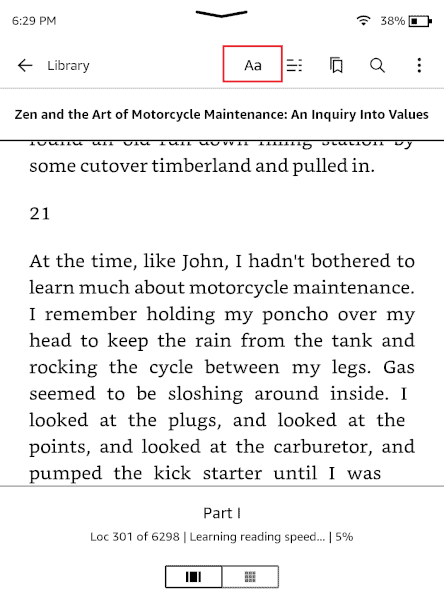
Tap anywhere on the top of the screen, then on the button that says “Aa” on the bar at the top of the screen.
- Choose the Theme
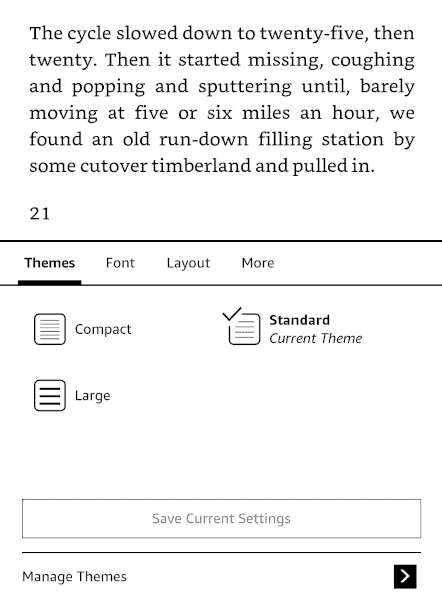
The first menu you’ll see is the one for themes. You can choose between “compact,” “standard” and “large.” Note that this setting overrides the choices you make in the next two steps.
- Choose Font and Text Size
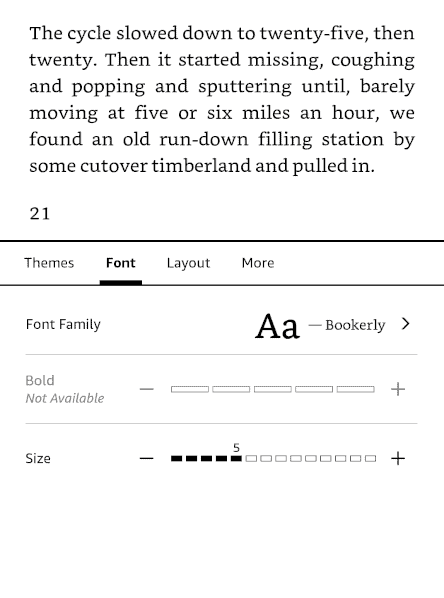
Next, tap “font.” There are 10 fonts to choose from, and the font size can be set to anything from 1 to 14. Depending on what font you pick, you can also bold all the text.
- Adjust the Layout
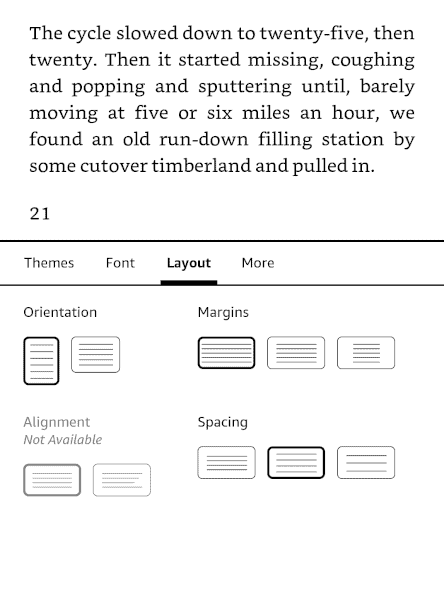
In the next menu, called “layout,” you can set the orientation as vertical or horizontal, the size of the margins and line spacing. If you set the orientation to horizontal, you can also adjust the text alignment.
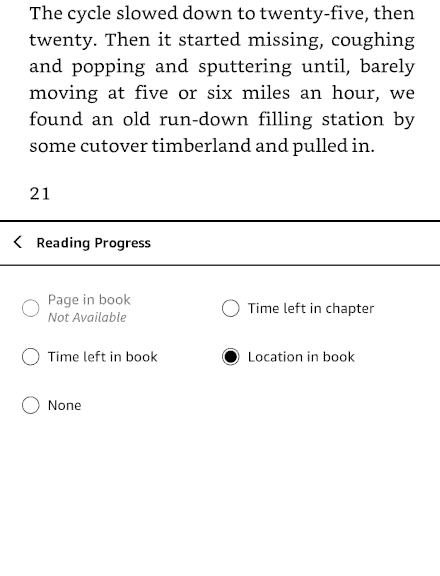
- Adjust Reading Progress Indicator
Finally, under the “more” menu, you’re presented with a random selection of settings. Set the reading progress indicator by tapping “reading progress” and choosing between time left in chapter, time left in book, location in book or page in book. Note that this last option is only available for books purchased from the Kindle store.
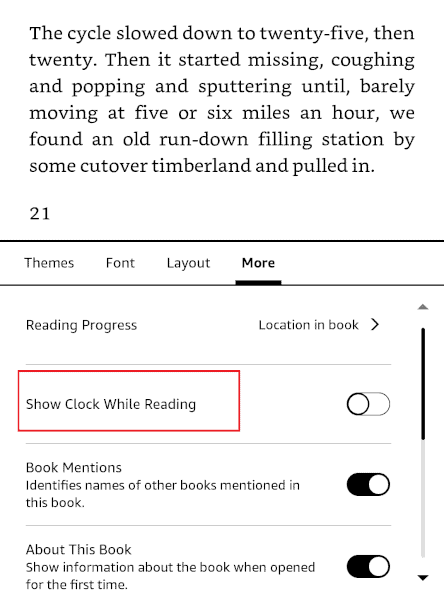
- Enable the Clock While Reading
If you’d like to be able to see the clock while reading, tap the option that says “show clock while reading.”
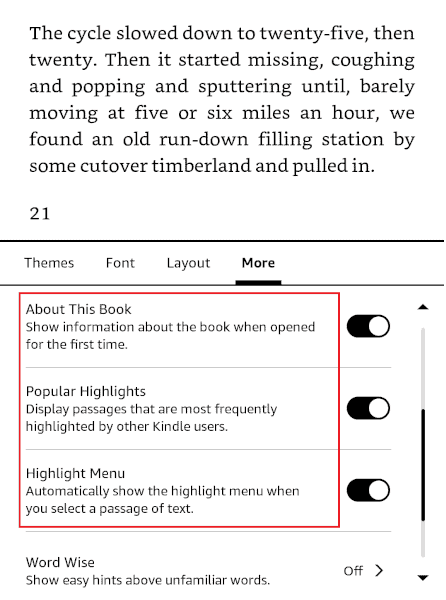
- Enable More Information About Your Books
The next three settings let you toggle whether your Kindle highlights known book names, shows information about books when opened for the first time and whether you’re shown popular highlights made by other users. Enable whichever you like.
How To Buy Books From the Kindle Store
Once your device has been registered and you’ve tweaked the settings to your liking, it’s time to get books onto your new Kindle. You can do this from any device — as long as it has a web browser and can connect to the Kindle store — but in this guide, we’ll be doing it from the Kindle.
- Search for the Book You Want to Purchase
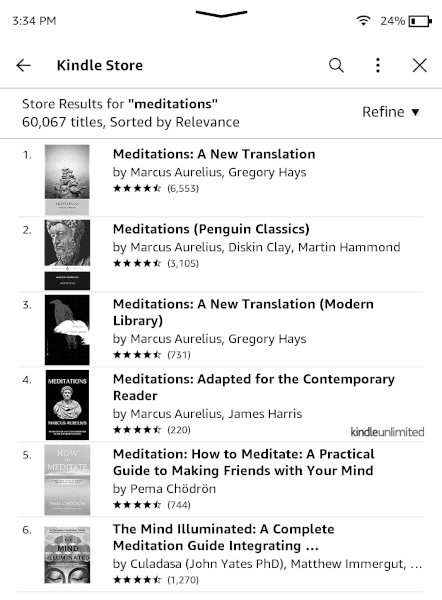
From the Kindle home page, tap the search bar and type the name of a book or an author. If you want to use the book’s serial number, that will work, too.
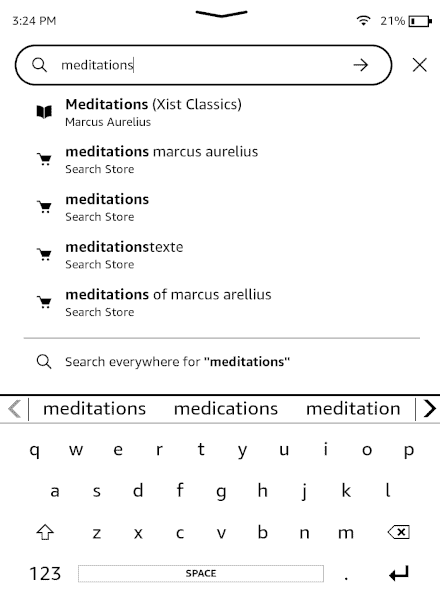
- Select the Book You Want to Buy
You’ll be shown a list of results. Select the book you want to purchase.
- Purchase the Book
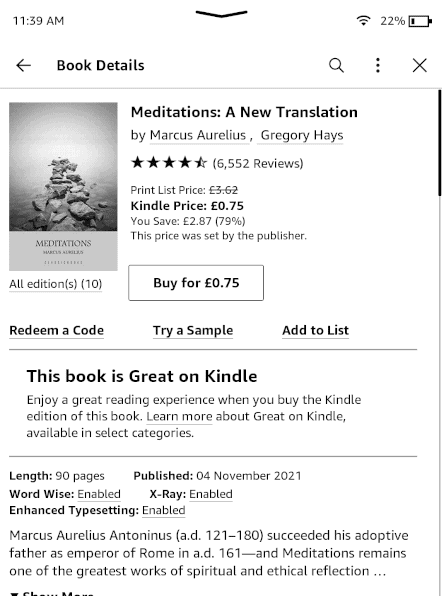
Once on the book’s page, tap the button that says “buy for” and the price.
- Choose and Verify Payment Method
If you haven’t bought a book through your Kindle, you’ll need to verify your payment method or add a new credit card if you don’t have one registered. That’s it. You can now navigate back to the home screen or your library and you’ll see your new book there within a few seconds.

Final Thoughts
With that, we’ve reached the end of our short tutorial on the Kindle setup process. Once you’ve registered your device, tweaked the settings to your liking and bought books, there’s nothing more to do but start reading. We have a complete guide on the different ways to get free Kindle books.
Although Amazon and Project Gutenberg offer some of the best stories ever told for free, we still recommend that avid readers consider a Kindle Unlimited subscription to get access to thousands more books on the same account across all Amazon devices.
What did you think of our Kindle setup guide? Did we help you get your device up and running or was it all self-explanatory anyway? Let us know in the comments below. Thank you for reading.
FAQ
Yes, setting up your Kindle for the first time is a straightforward process.
A Kindle is an e-reader that you can use to purchase books with your Amazon account and read them. You can also manually load e-book files from other sources. There are also Kindle apps on most devices that synchronize with the device.
Yes, you can access your Kindle library through the free Kindle app on most types of devices, including iOS, Android, Windows and Mac.
Most Kindle books aren’t free, but some are. Classics and other older works especially are often offered free of charge. The occasional sale or giveaway can happen with newer titles, as well. You can also download books in the public domain through Project Gutenberg.


